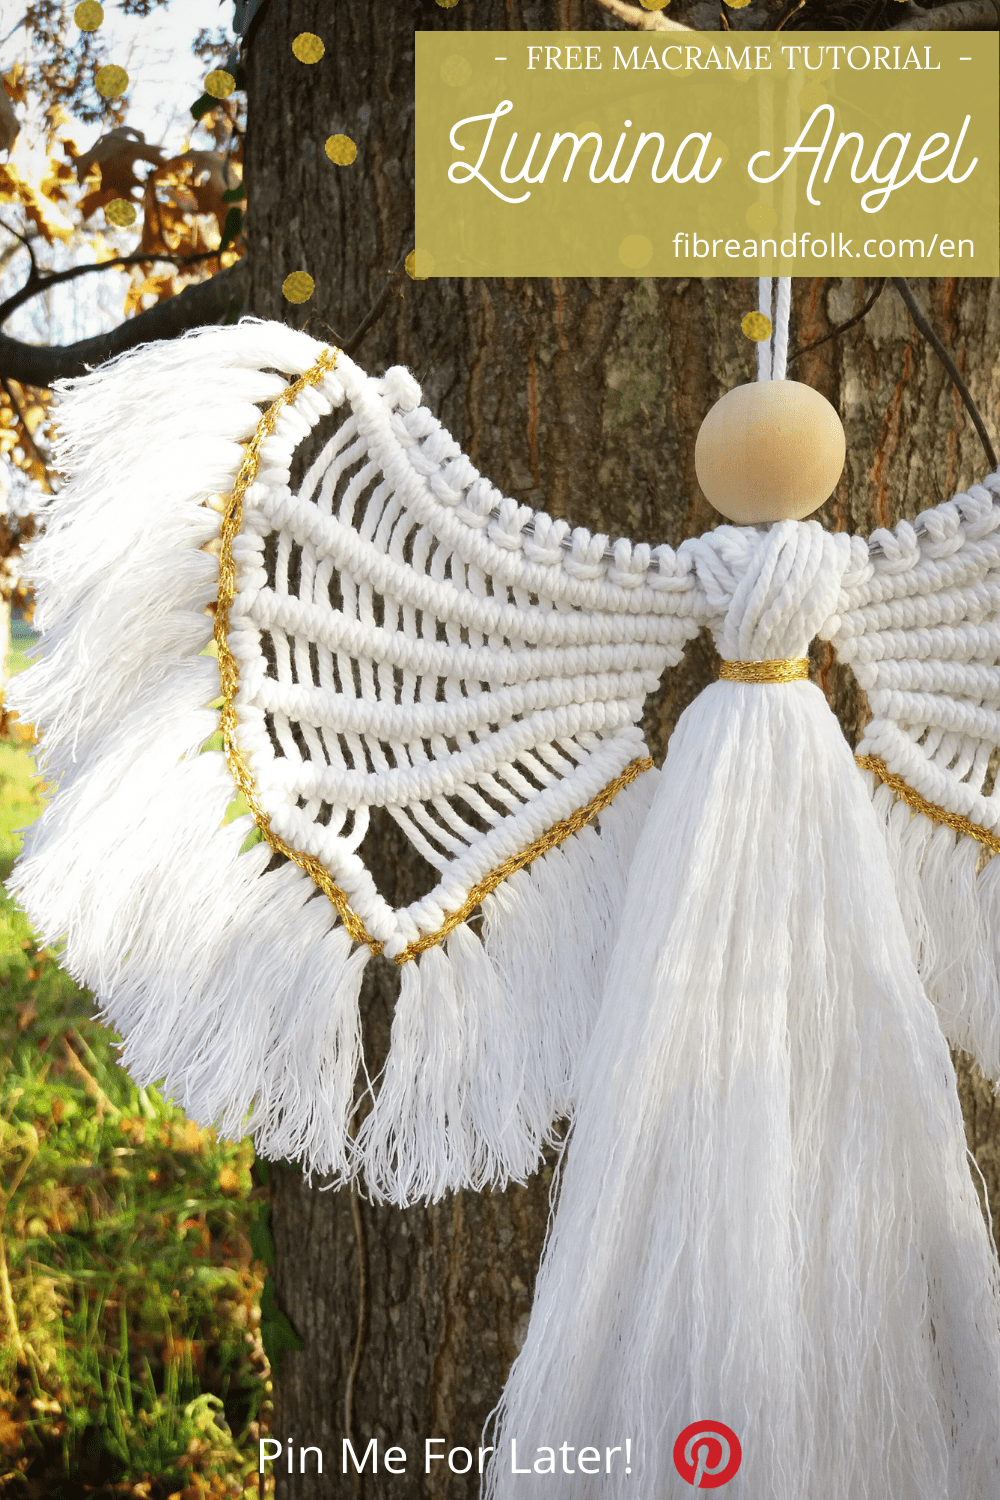

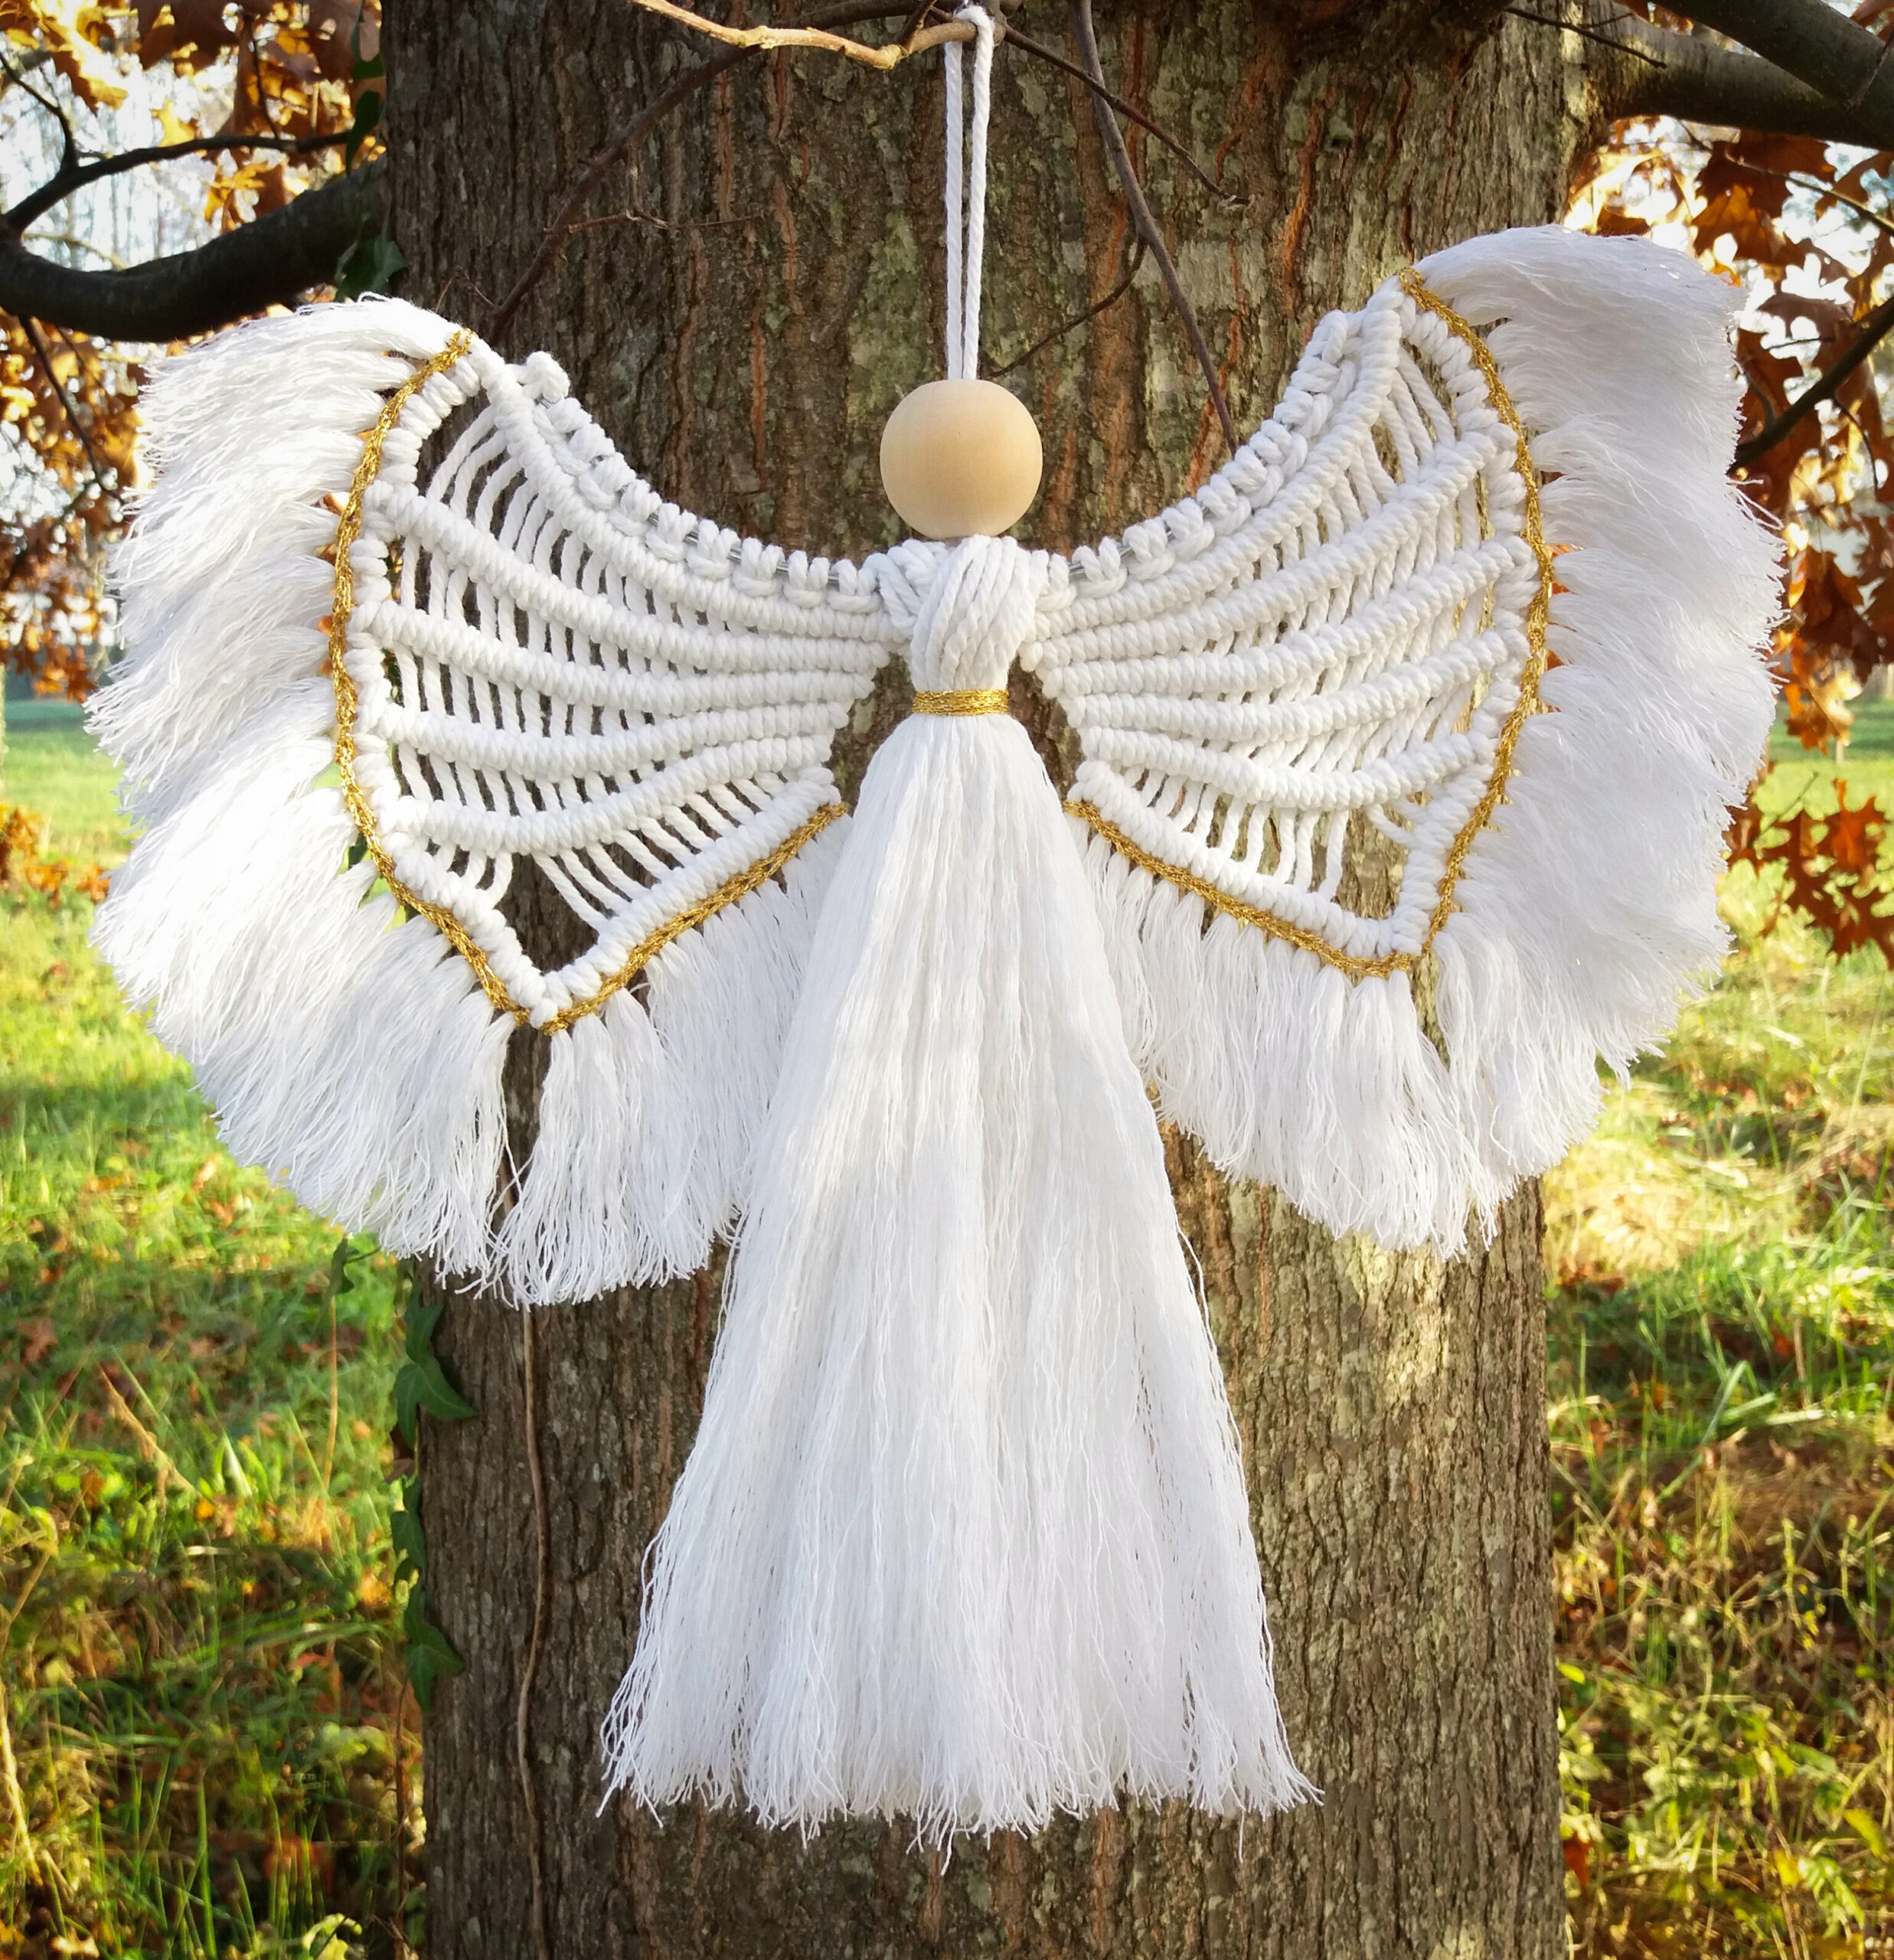
Bring light into your home! I introduce you my – Lumina Macrame Angel -. Read through my inspiration, design process and everything on the yarn I chose. Get the free tutorial below or purchase the ad-free, printable PDF here. 
My Inspiration
The approach of the end-of-year holidays made me want to create an angel! A simple, beautiful, bright angel to embellish my interior decor and I really wanted to use macrame again. Then I looked for a name for him that inspires the Light … Lumina came to me spontaneously!
The Lumina angel fits perfectly into a holidays decoration or even throughout the year if you like signs of protection.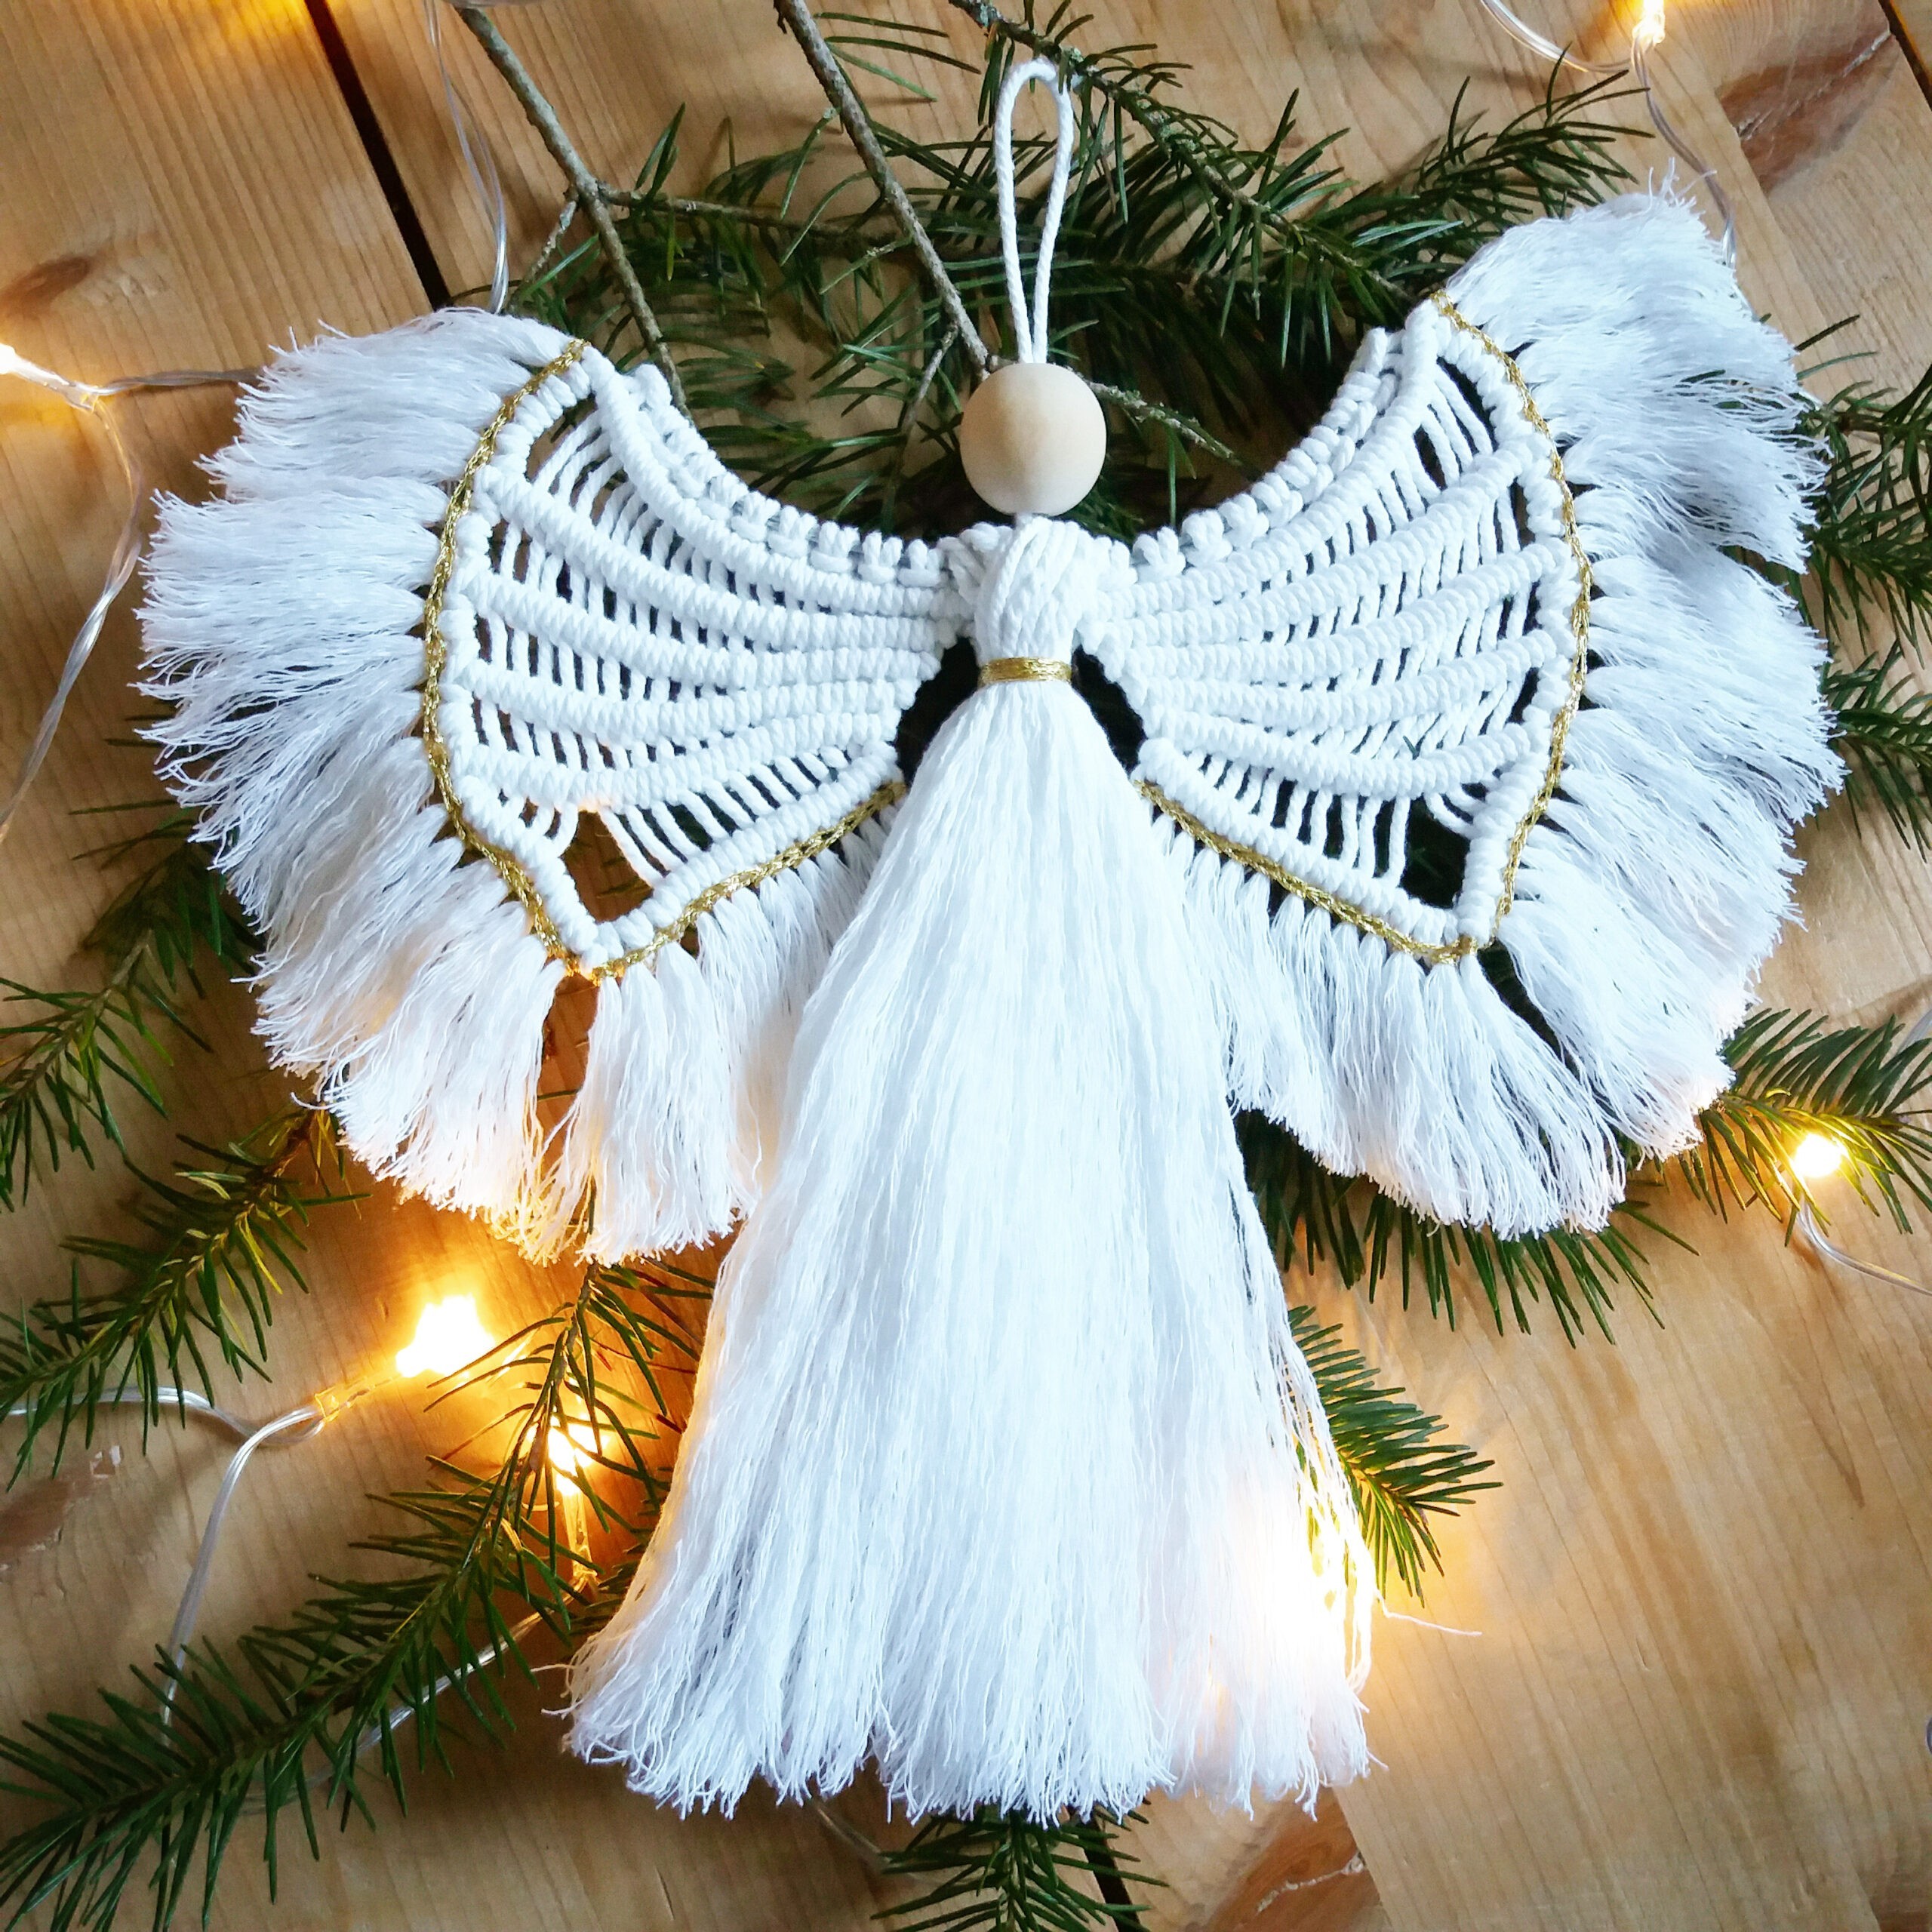
Beginners Friendly
The Lumina Macrame Angel is easier to make than it looks, I only use three macrame knots to do this, and they are well explained with the help of written explanations, drawings and explanatory photos below. Beginners have no more excuses not to try!
Yarn
For the main yarn I used a white 3mm cotton cord, which is perfect for all macrame projects. Noted that it unfolds very well, compared to other yarns supposed to be for macrame but which are in fact woven so impossible to create the fringe effect.
For the gold edges, I used a gold-colored lurex thread, it is thin enough while being solid.
PIN ME FOR LATER!
LUMINA MACRAME ANGEL
Description
The angel is first made with the wings: with Larks knots and horizontal Clove Hitch, then we add the gold Lurex yarn in the chain stitch, finally we make the central body in a Gathering knot and we add the wooden bead.
Dimensions
Height: 26 cm/10” x Width: 31 cm/12”.
Yarns
– 35 m/40 yds of 3mm cotton cord | Color: white
– 4 m/ 5 yds Lurex yarn | Color: gold
Materials
↠ 36 cm / 14.1” wire (around 1mm thickness)
↠ Comb
↠ Ruler
Knots Used
↠ Lark’s head knot
↠ Horizontal Clove Hitch
↠ Gathering knot
Useful Video
TUTORIAL
BASE
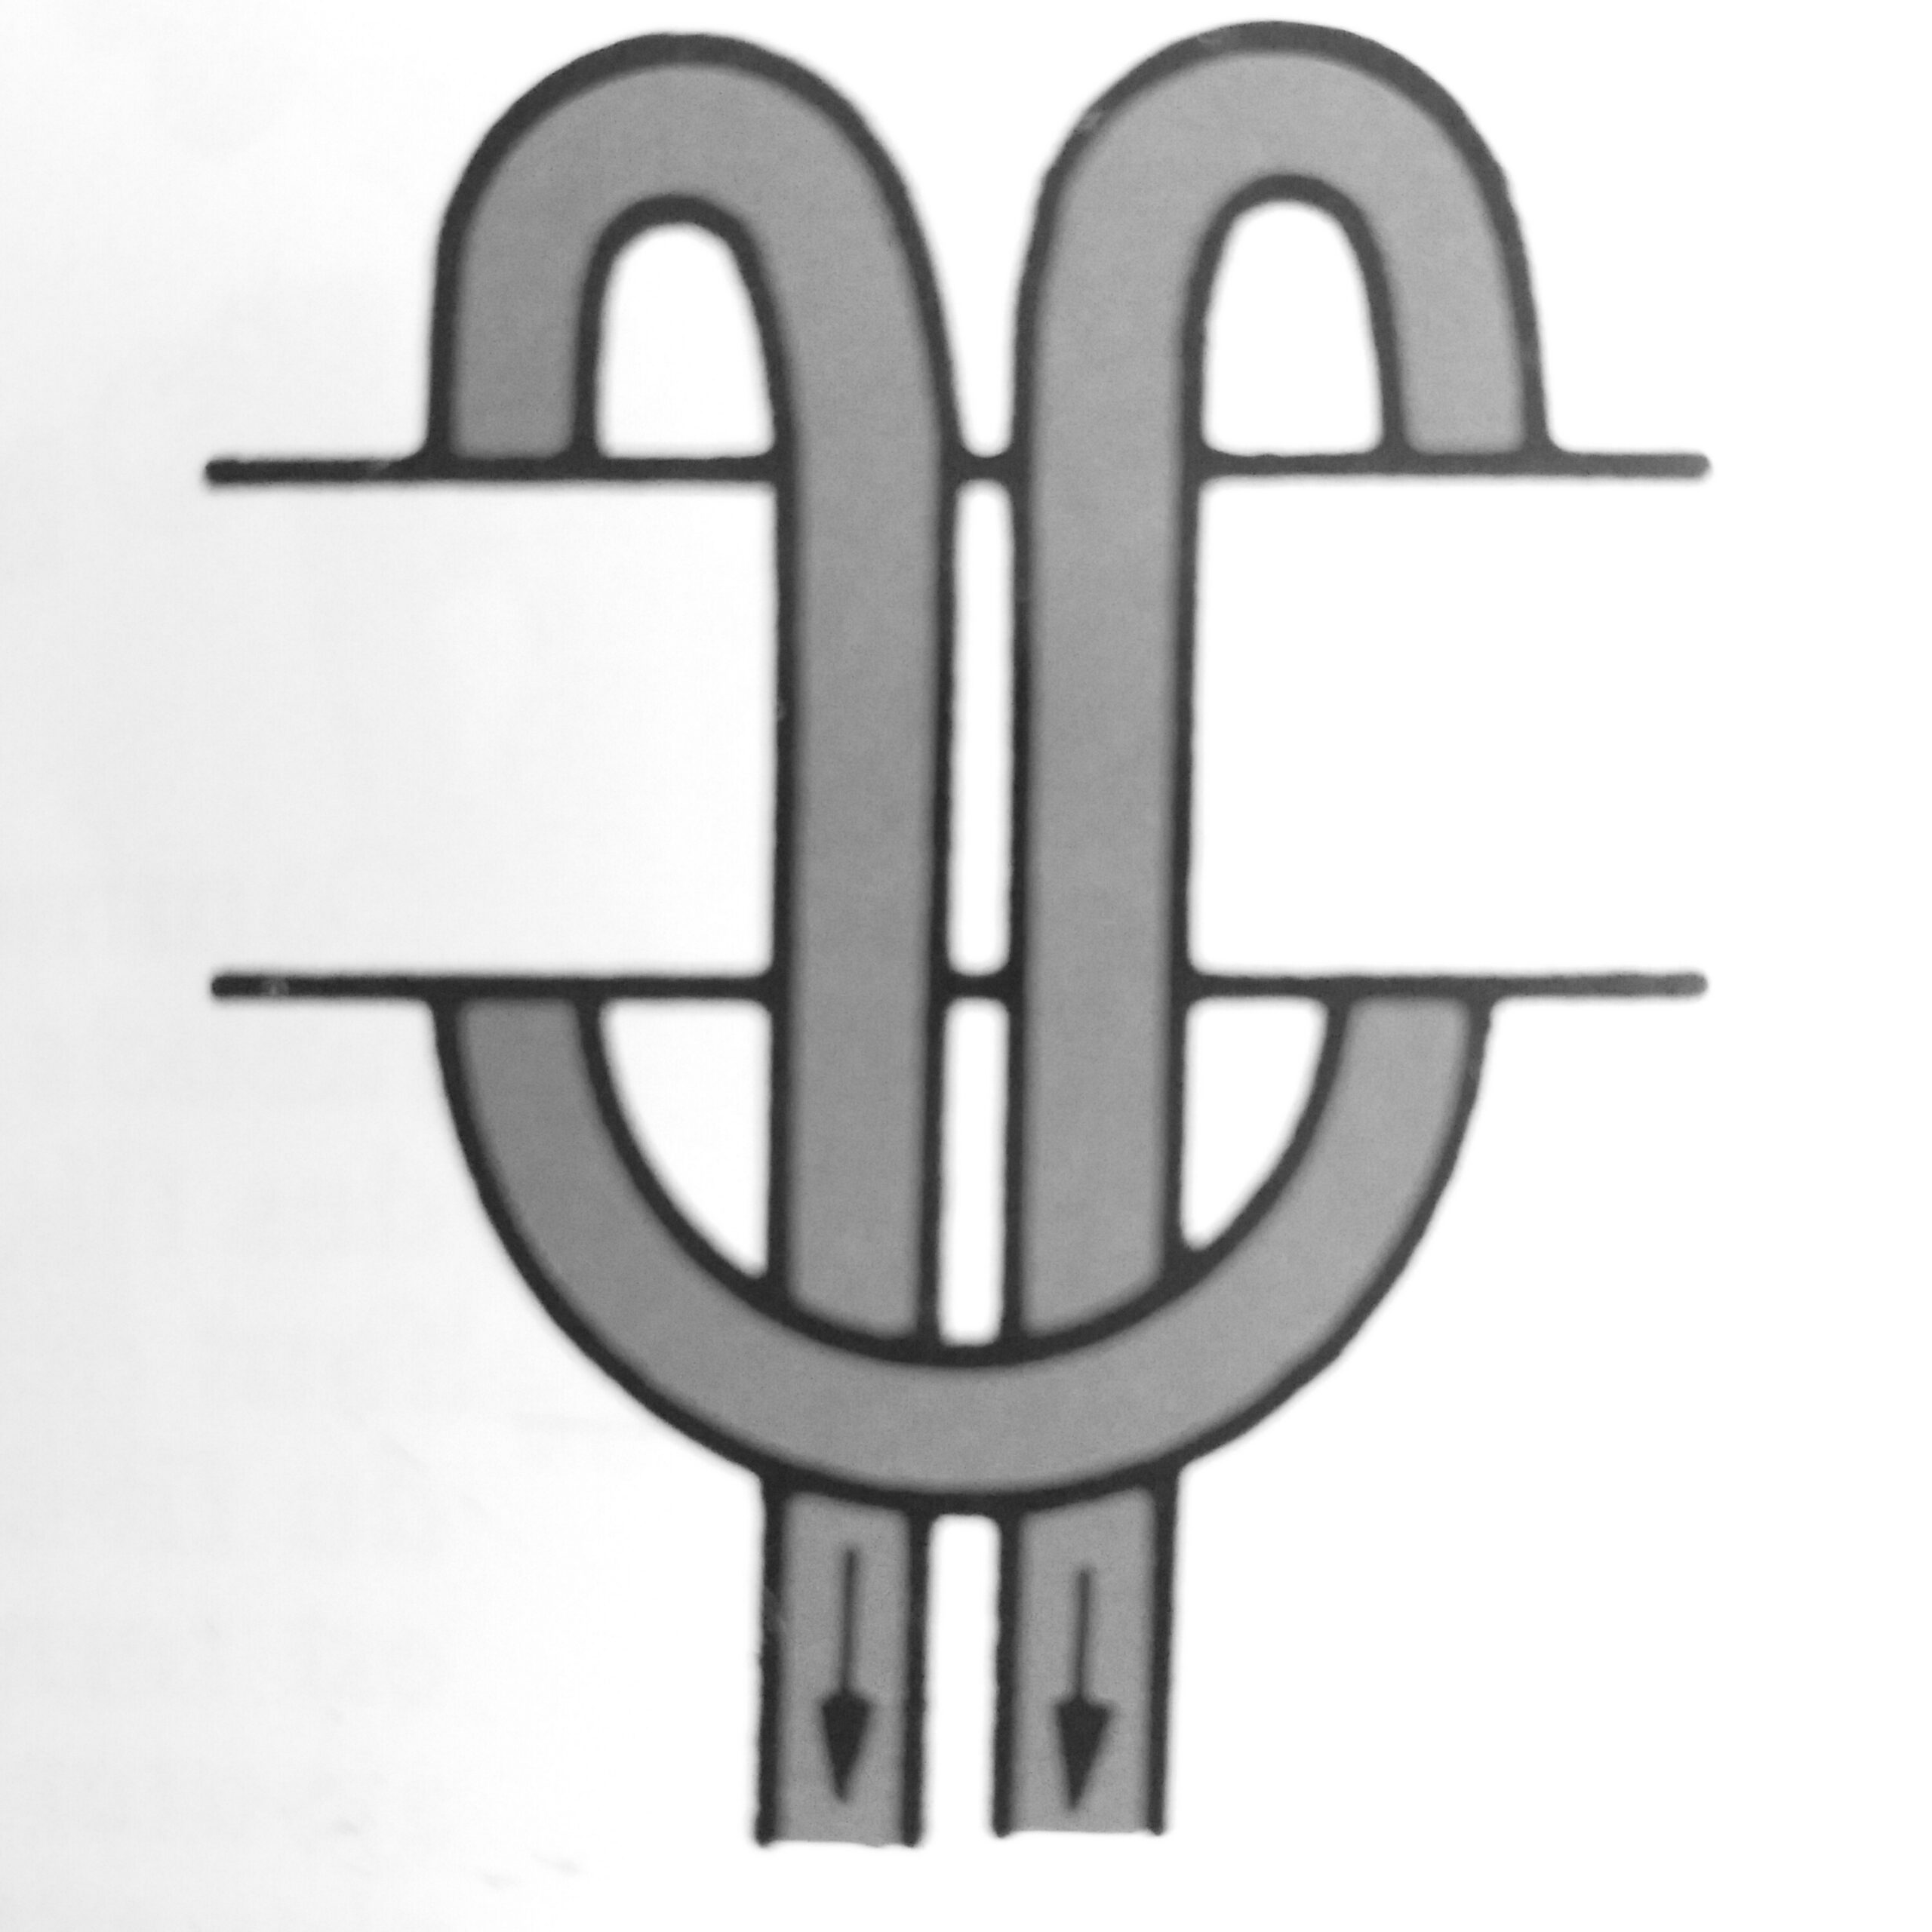
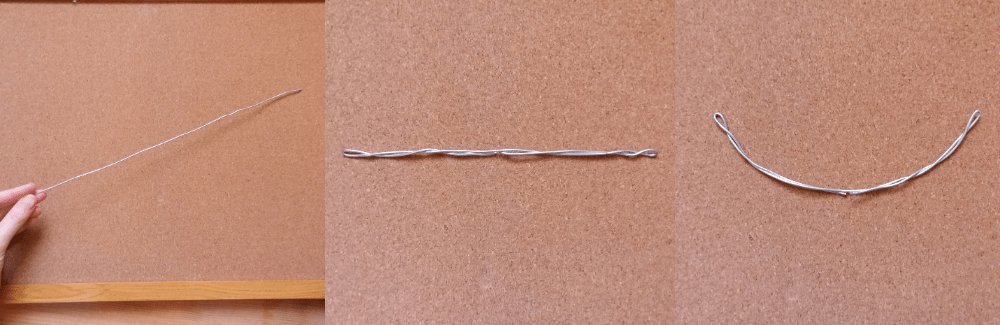
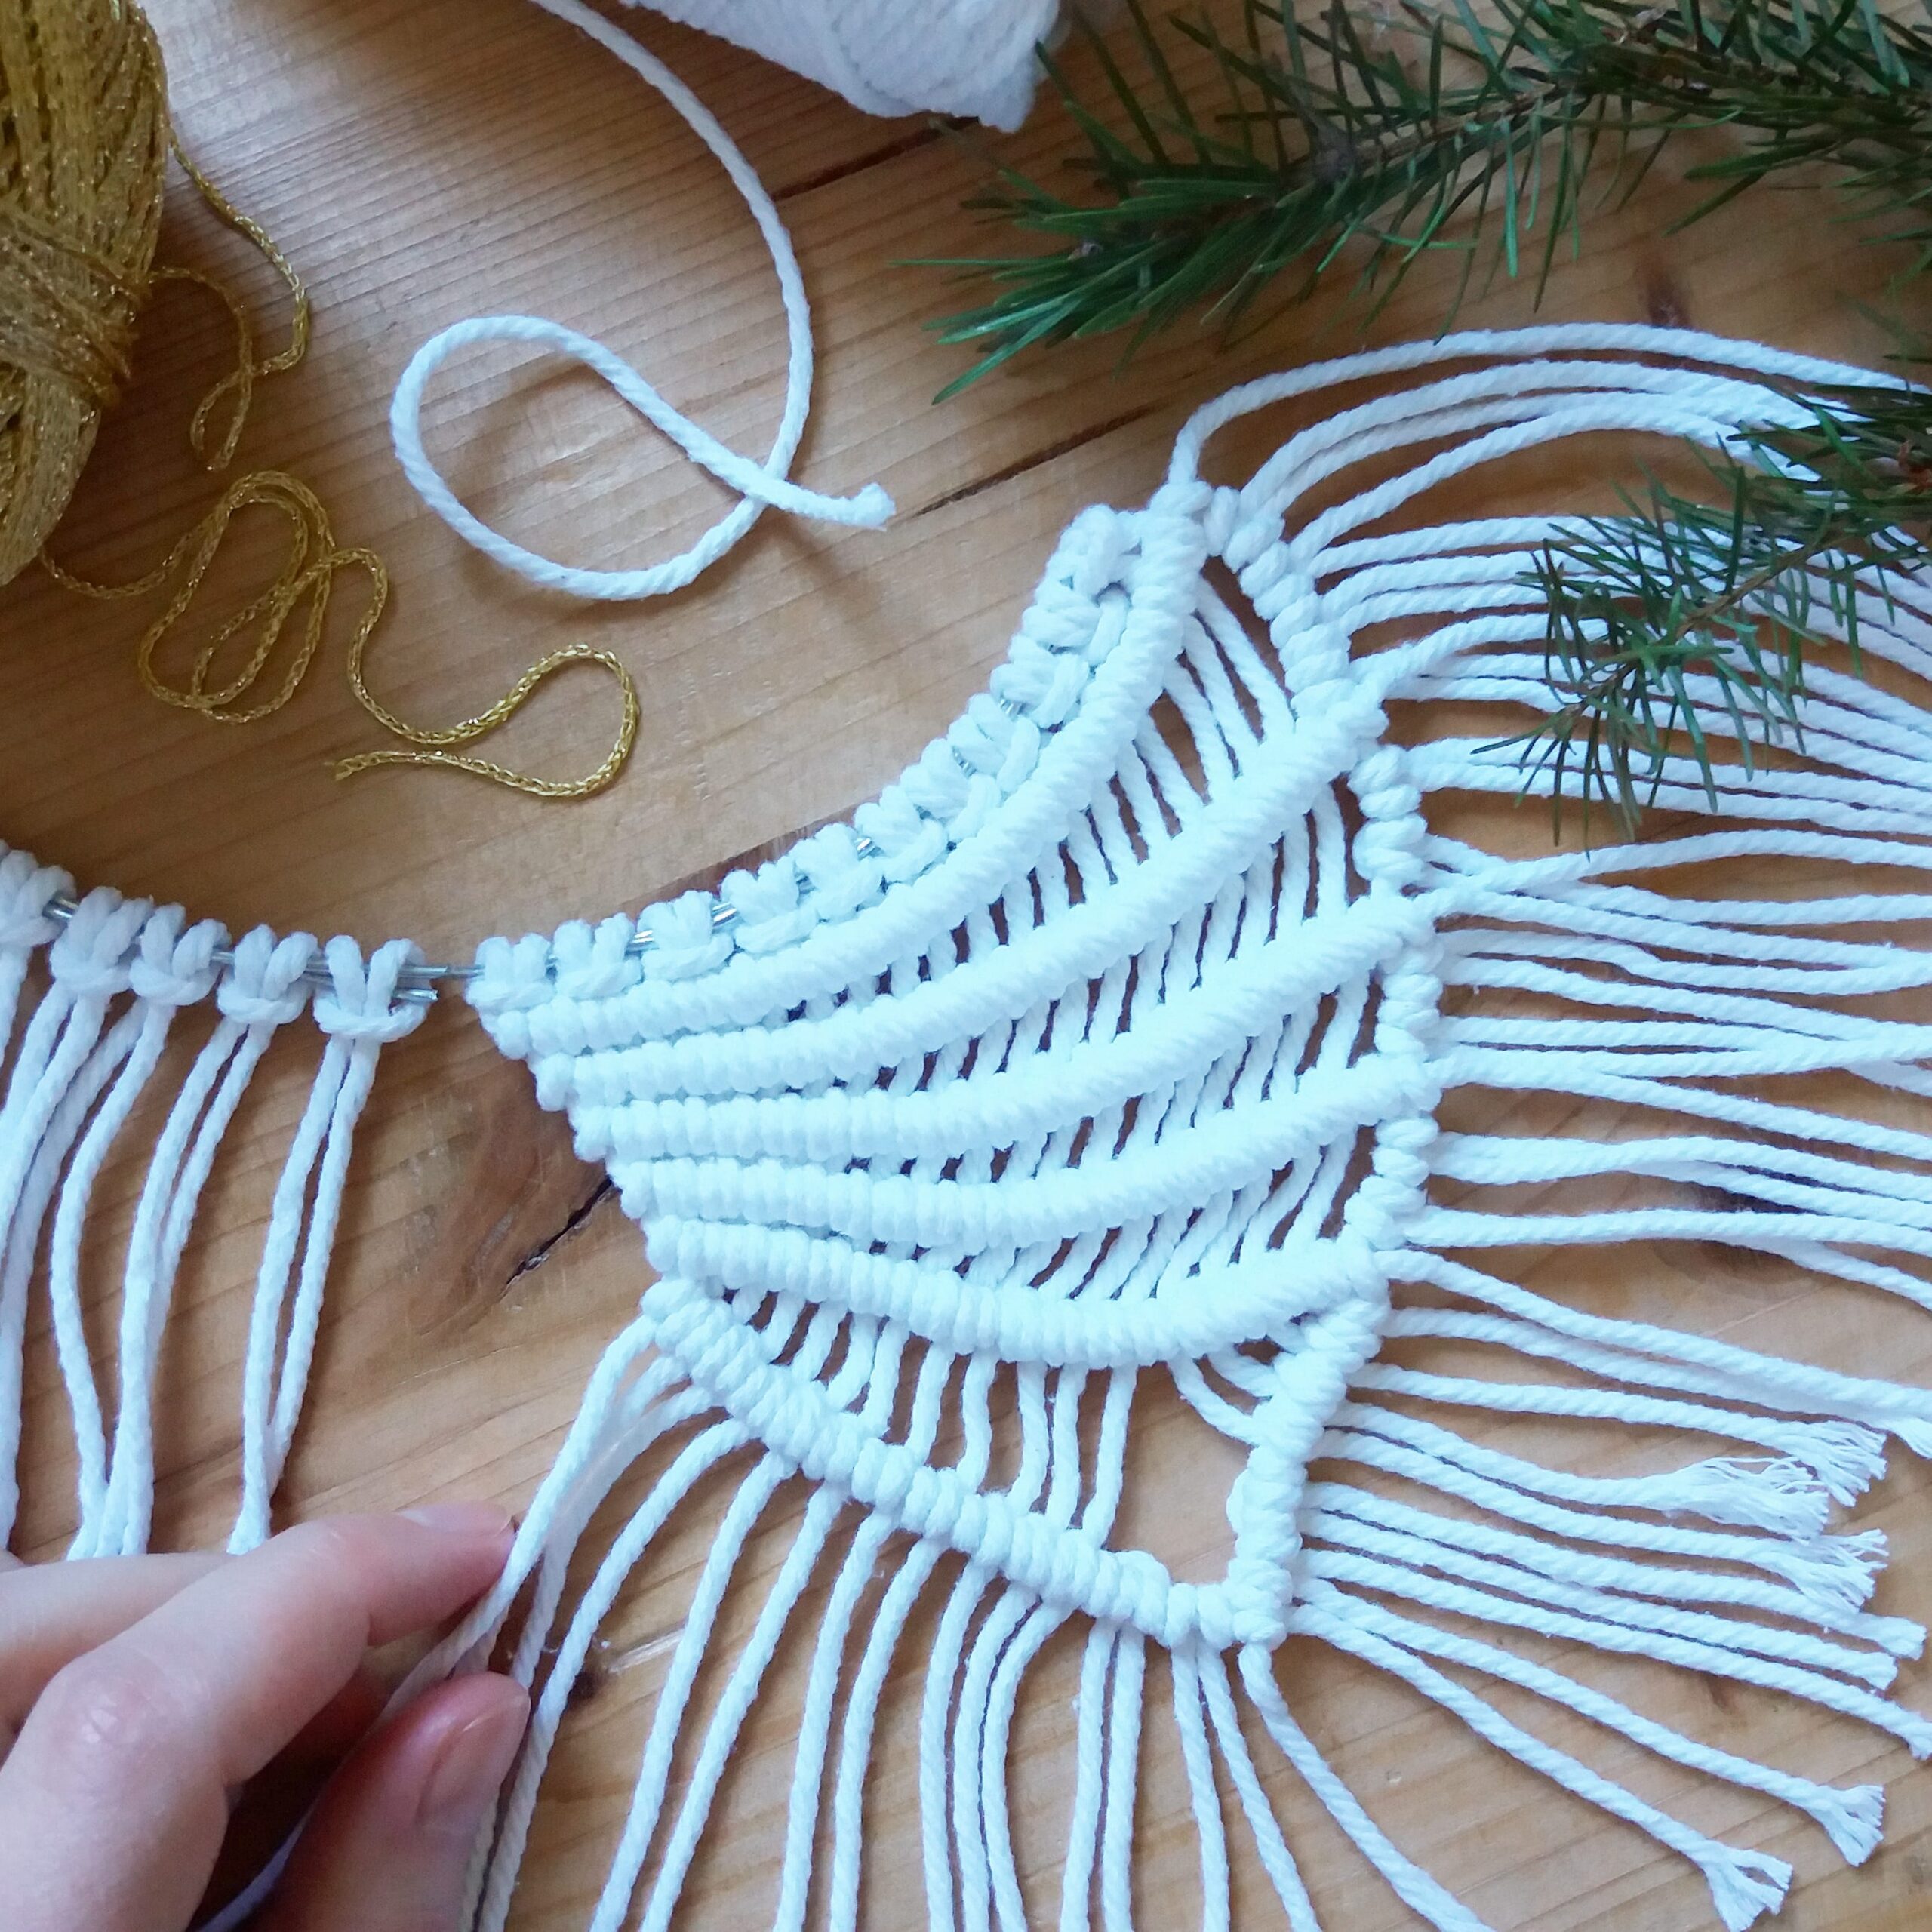
- Bend the wire so that each end joins the center / middle of the wire. Wind each thread on itself, leaving a small loop at each end, flat, as in the photo. Then curve it to get 14cm/5.5” wide.
RIGHT WING
- Cut 11 strings of 80cm/32” white cotton thread.
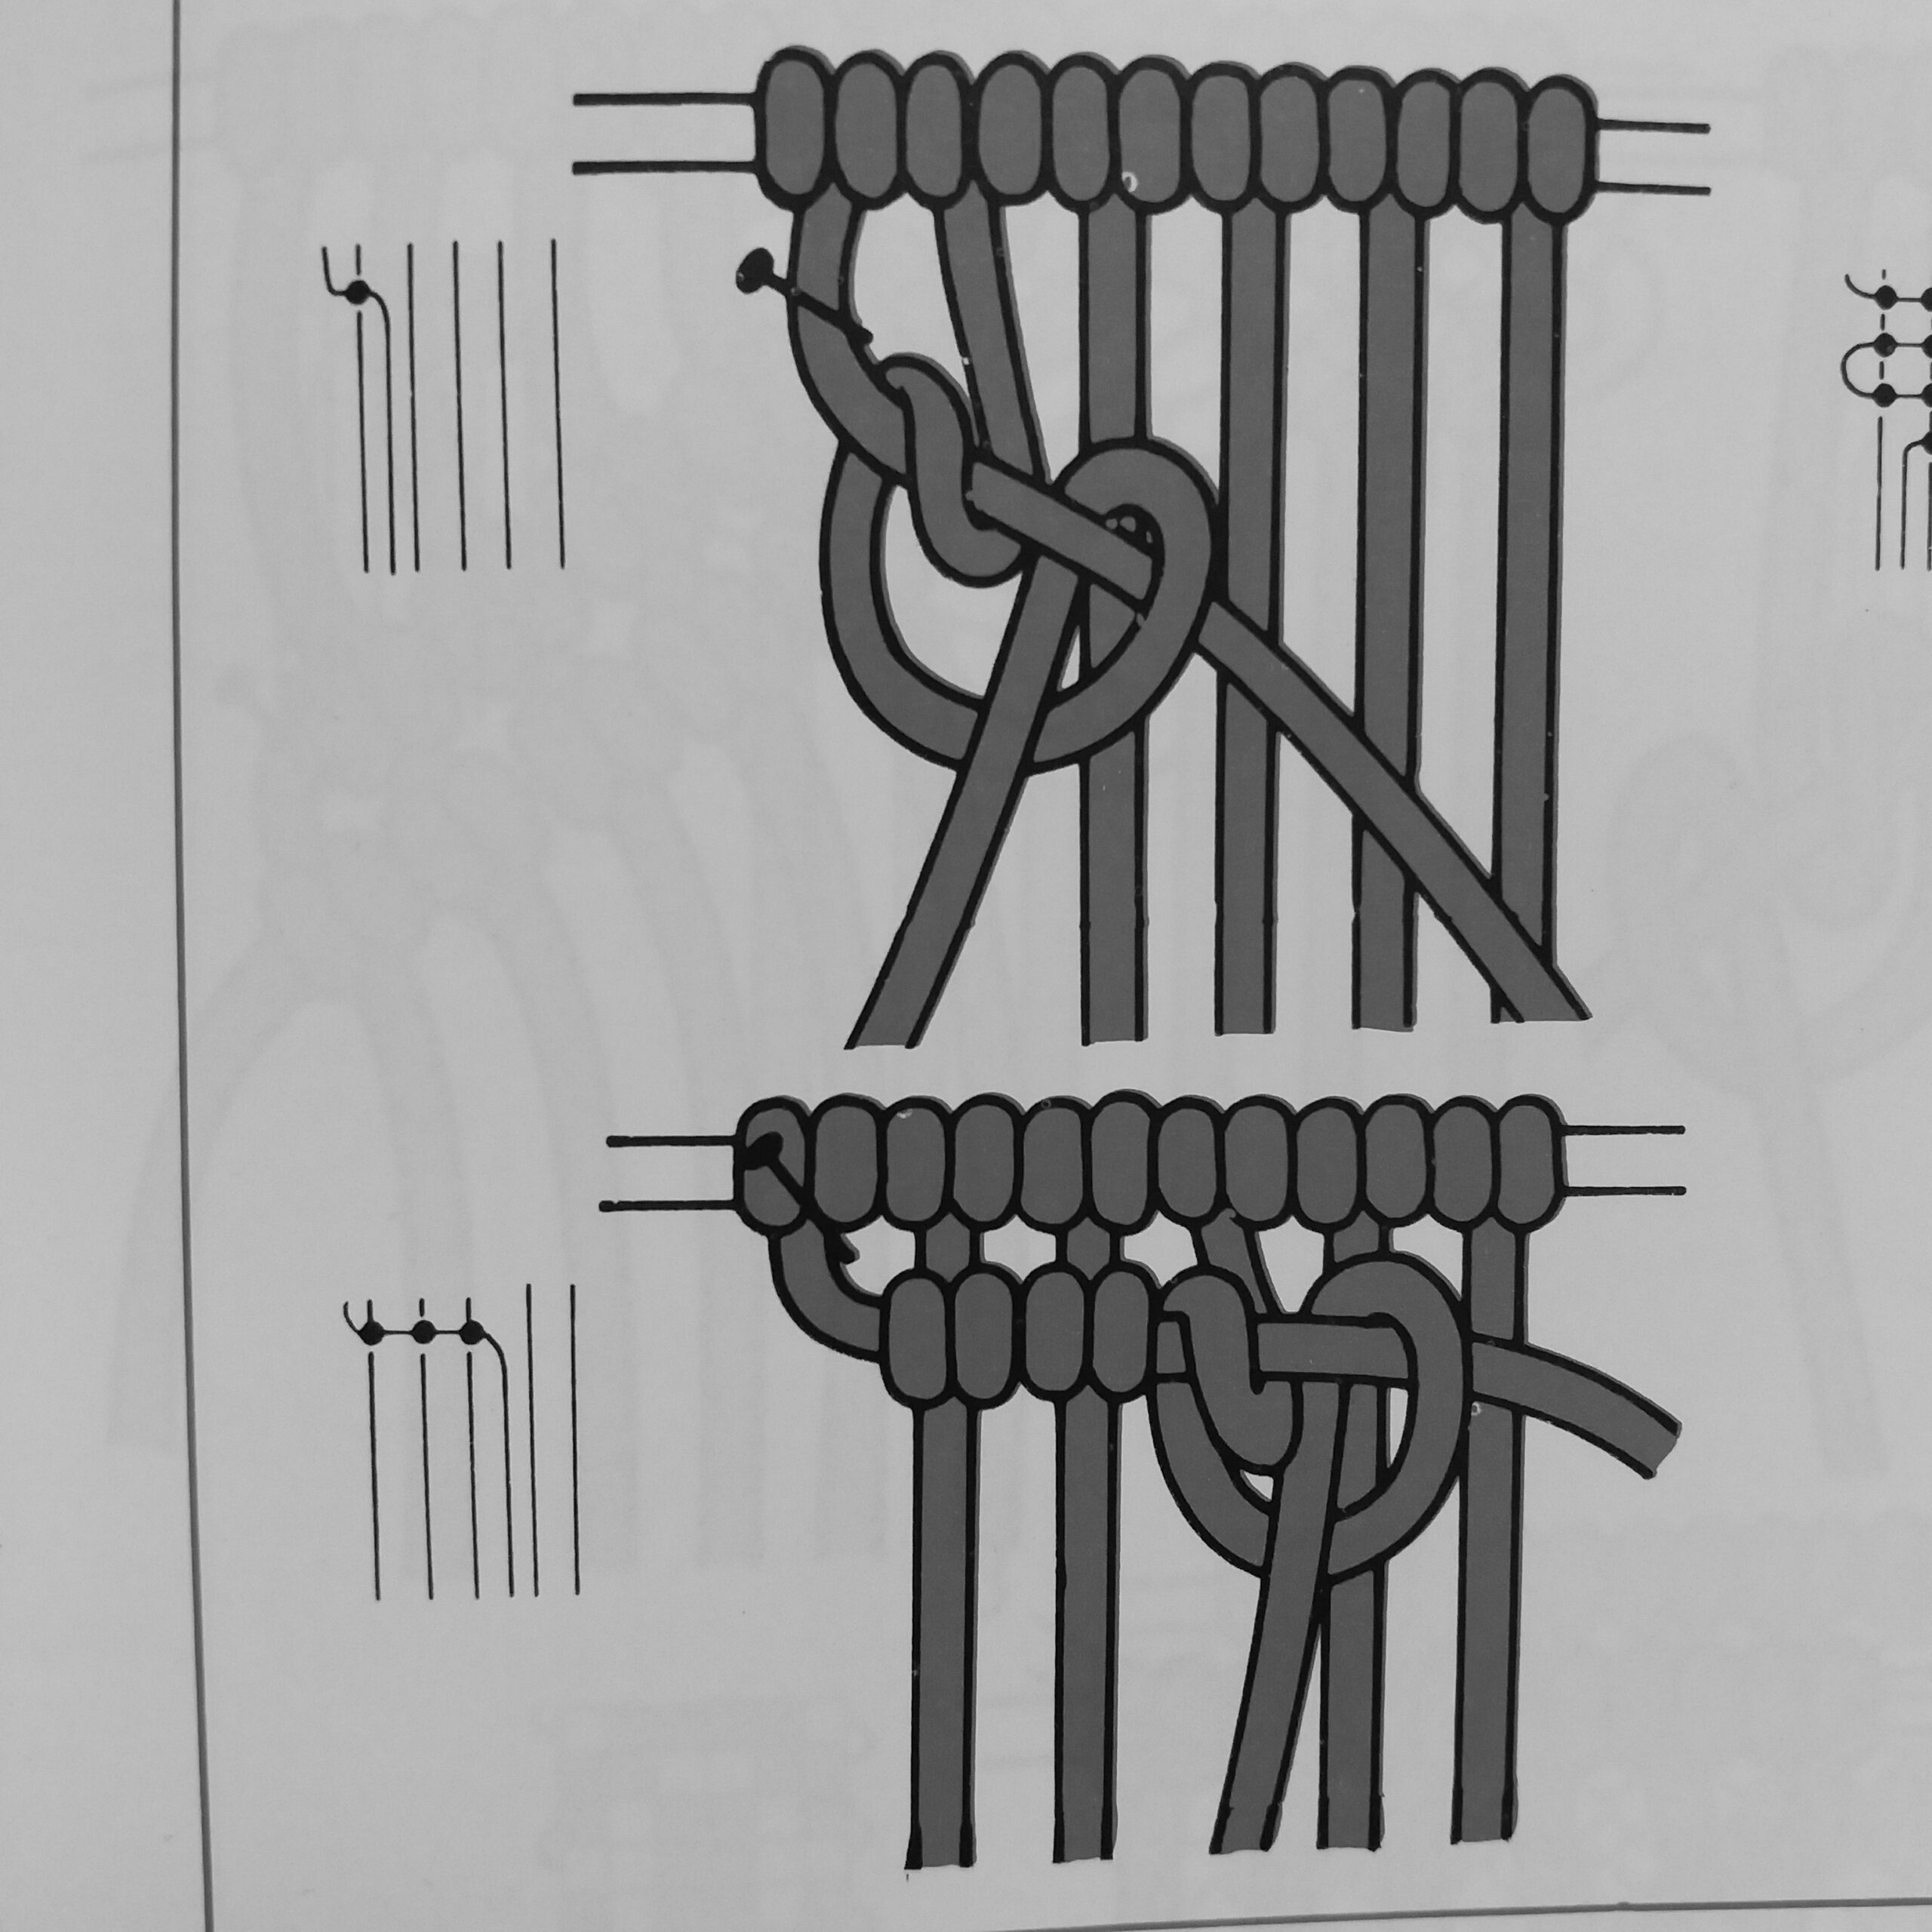
- Tie a thread through the right end loop in a lark’s head knot.
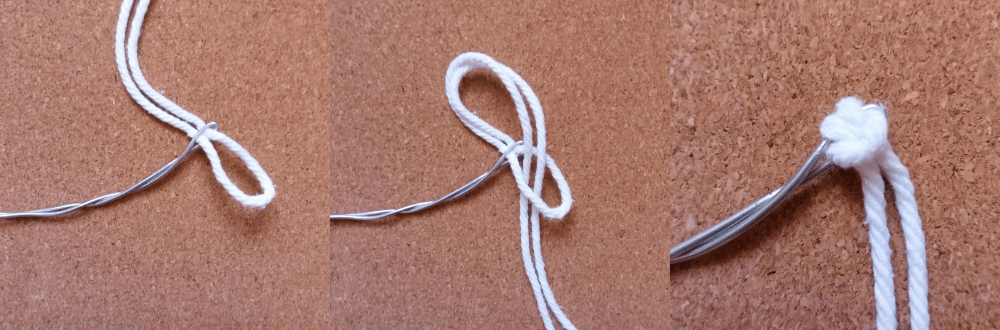
- Tie the other 10 threads along the wire in the same lark’s head knot, tightening them on the right side of the wire to create a row. (photos below)
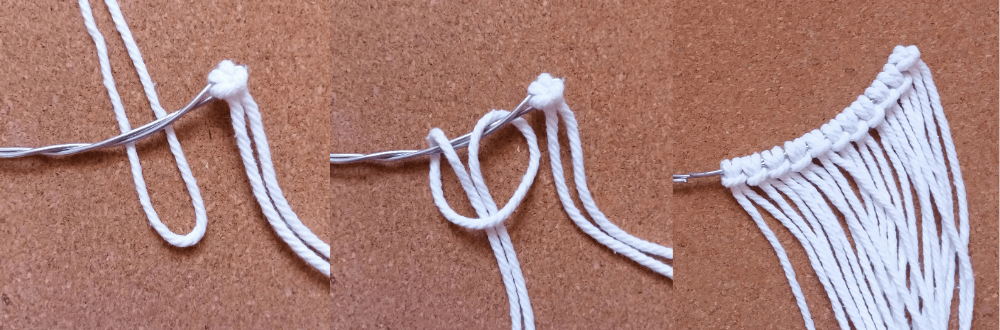
- Start the first horizontal clove hitch: fold the first thread on the far left horizontally, tie a knot with all the other following threads. (see photos below)

 6. Make a second horizontal clove hitch in the same way, by tightening the first 4 knots on the top stick, then loosening little by little so as to obtain a space of about 2.5 cm/0.8” at the end between the two sticks.
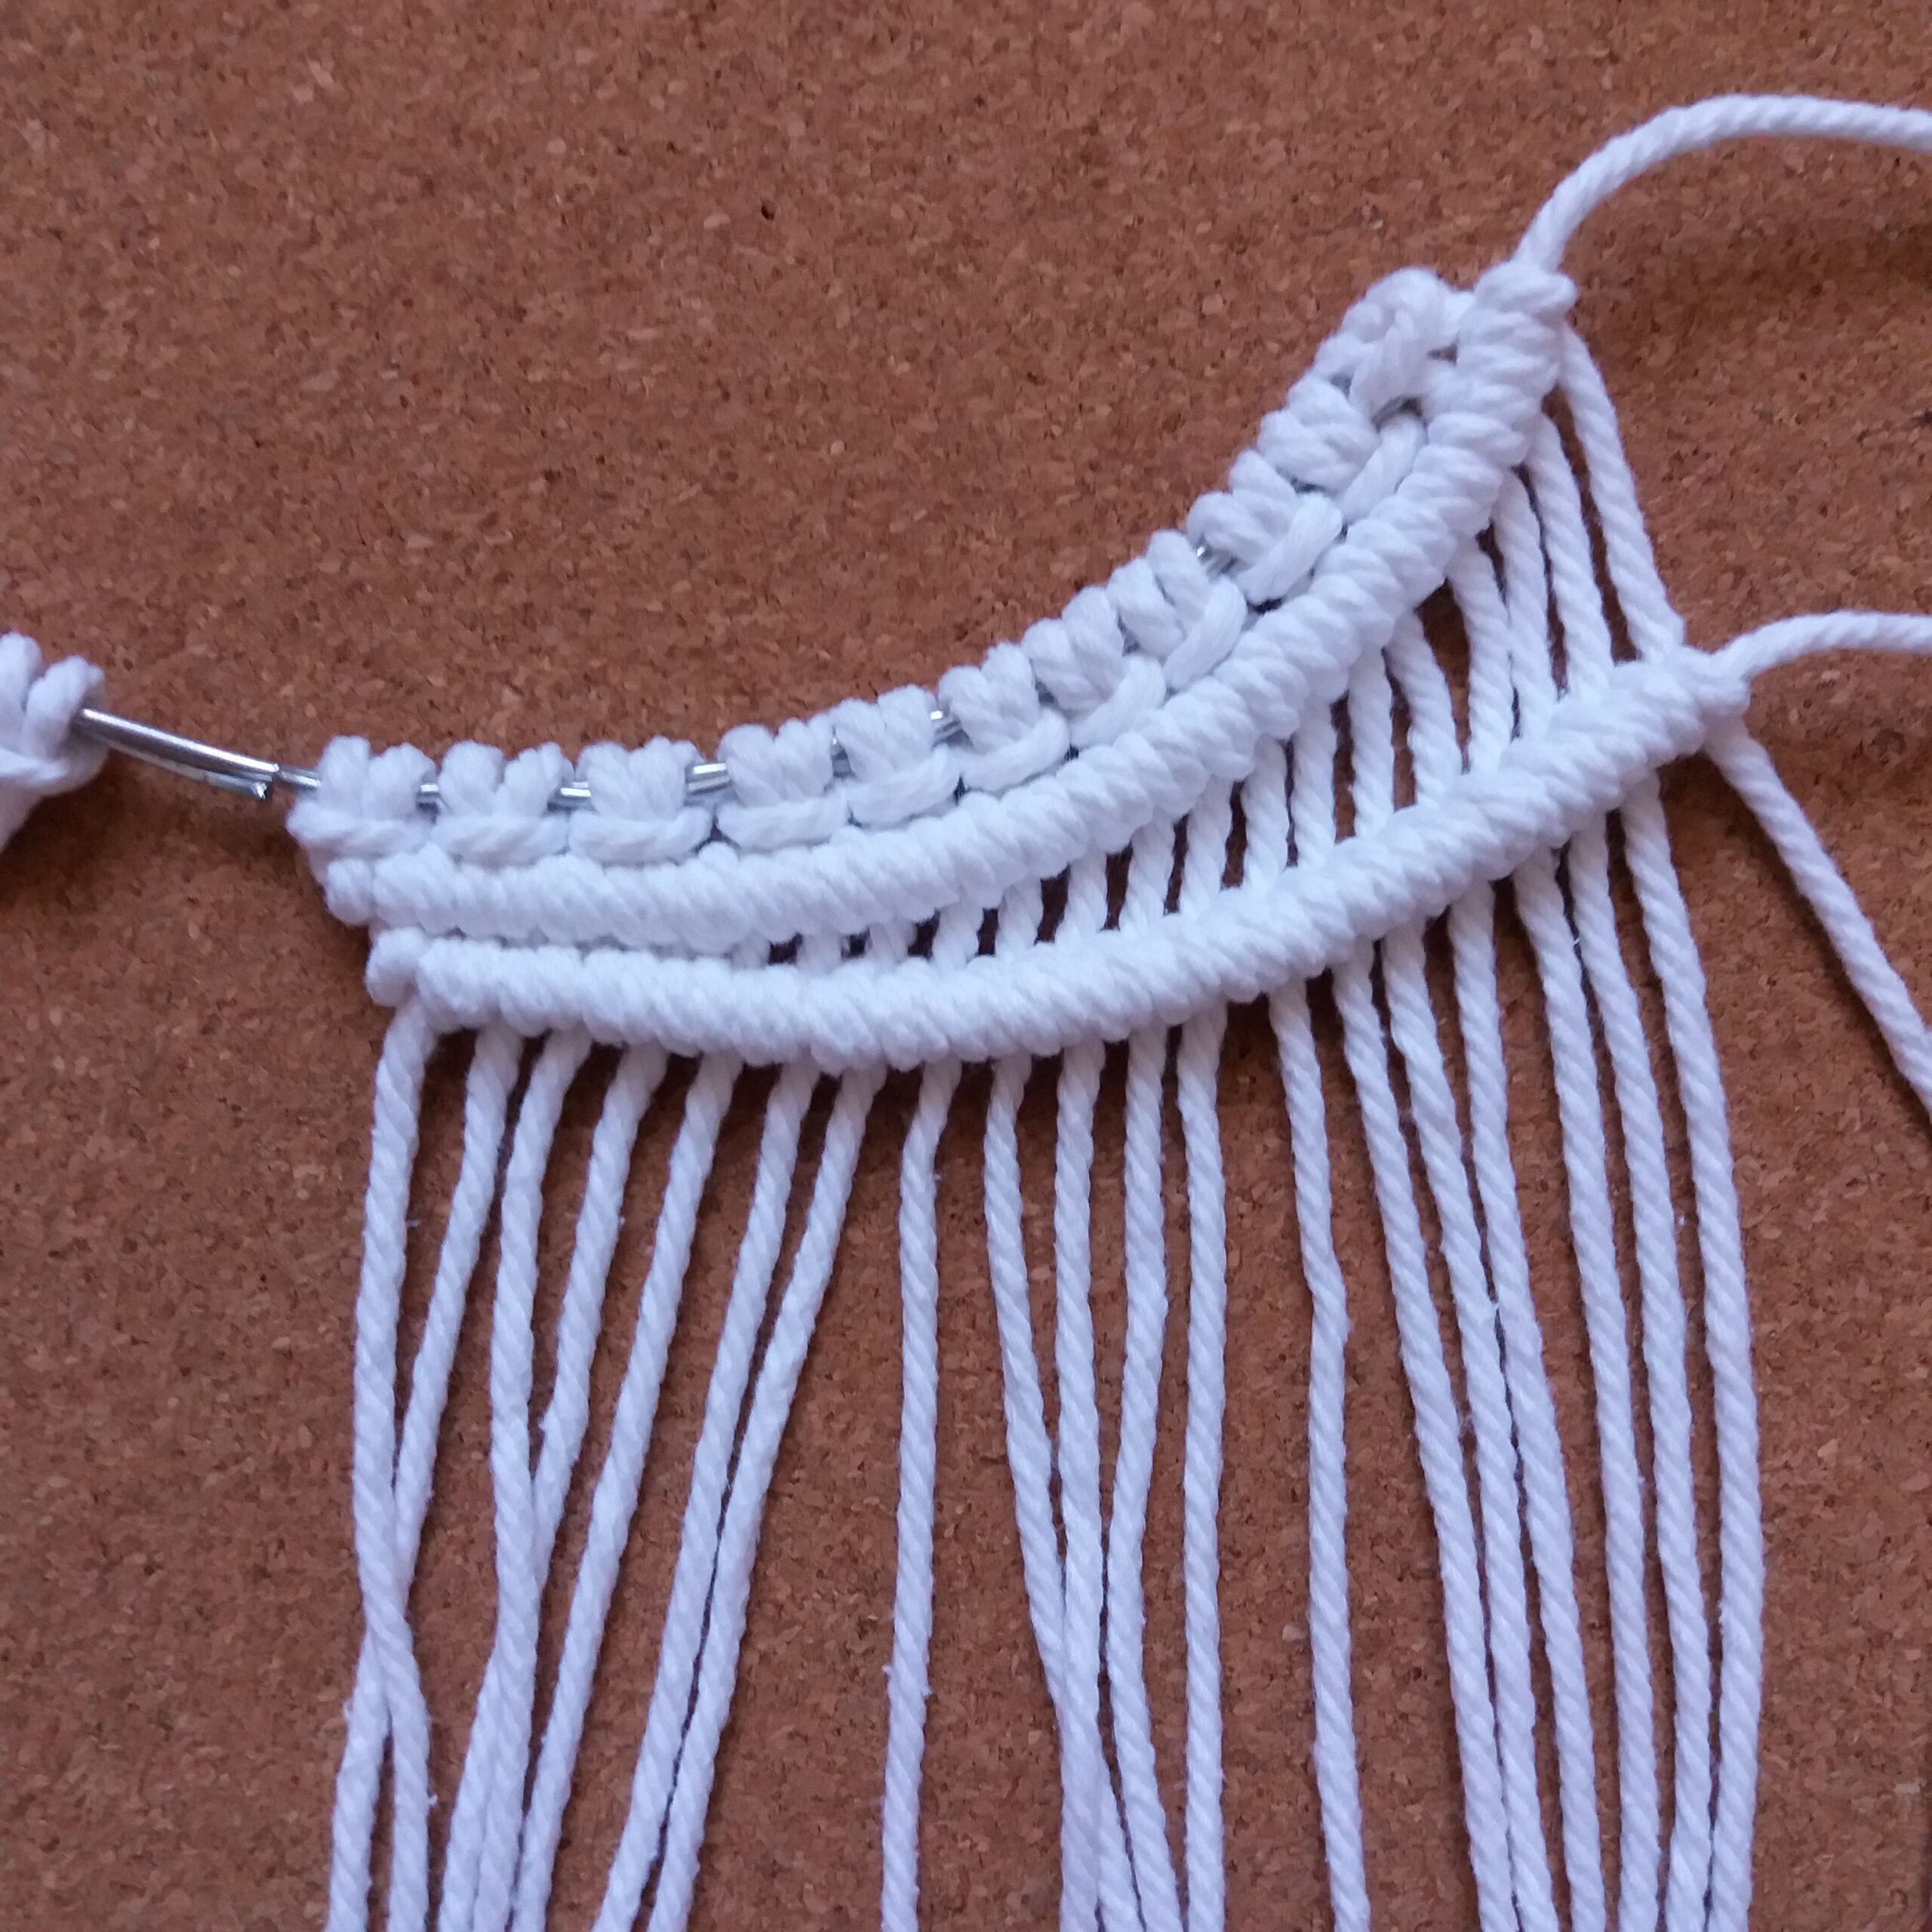
7. Make a third similar horizontal clove hitch (with a final height space: 2 cm/0.7”). Then a fourth and fifth horizontal clove hitch.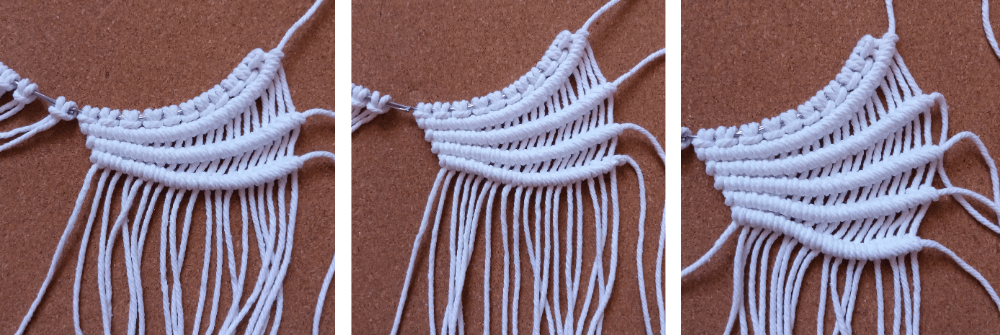

- Make a diagonal clove hitch from left to right on 11 knots, then another from right to left on 4 knots. Finally, a last knot of the thread of the left stick on the right stick to tie them together leaving about 1 – 1.5 cm/0.4” of margin.

- Cut 14 cotton threads of 20 cm/8”. Tie 2 threads per outer space between the knots, except the top one: 4 threads, making lark’s head knots.
 10. Even out the ends by cutting with scissors and leaving 5 cm/2” of fringes. (Here you can do step 10 before combing if you prefer). Comb the fringes with the comb.
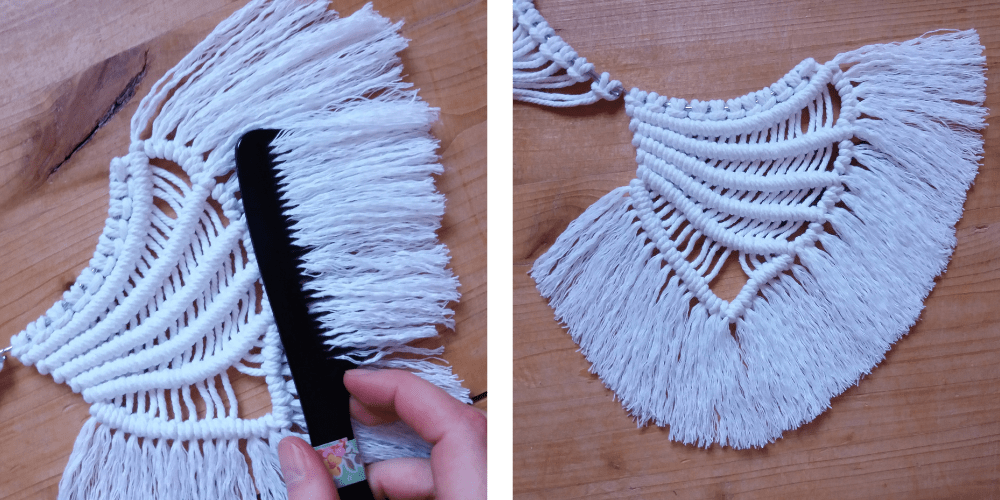
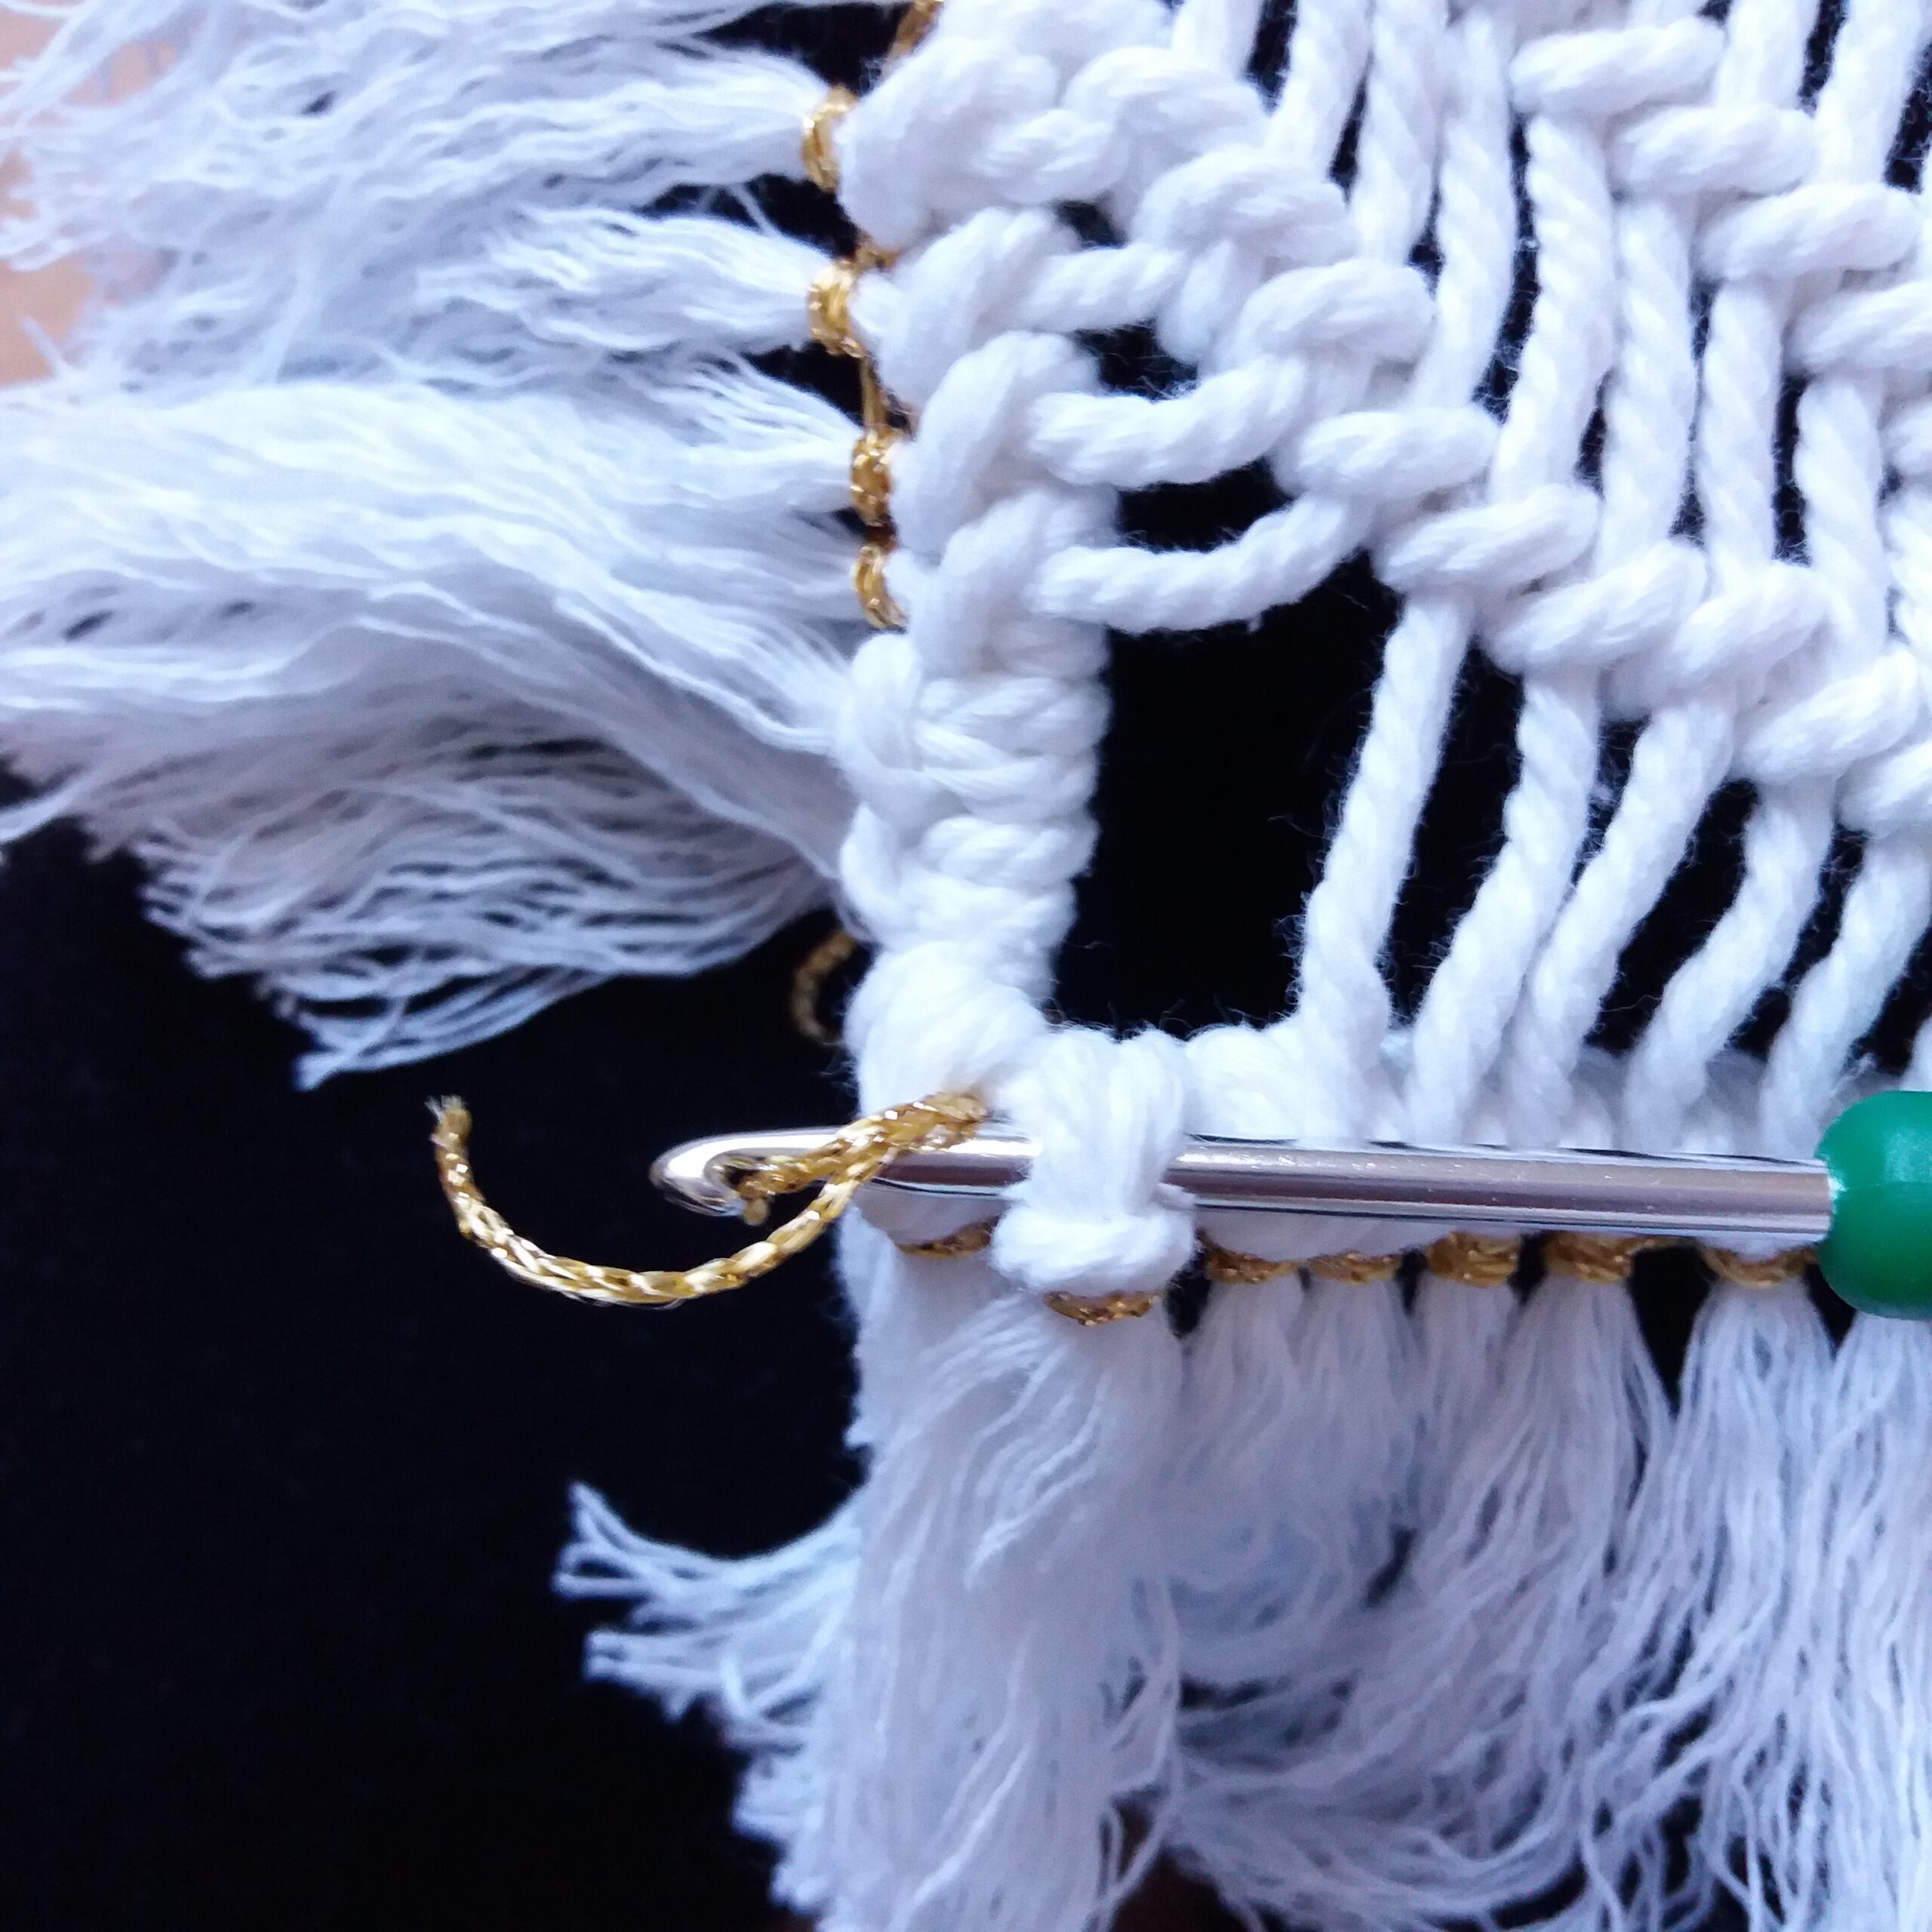
11. Make the golden borders: cut a 70 cm/27.5” golden lurex thread, tie it to the first fringe on the far left by making a lark’s head knot, then insert the thread into the yarn needle and make the chain stitch each time next fringe from the bottom edge. Finish with a clove hitch knot on the last fringe.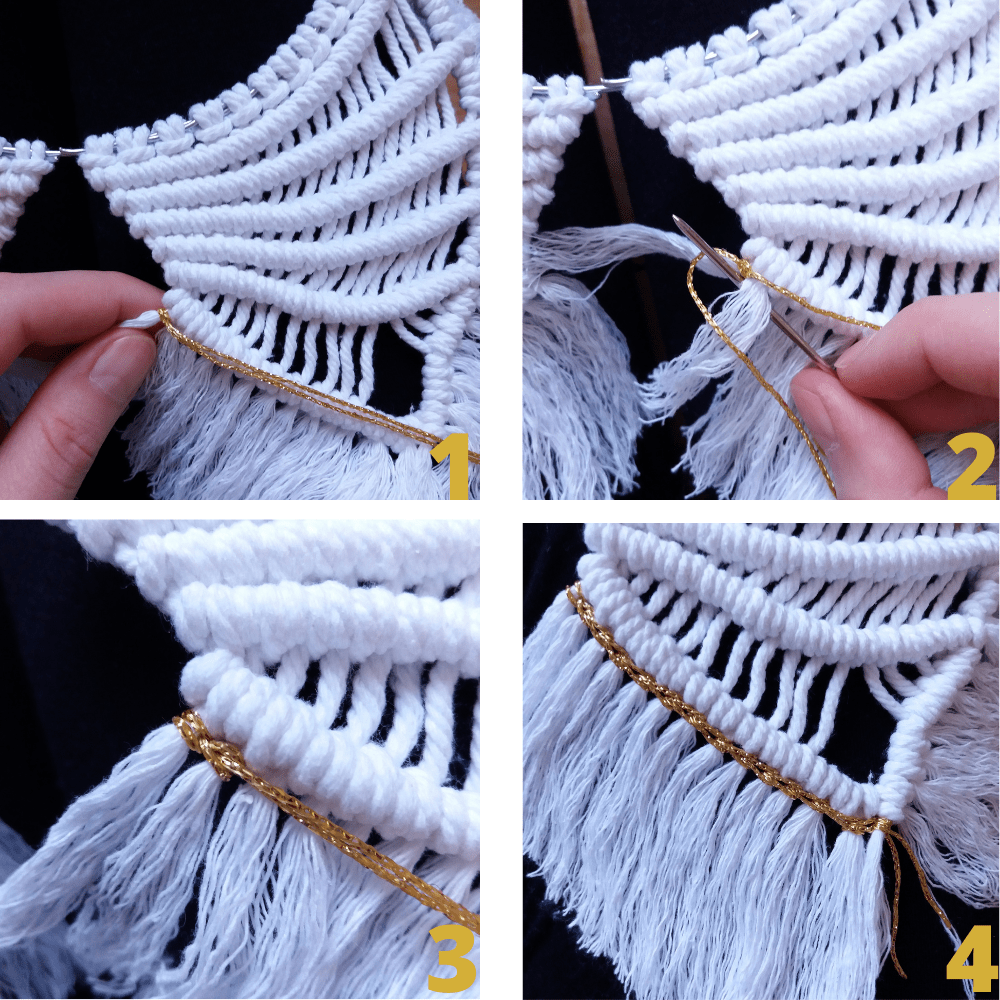
Tuck the remaining golden threads on the back of the piece by inserting them into the knots with the 3mm crochet hook.
12. Cut a 90 cm/35” golden lurex thread. Repeat step 10 for the side bangs from top to bottom.

LEFT WING
Repeat steps 1-11 of the right wing adjusting them for the left wing.

BODY
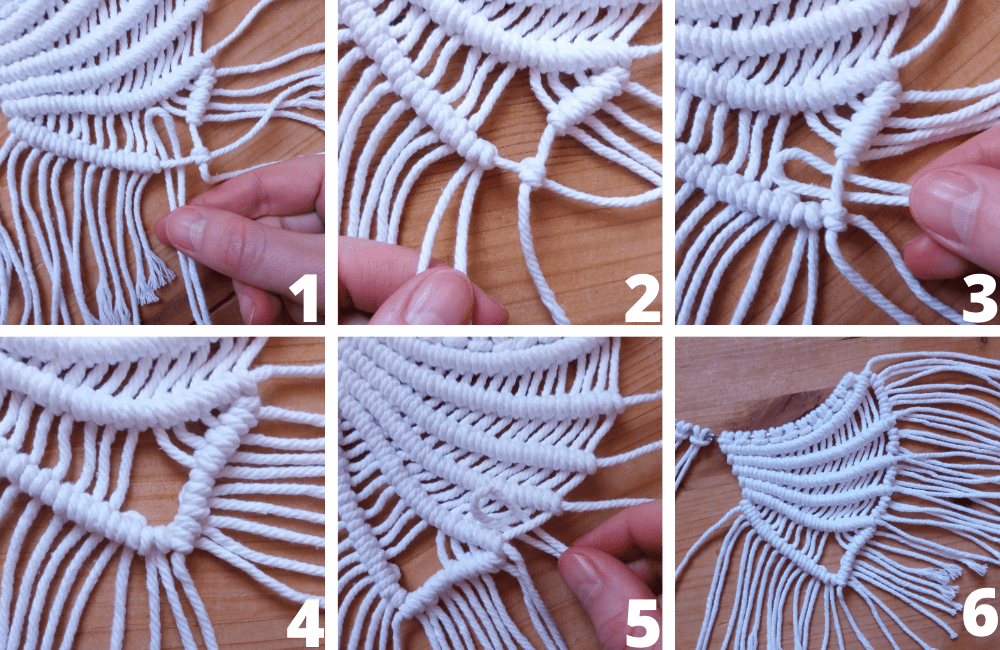
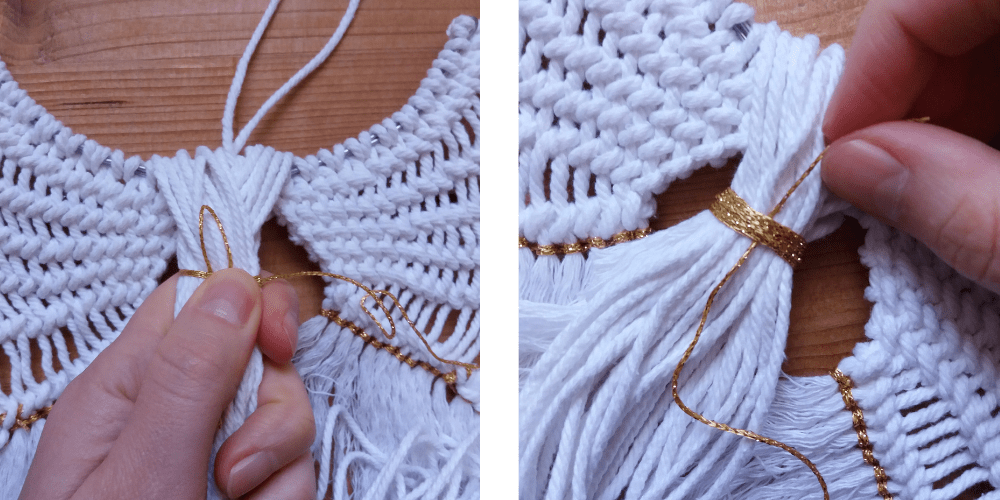
- Cut a 40 cm/16” cotton thread, fold it in half, and tie two clove hitch knots between the two wings, leaving an upper spike/picot of thread of about 9 cm/3.5” (folded thread).
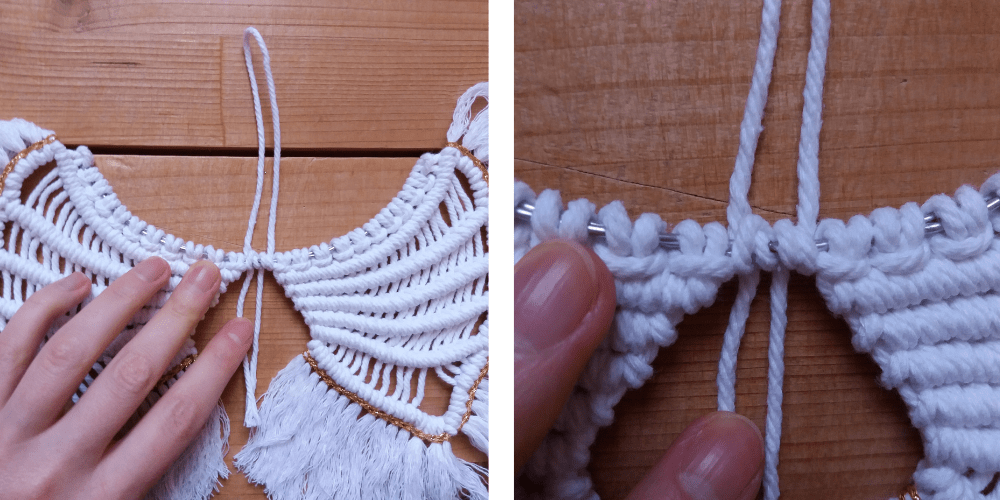
14. Cut 20 threads of 50 cm/20” cotton, divide them, fold them in half and place them on either side of the two clove hitch knots: 10 threads folded on one side, 10 threads folded on the other of the picot thread.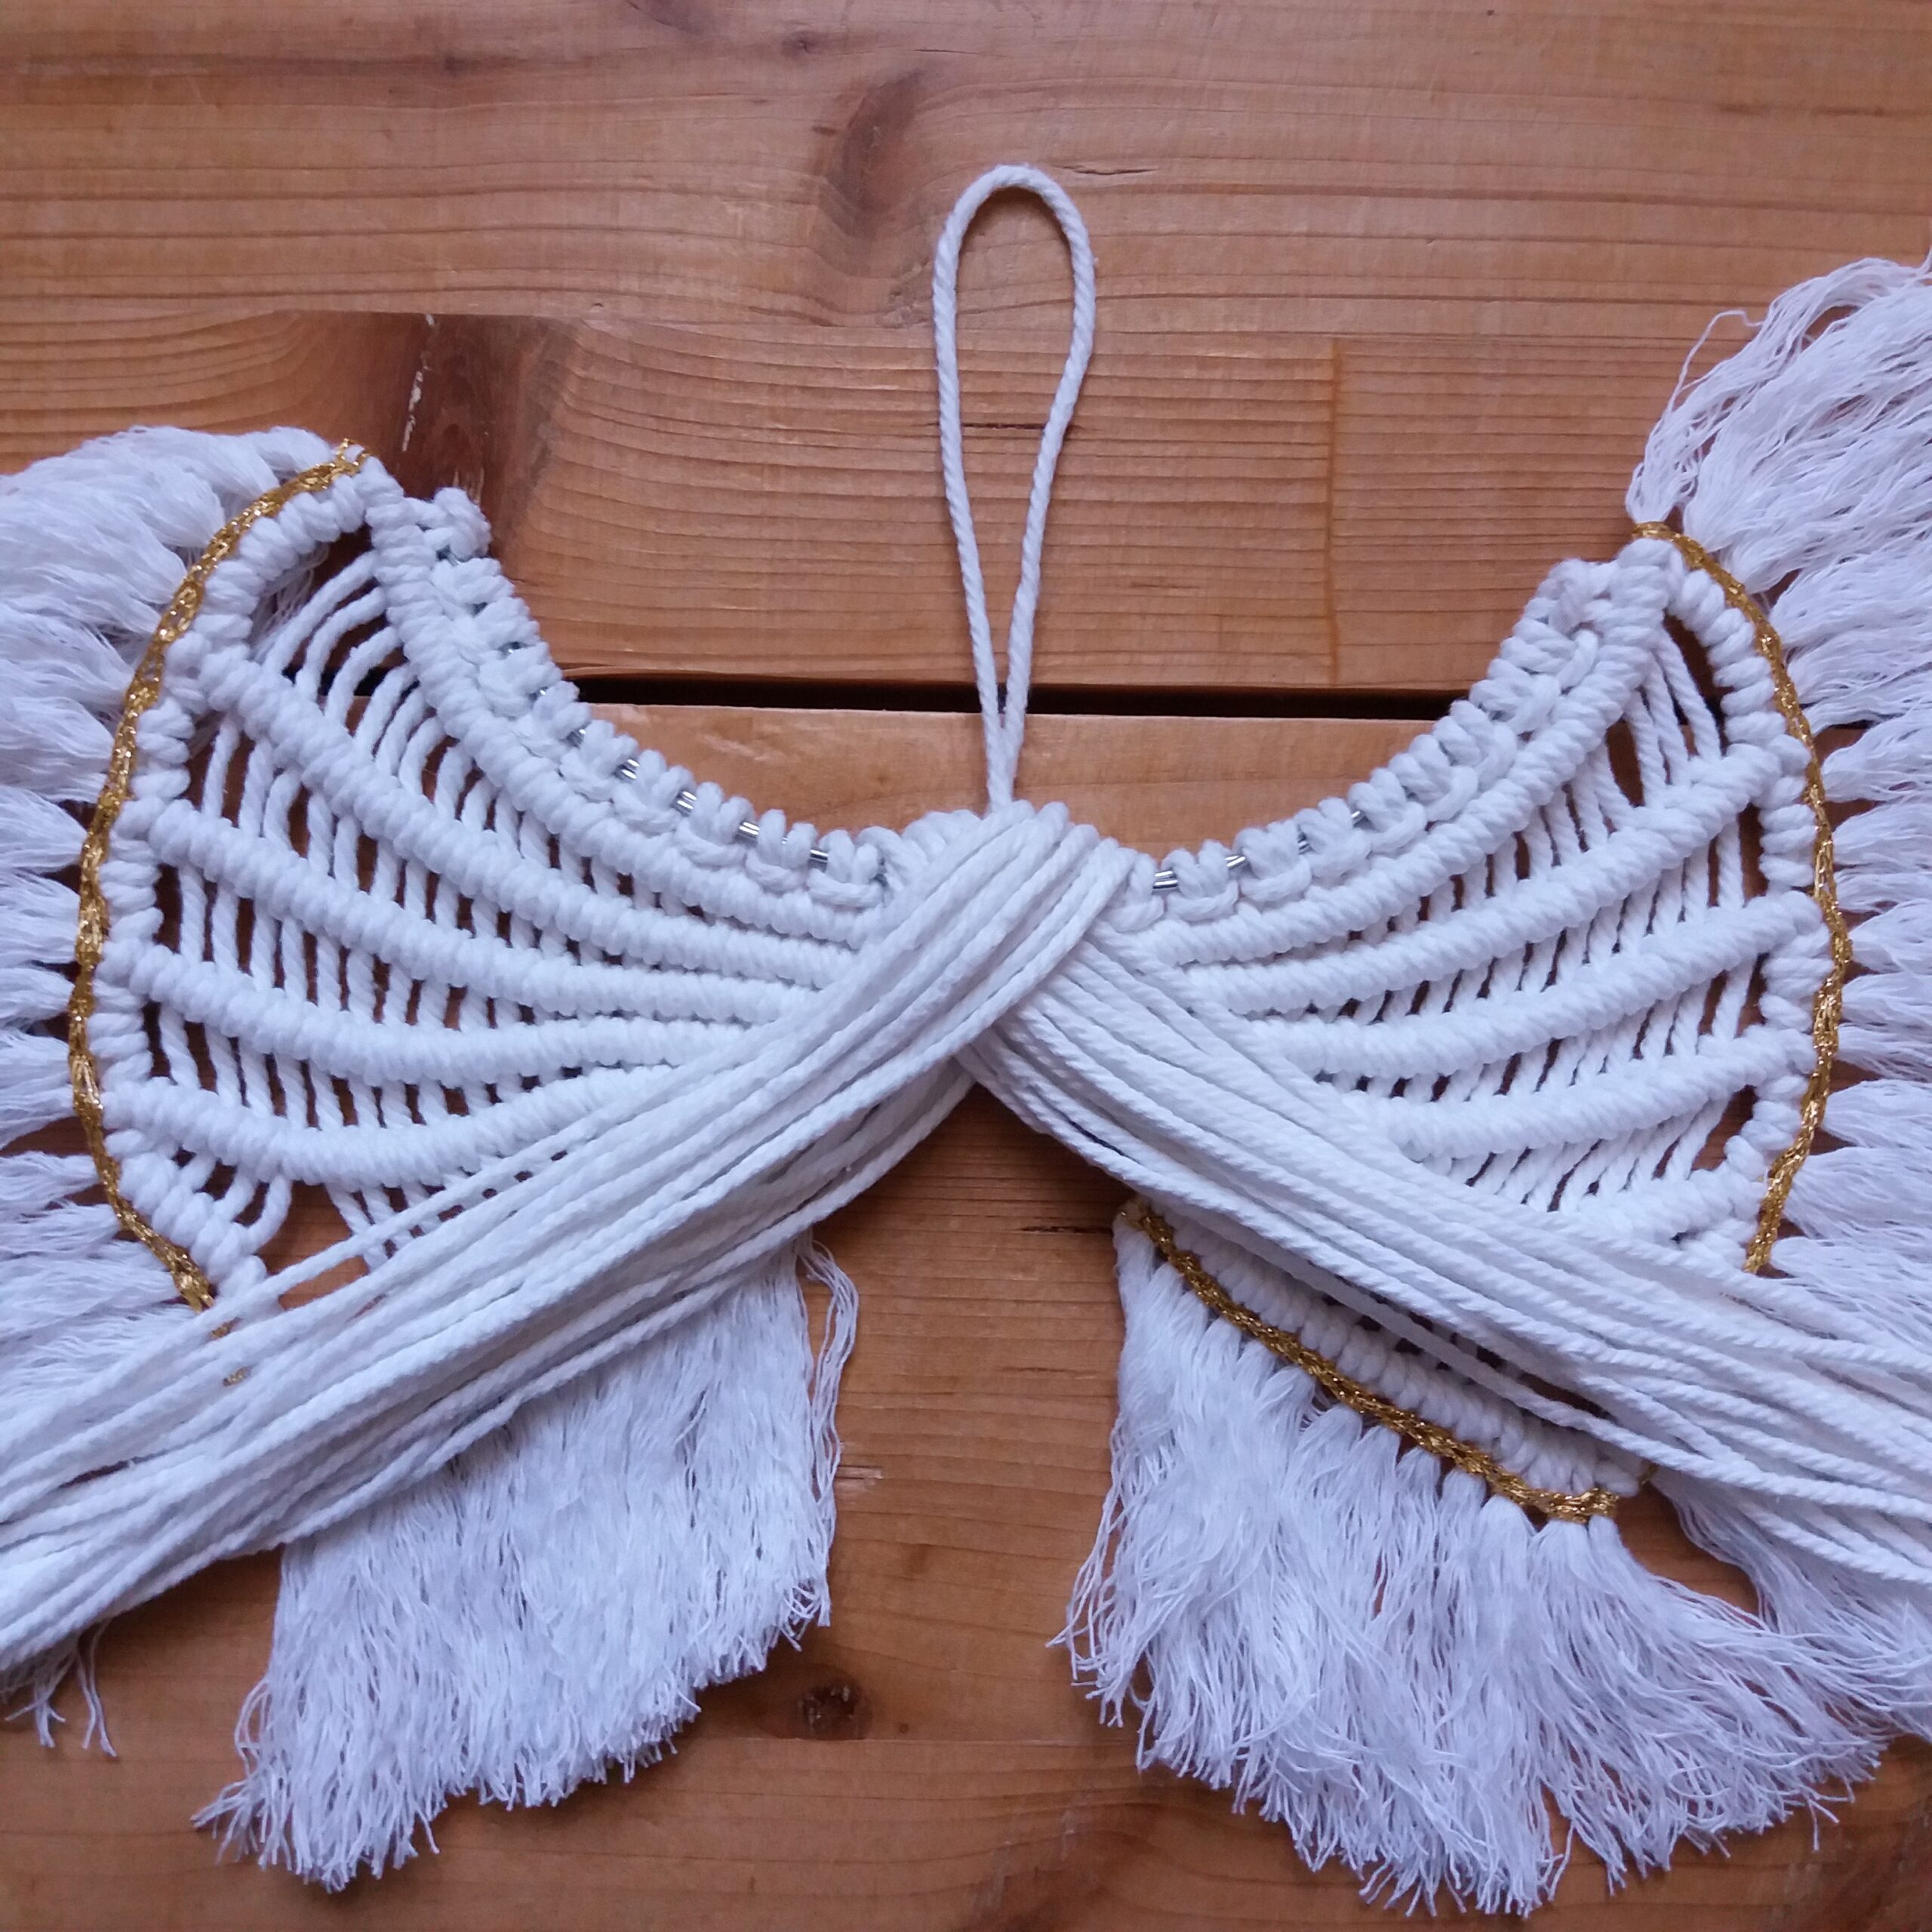
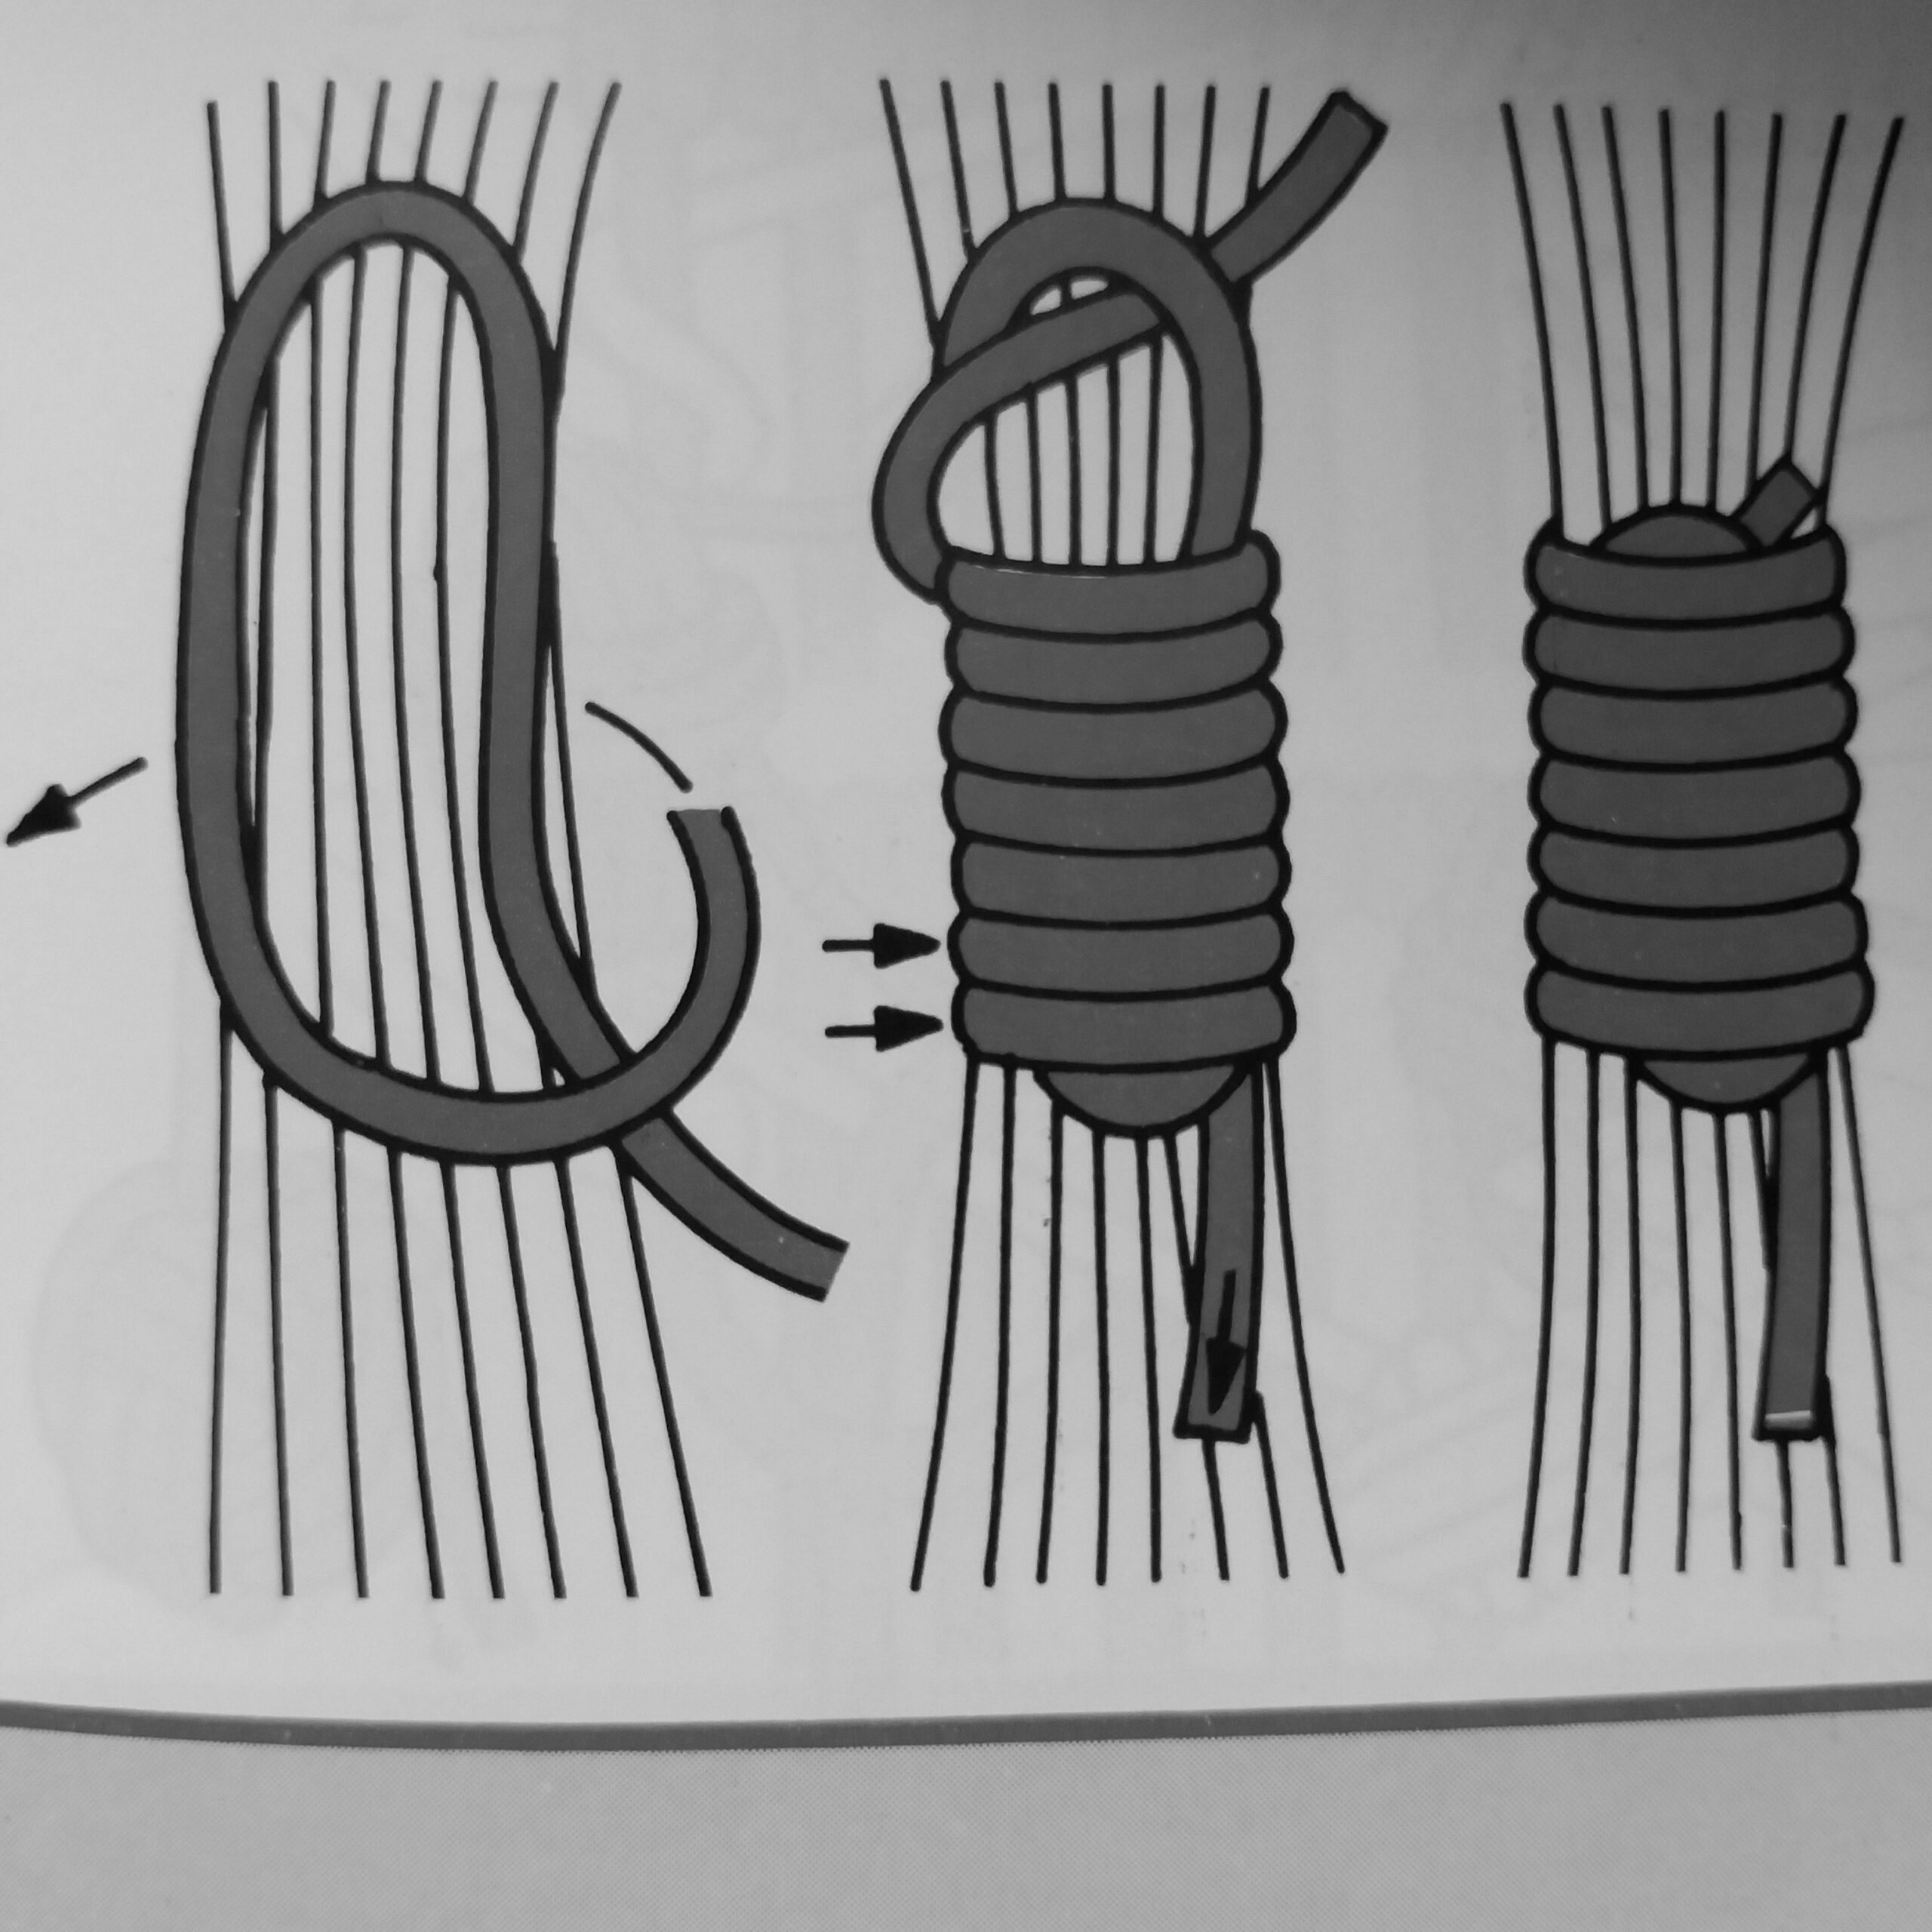
- Turn the item over and tie a Gathering knot with a 50 cm/20” golden lurex thread on the reverse side.
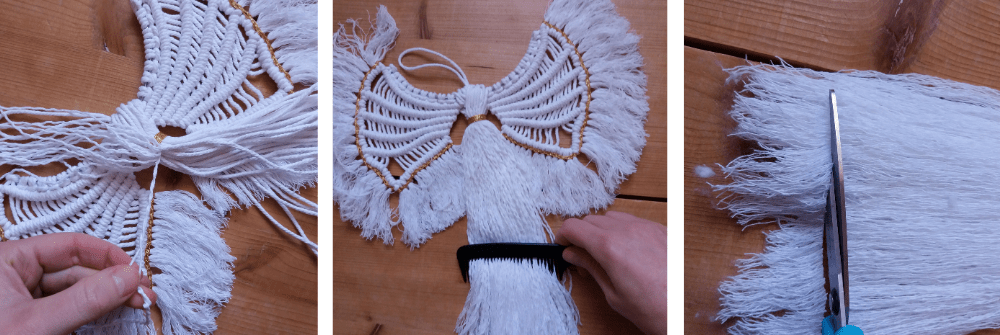
- Unwind by hand each thread located under the Gathering knot and comb the whole (delicately) with the comb. Then cut the end of the fringes to even out, leaving 20 cm/8” of fringe.
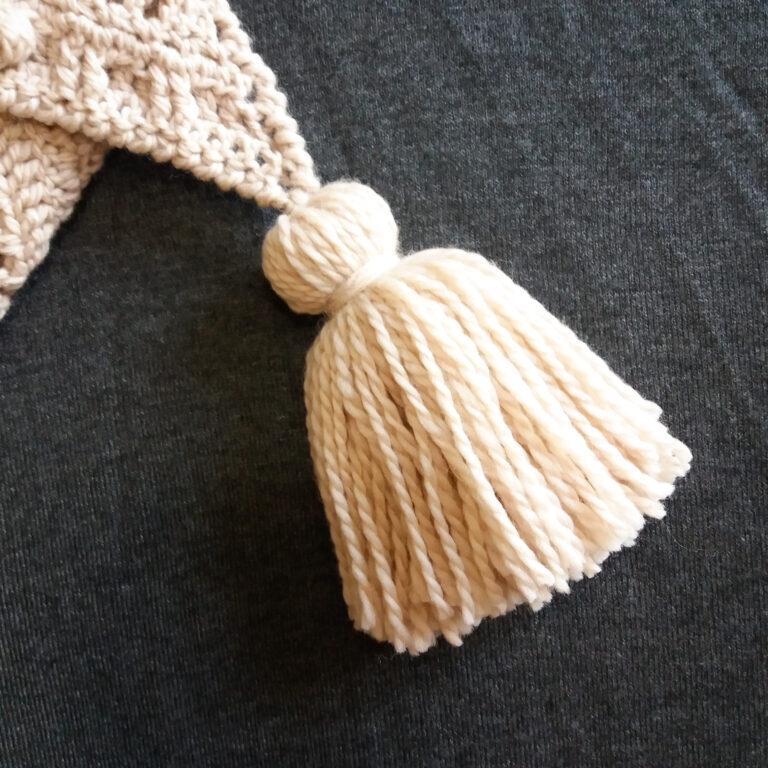
17. Thread the wooden bead through the thread of the upper picot (with the 3mm/D crochet hook).
Your angel Lumina is ready to light up your interior home!
I hope you loved making your #luminamacrameangel ! Be sure to tag me on social media (@FibreandFolk) so I can share your work!
The patterns and photographs of items on this site are the property of Fibre and Folk and are for personal, non-commercial use only. These patterns files are protected by copyright, and you may not distribute or sell them electronically or physically. If you would like to sell finished pieces made from these patterns please contact me. This post contains affiliate links.