
Go zero waste with this free and easy sewing tutorial, my new – complete kit of makeup remover pads with butterfly pattern – to have Spring all year round and save money! Check out my inspiration, details, and all about the fabrics I chose for this project or scroll down for the free tutorial.
 Butterfly Inspiration
Let me first make a little note: I love butterflies! Since always. Who doesn’t? And the flowers, so yes I fully assume my buccolic, country…folk side, so it will surely not be the only butterfly creation that you will see comes here afterwards! This pretty spring shape offers an original and unique effect compared to the traditional square makeup remover. Bring nature into your bathroom!
Every Step Counts
Currently in transition to zero-waste in my everyday life, it is a subject that is more and more close to my heart and that also comes with my change to a much healthier diet established for a few years but that is another topic!
It makes me really happy to share with you these eco-responsible and useful tutorials which are actions that will help, I hope, little by little to modify our consumption patterns, these conditioned reflexes that we should not hesitate to change to respect the Earth that welcomes us and future generations. No more single-use cottons, let’s do something for the environment!

A Complete & Practical Kit
Forced to realize that I did not yet have reusable makeup removing pads in my bathroom, I went to the sewing workshop to make some. I sewed a total of 12 butterfly pads … And as long as you sew, let’s make the complete panoply of a very practical kit: the zipper pouch to carry your pads on weekends, the wash bag to protect your padss for their machine cycle and the reversible storage fabric basket on the size of the butterfly pads of course!
Easier Than It Seems
These tutorials are accessible to beginners to intermediate. It’s not rocket science and we are so proud when our beautiful kit is finished. The main recommendation is to have a sewing machine and already know how to use it. Then the most technical part remains to make the zig zag stitch tight while turning your butterfly pattern, that’s why I advise in the tutorial to first practice a little on a piece of fabric. But if you have the joy of having an overlock/surjer machine that’s even better, use it! The rest of the tutorials are easy to do, I even found that meditative so to tell you. In addition, I have inserted many explanatory photos, you have no more excuses!
 What Fabrics For This Project?
To make this project of reusable washable pads I used ecological fabrics from a French brand: Mondial Tissus, committed to sustainable development, in particular by encouraging the choice of eco-responsible materials such as organic fabrics, recycled fabrics, certified Oeko-Tex fabrics or even natural materials.
As it is a French brand I made a selection of interesting ideas for fabrics and materials (delivered worldwide) as a substitute to help you in the making of your butterfly pads kit.
As the main fabric of this project I would recommend this selection of fabrics very similar to the original flower pattern cotton I used: Spoonflower Floral cotton fabric or Spoonflower Victorian Floral cotton fabric or this other selection of floral cotton fabrics. And this terry cloth fabric for the reverse of the pads.
For the zipper pouch, this cotton fabric lining in white with dots.
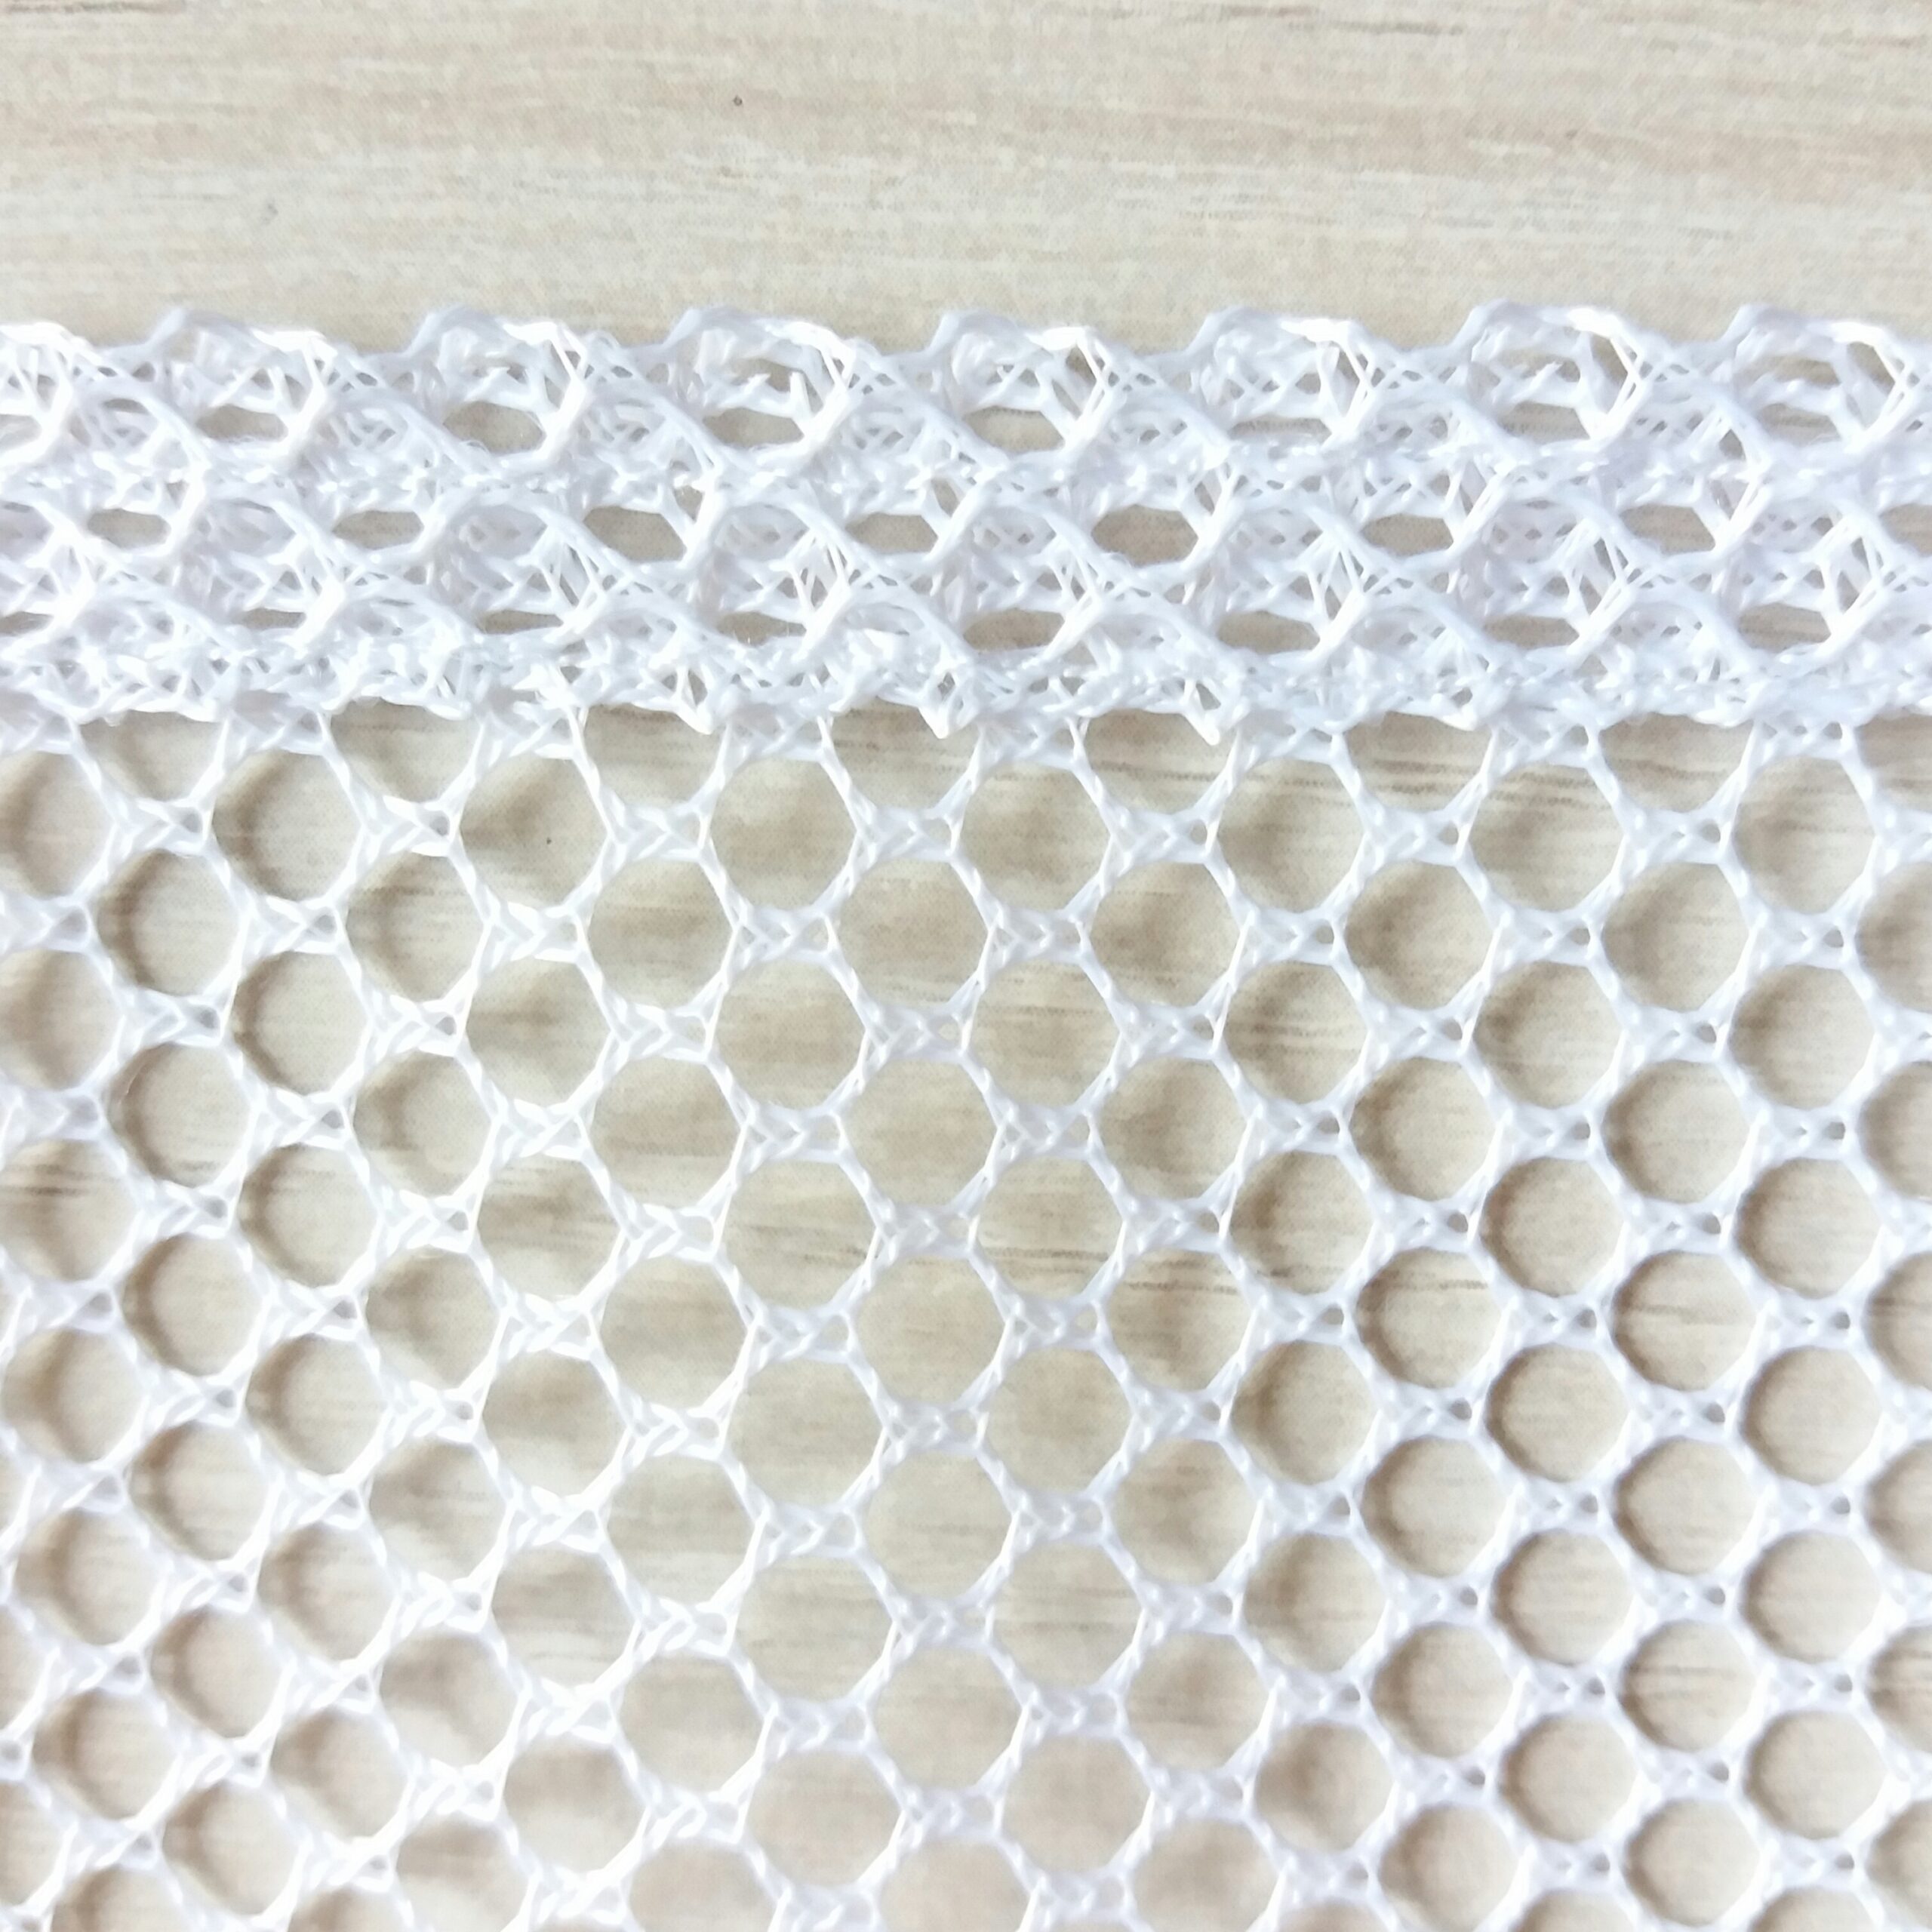
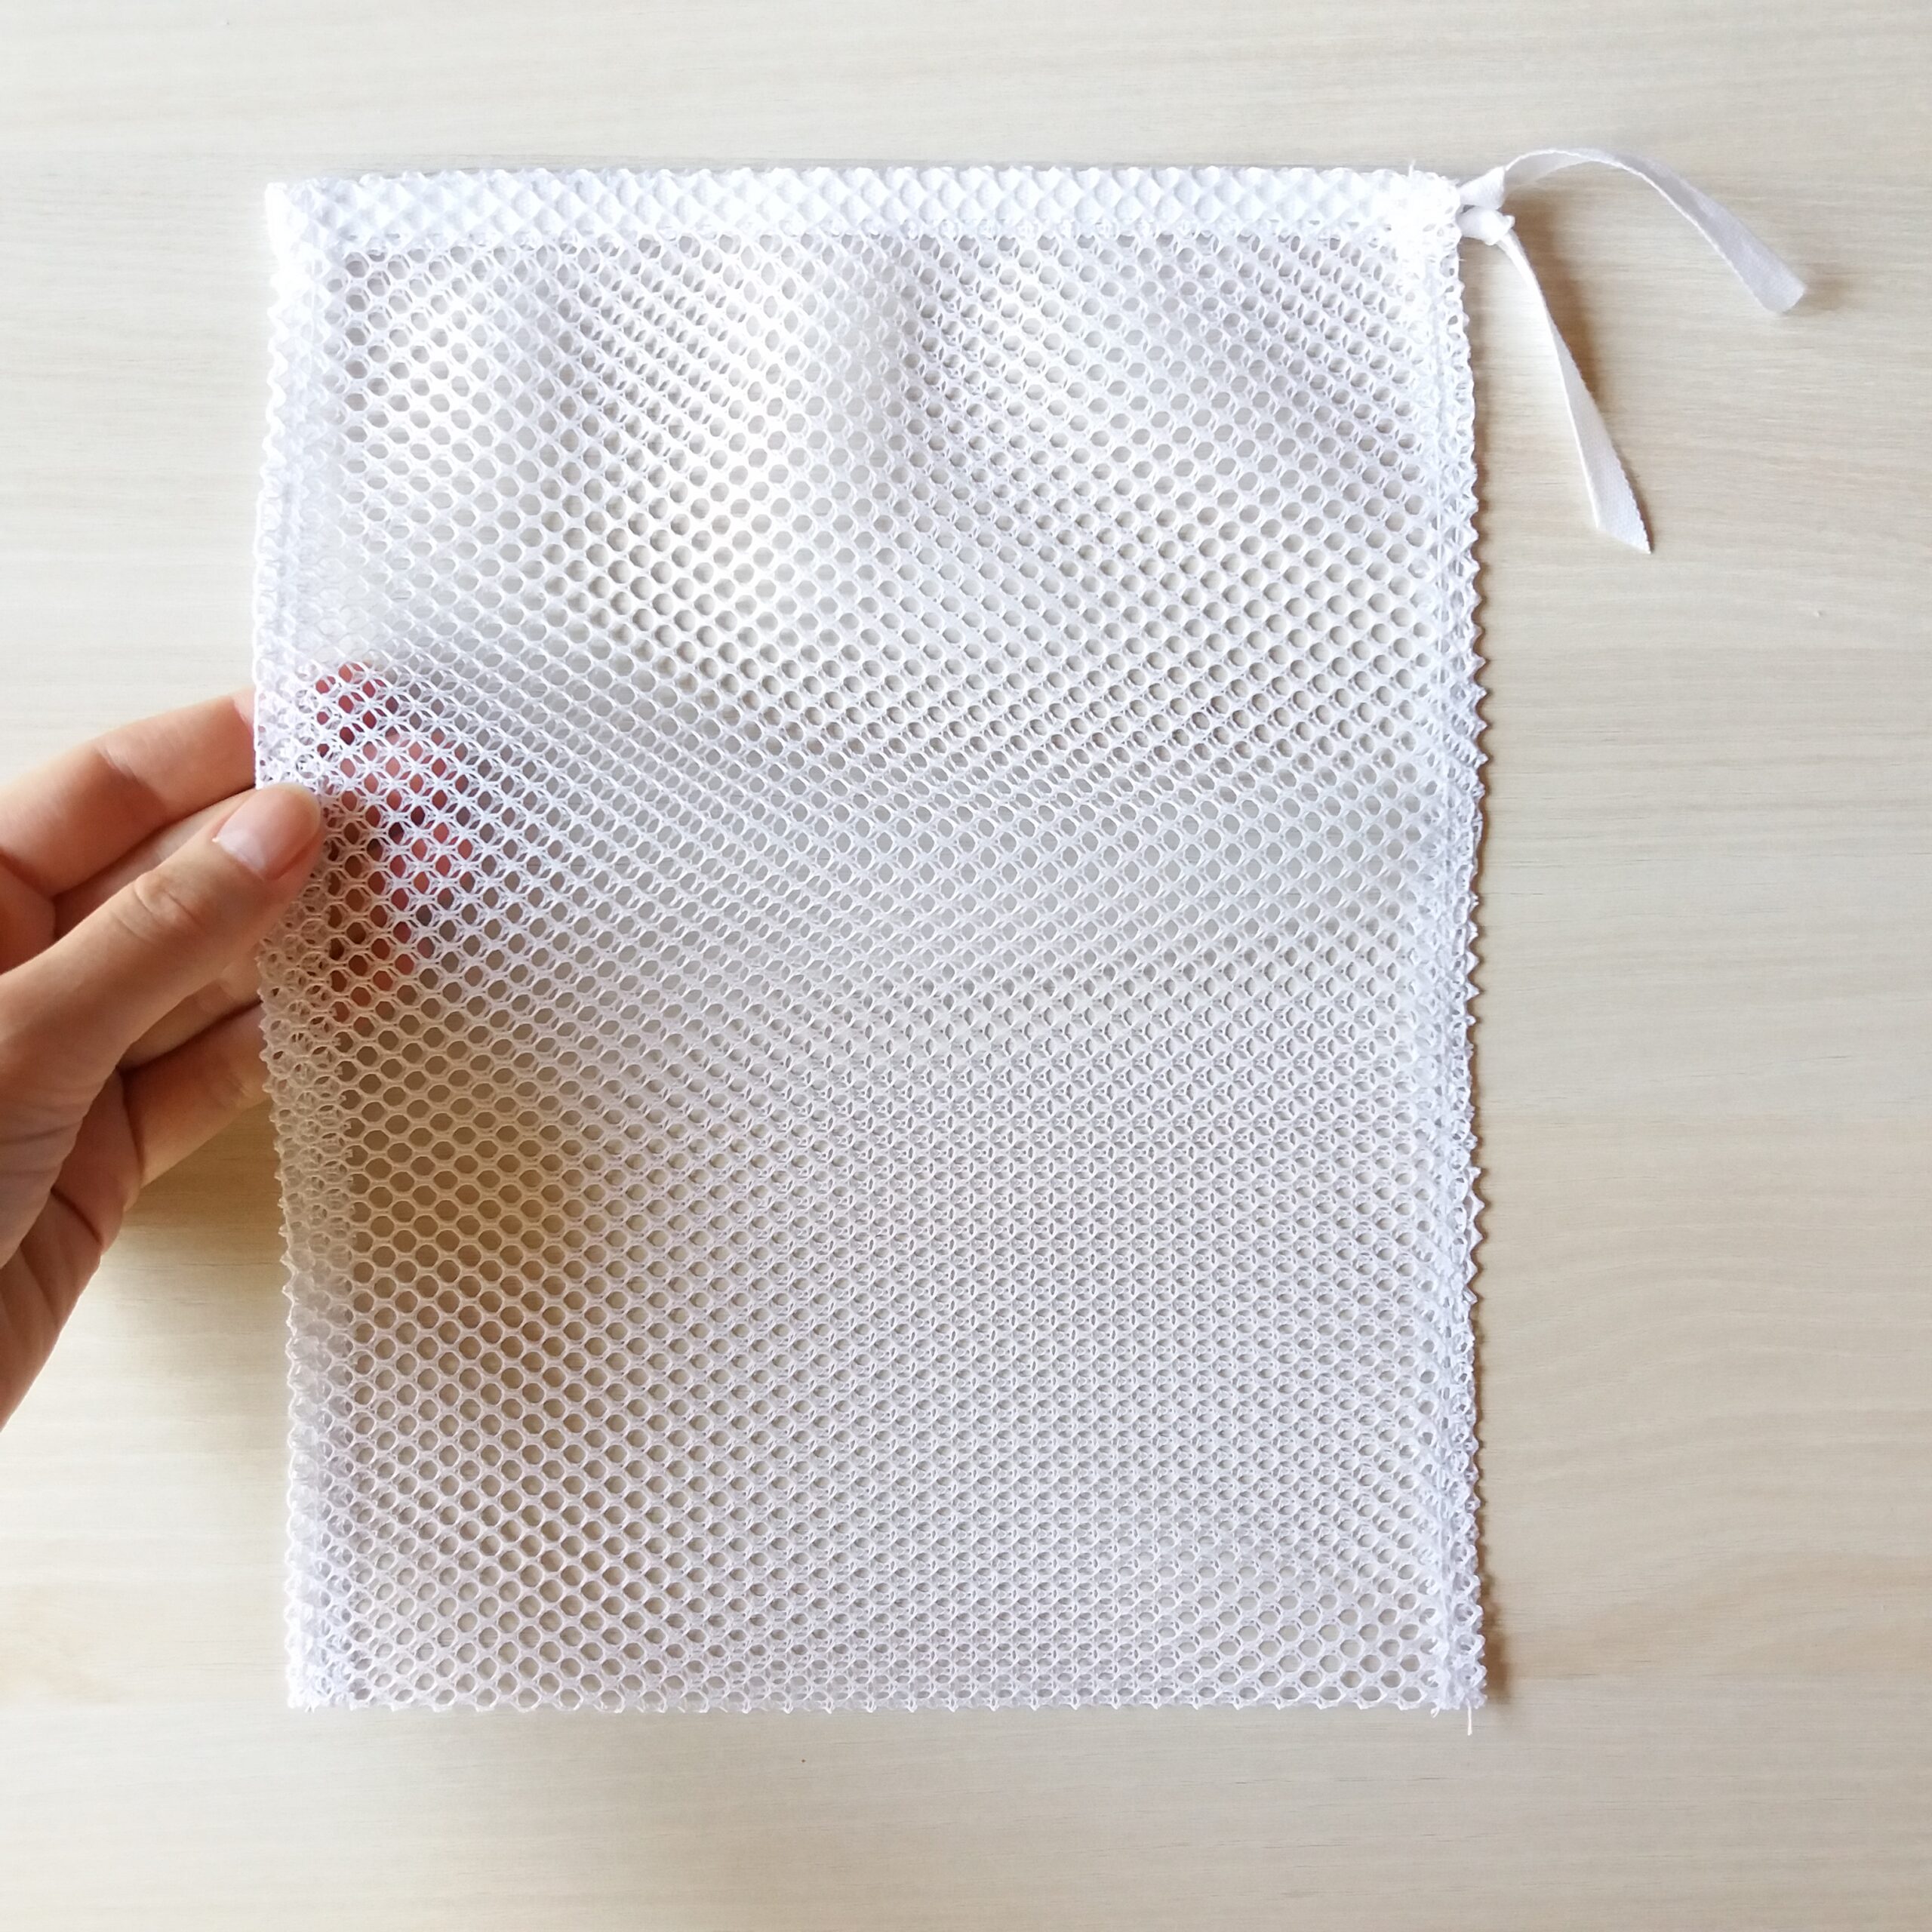
Then for the wash bag I would recommend this white net fabric.
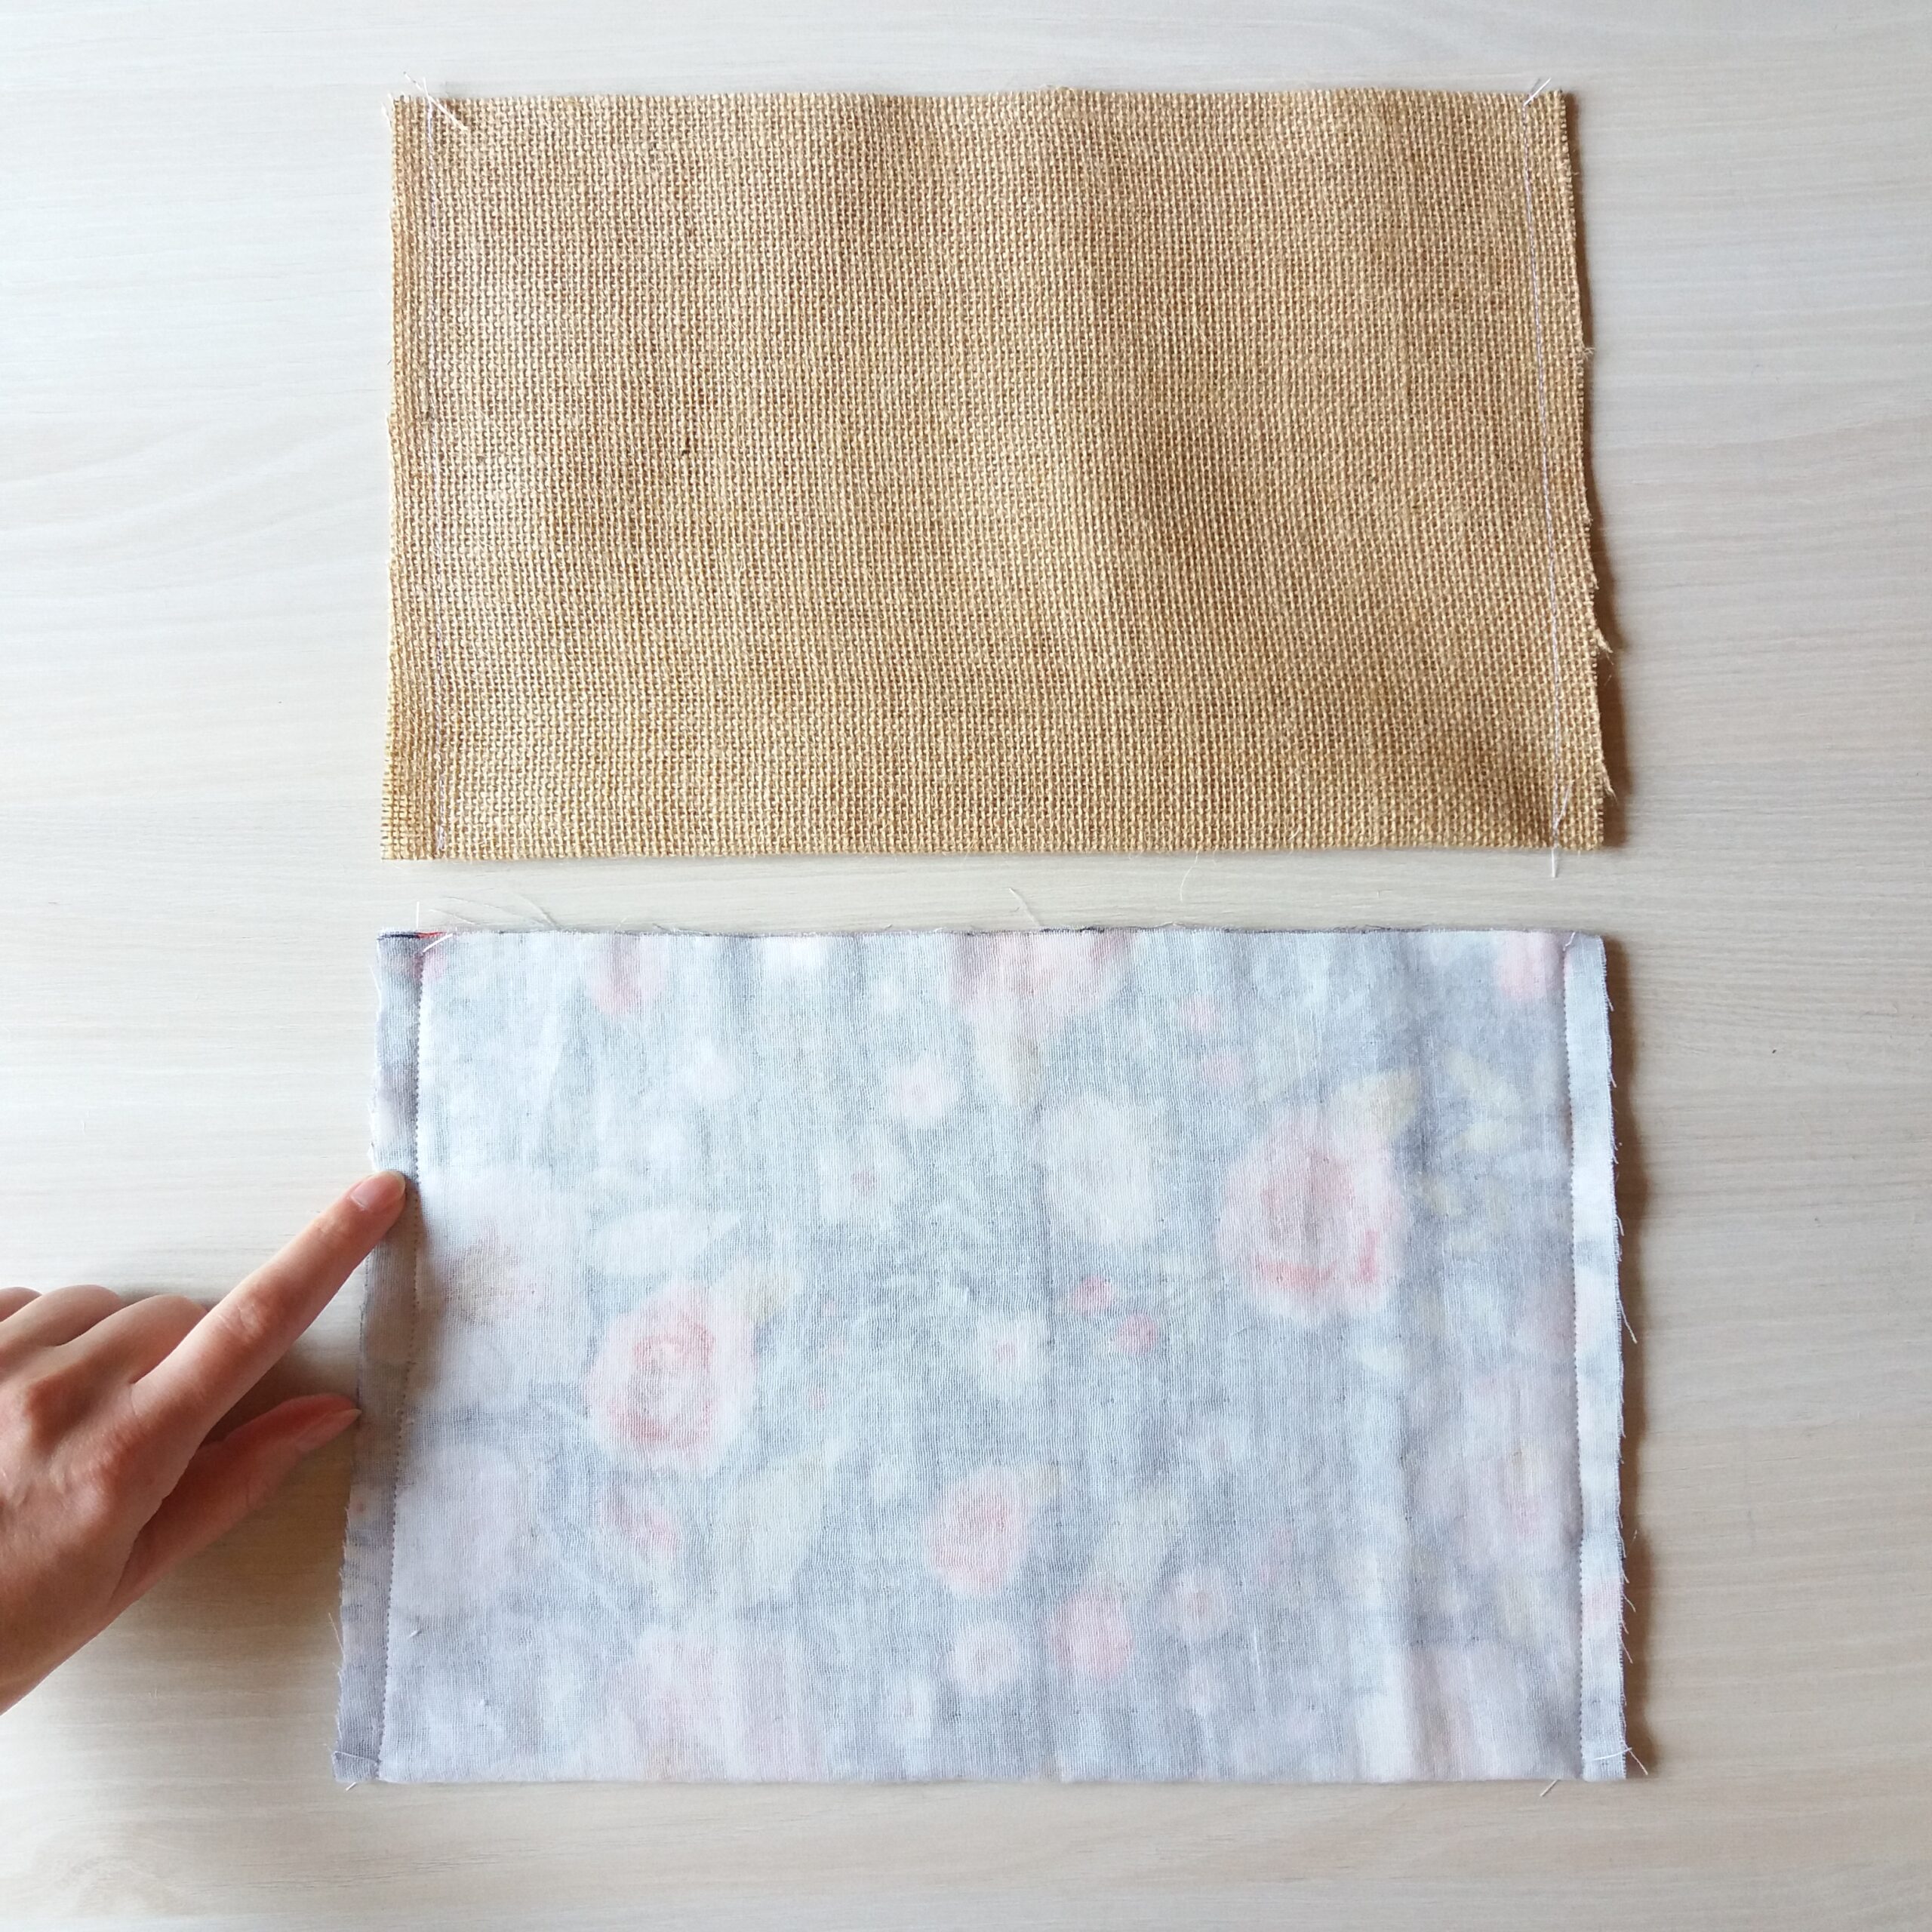
And for the reversible basket this natural burlap/jute fabric as a lining, which has the advantage of being a thick fabric so no need for iron-on to keep the basket straight and I like its rustic side, nature!
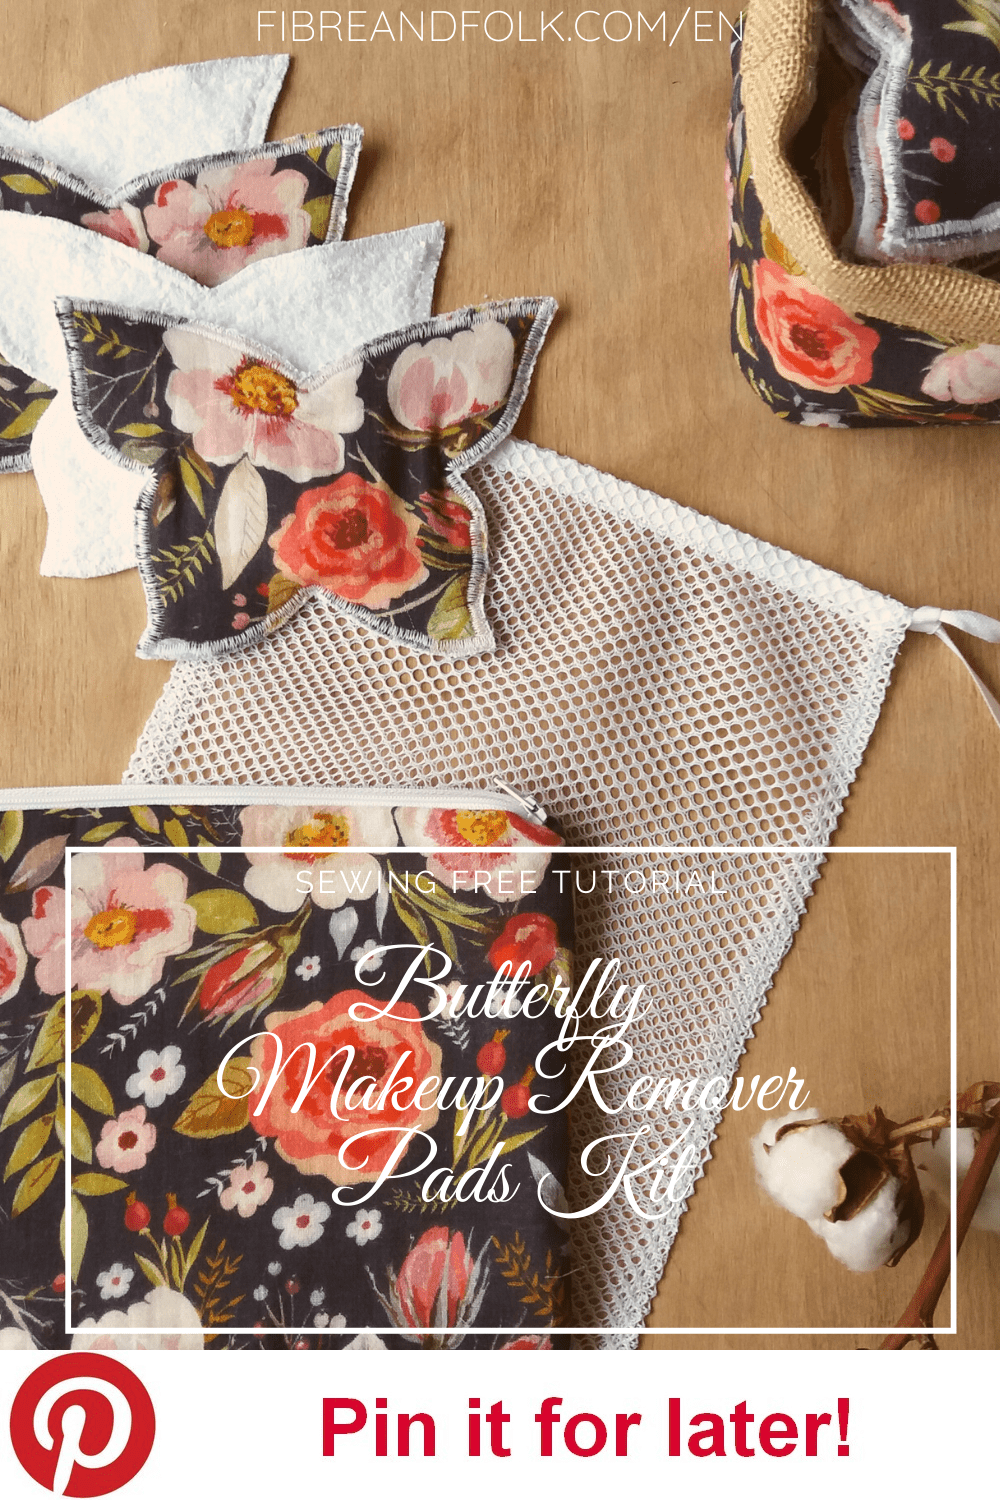
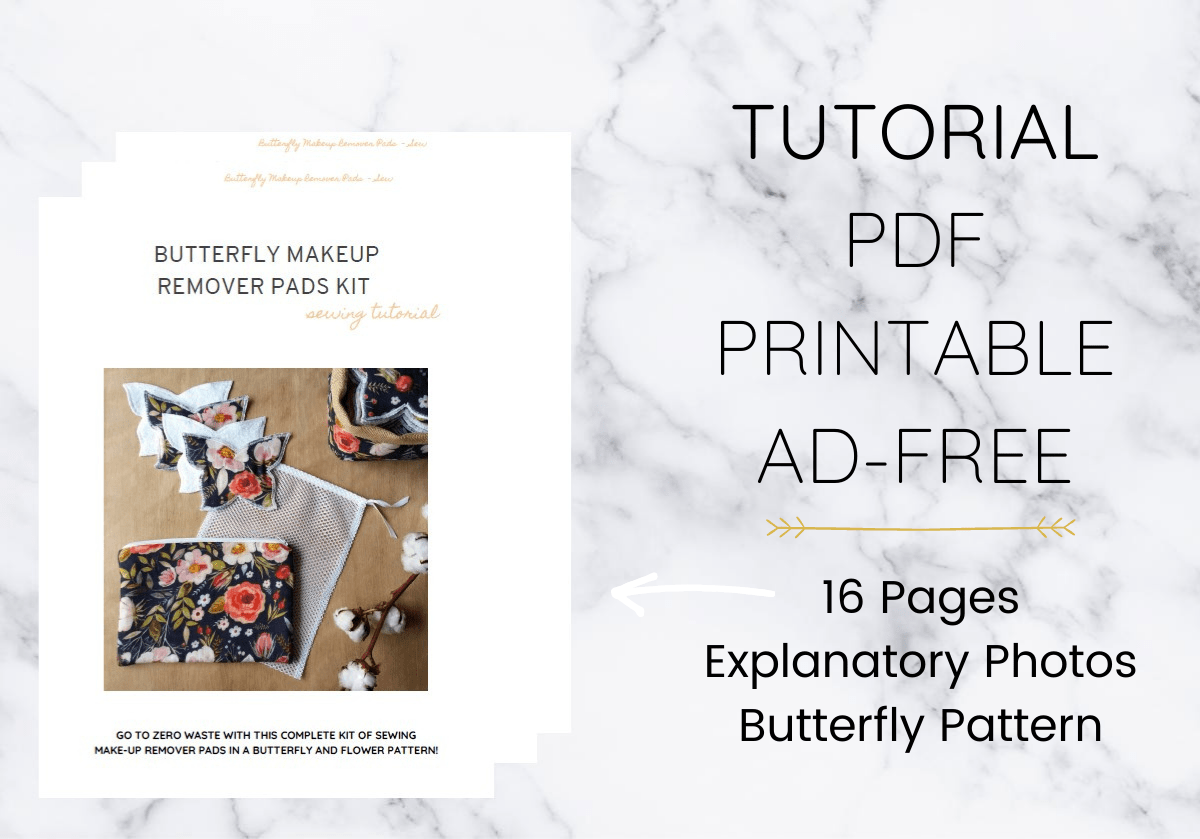
SEWING BUTTERFLY MAKEUP REMOVER PADS KIT
- Get the ad-free, printable PDF tutorial (butterfly pattern included) HERE.
- PIN IT to your Pinterest boards for later HERE.
SIZES
Butterfly pad: 14,5cm x 11cm (5.7” x 4.3”) |
Zipper pouch: 25cm x 17cm (9.8” x 6.6”) |
Reversible fabric basket: Heigh: 13cm/5.1” x length: 13cm/5.1” x width: 16cm/6.2”|
Wash bag: 28cm x 22cm (11” x 8.6”)
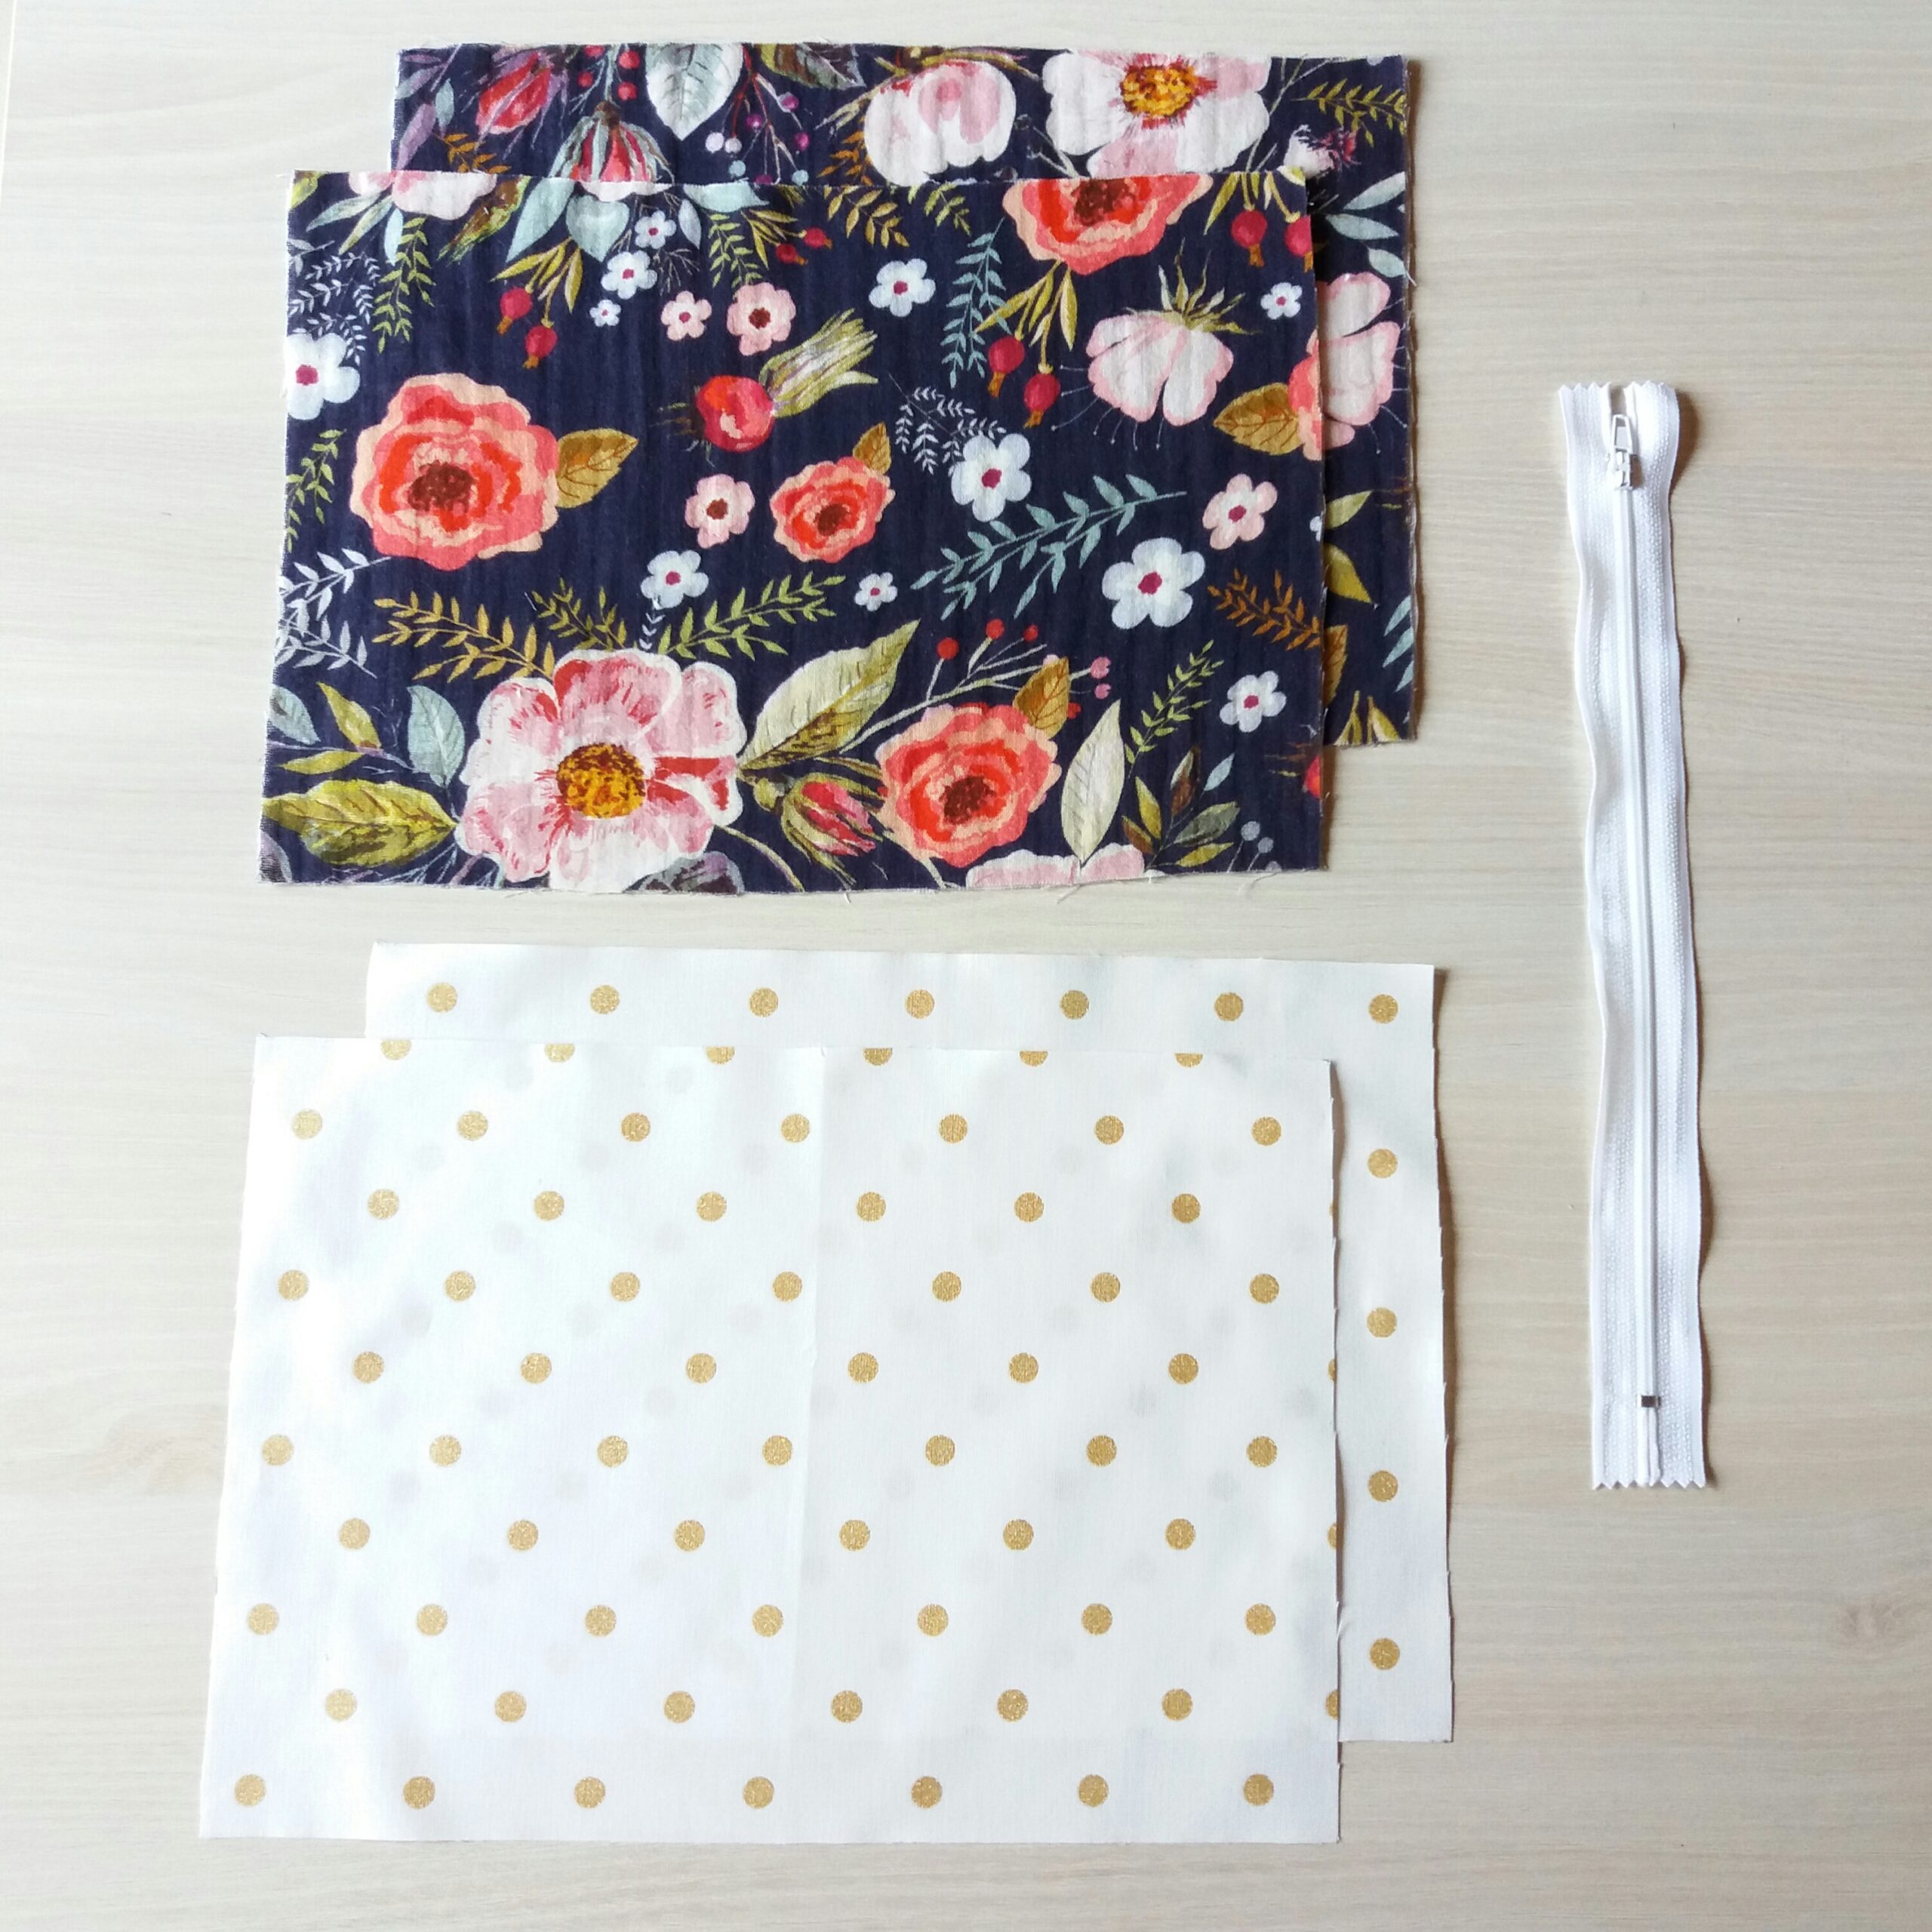
FABRICS
↠ For 6 Pads: 90cm x 70cm (35.4” x 27.5”) flower print cotton fabric, 93cm x 72cm (36.6” x 28.3”) white terry cloth.
↠ Zipper pouch: 27cm x 19cm (10.6” x 7.4”) flower print cotton fabric (main), 27cm x 19cm (10.6” x 7.4”) white cotton fabric with dots (lining).
↠ Reversible fabric basket: 41cm x 31cm (16.1” x 12.2”) flower print cotton fabric, 41cm x 31cm (16.1” x 12.2”) natural jute fabric.
↠ Wash bag: 60cm x 24cm (23.6” x 9.4”) white cotton net fabric.
MATERIALS
↠ scissors, pins and/or sewing clips, white thread, Ruler, Pen
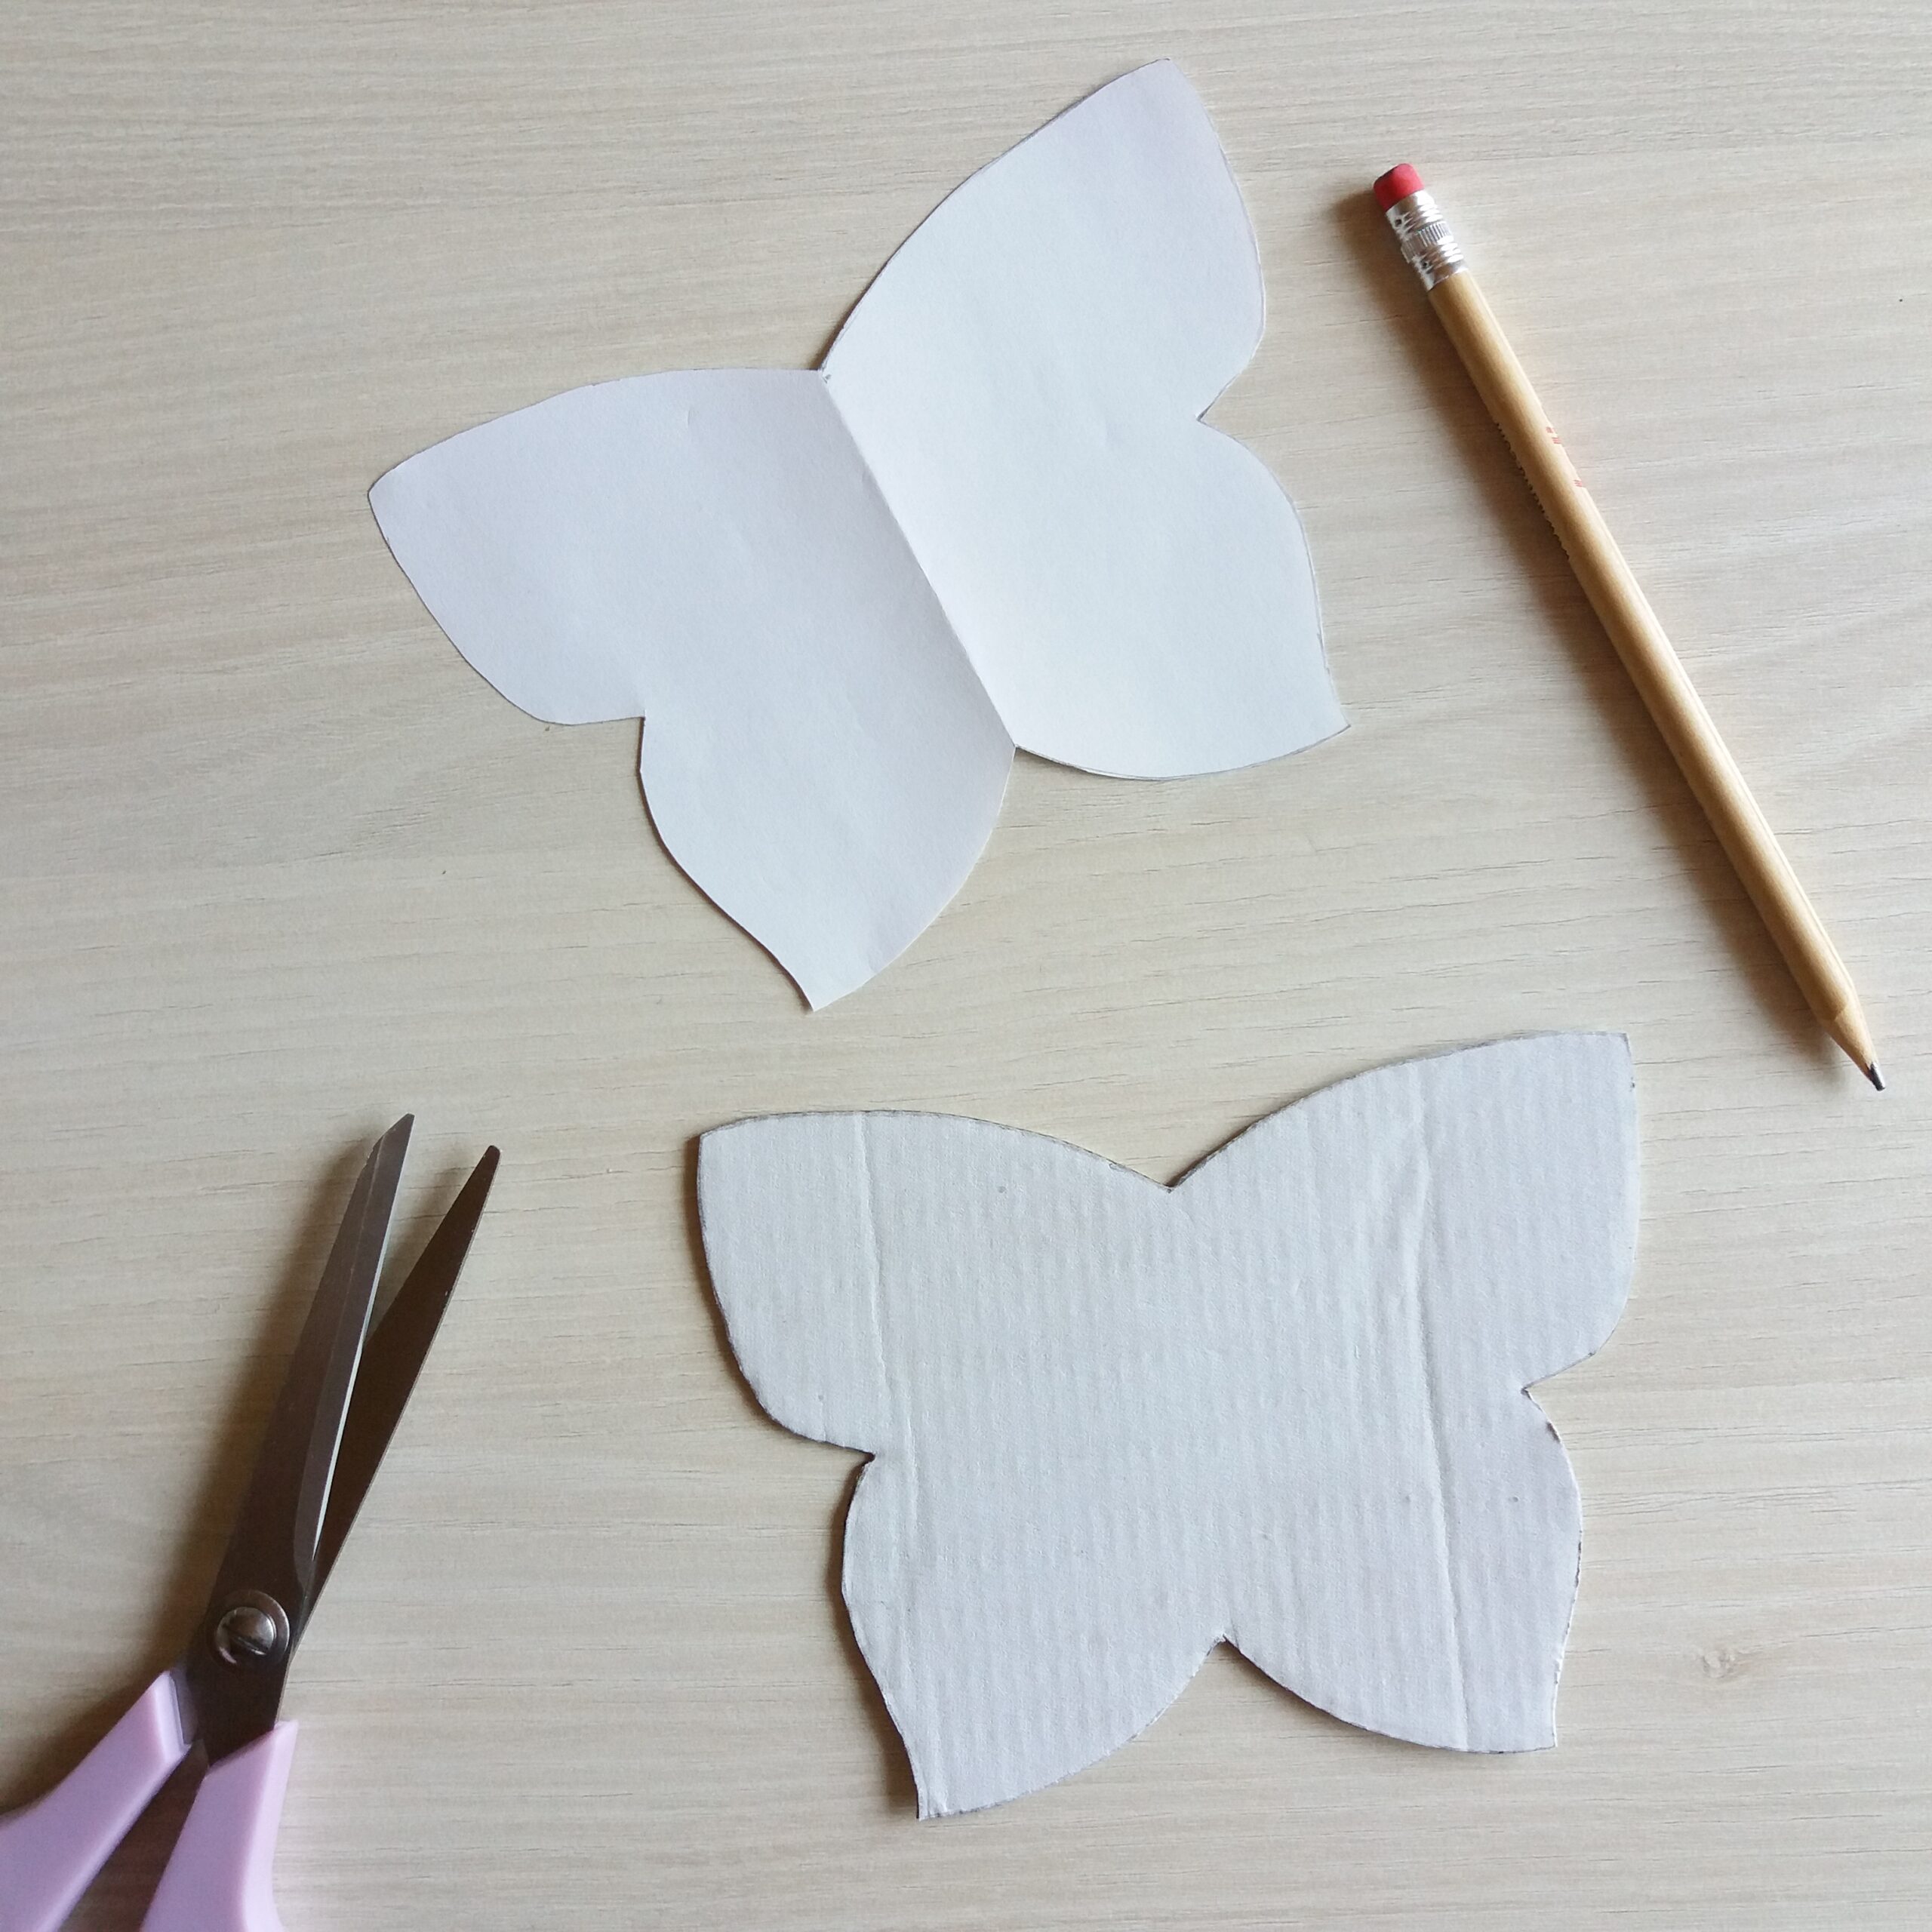
↠ Pads: 16 x 13cm ( 6.2” x 5.1”) Cardboard sheet for the butterfly pattern,
↠ Zipper pouch: 25cm (9.8”) White zip
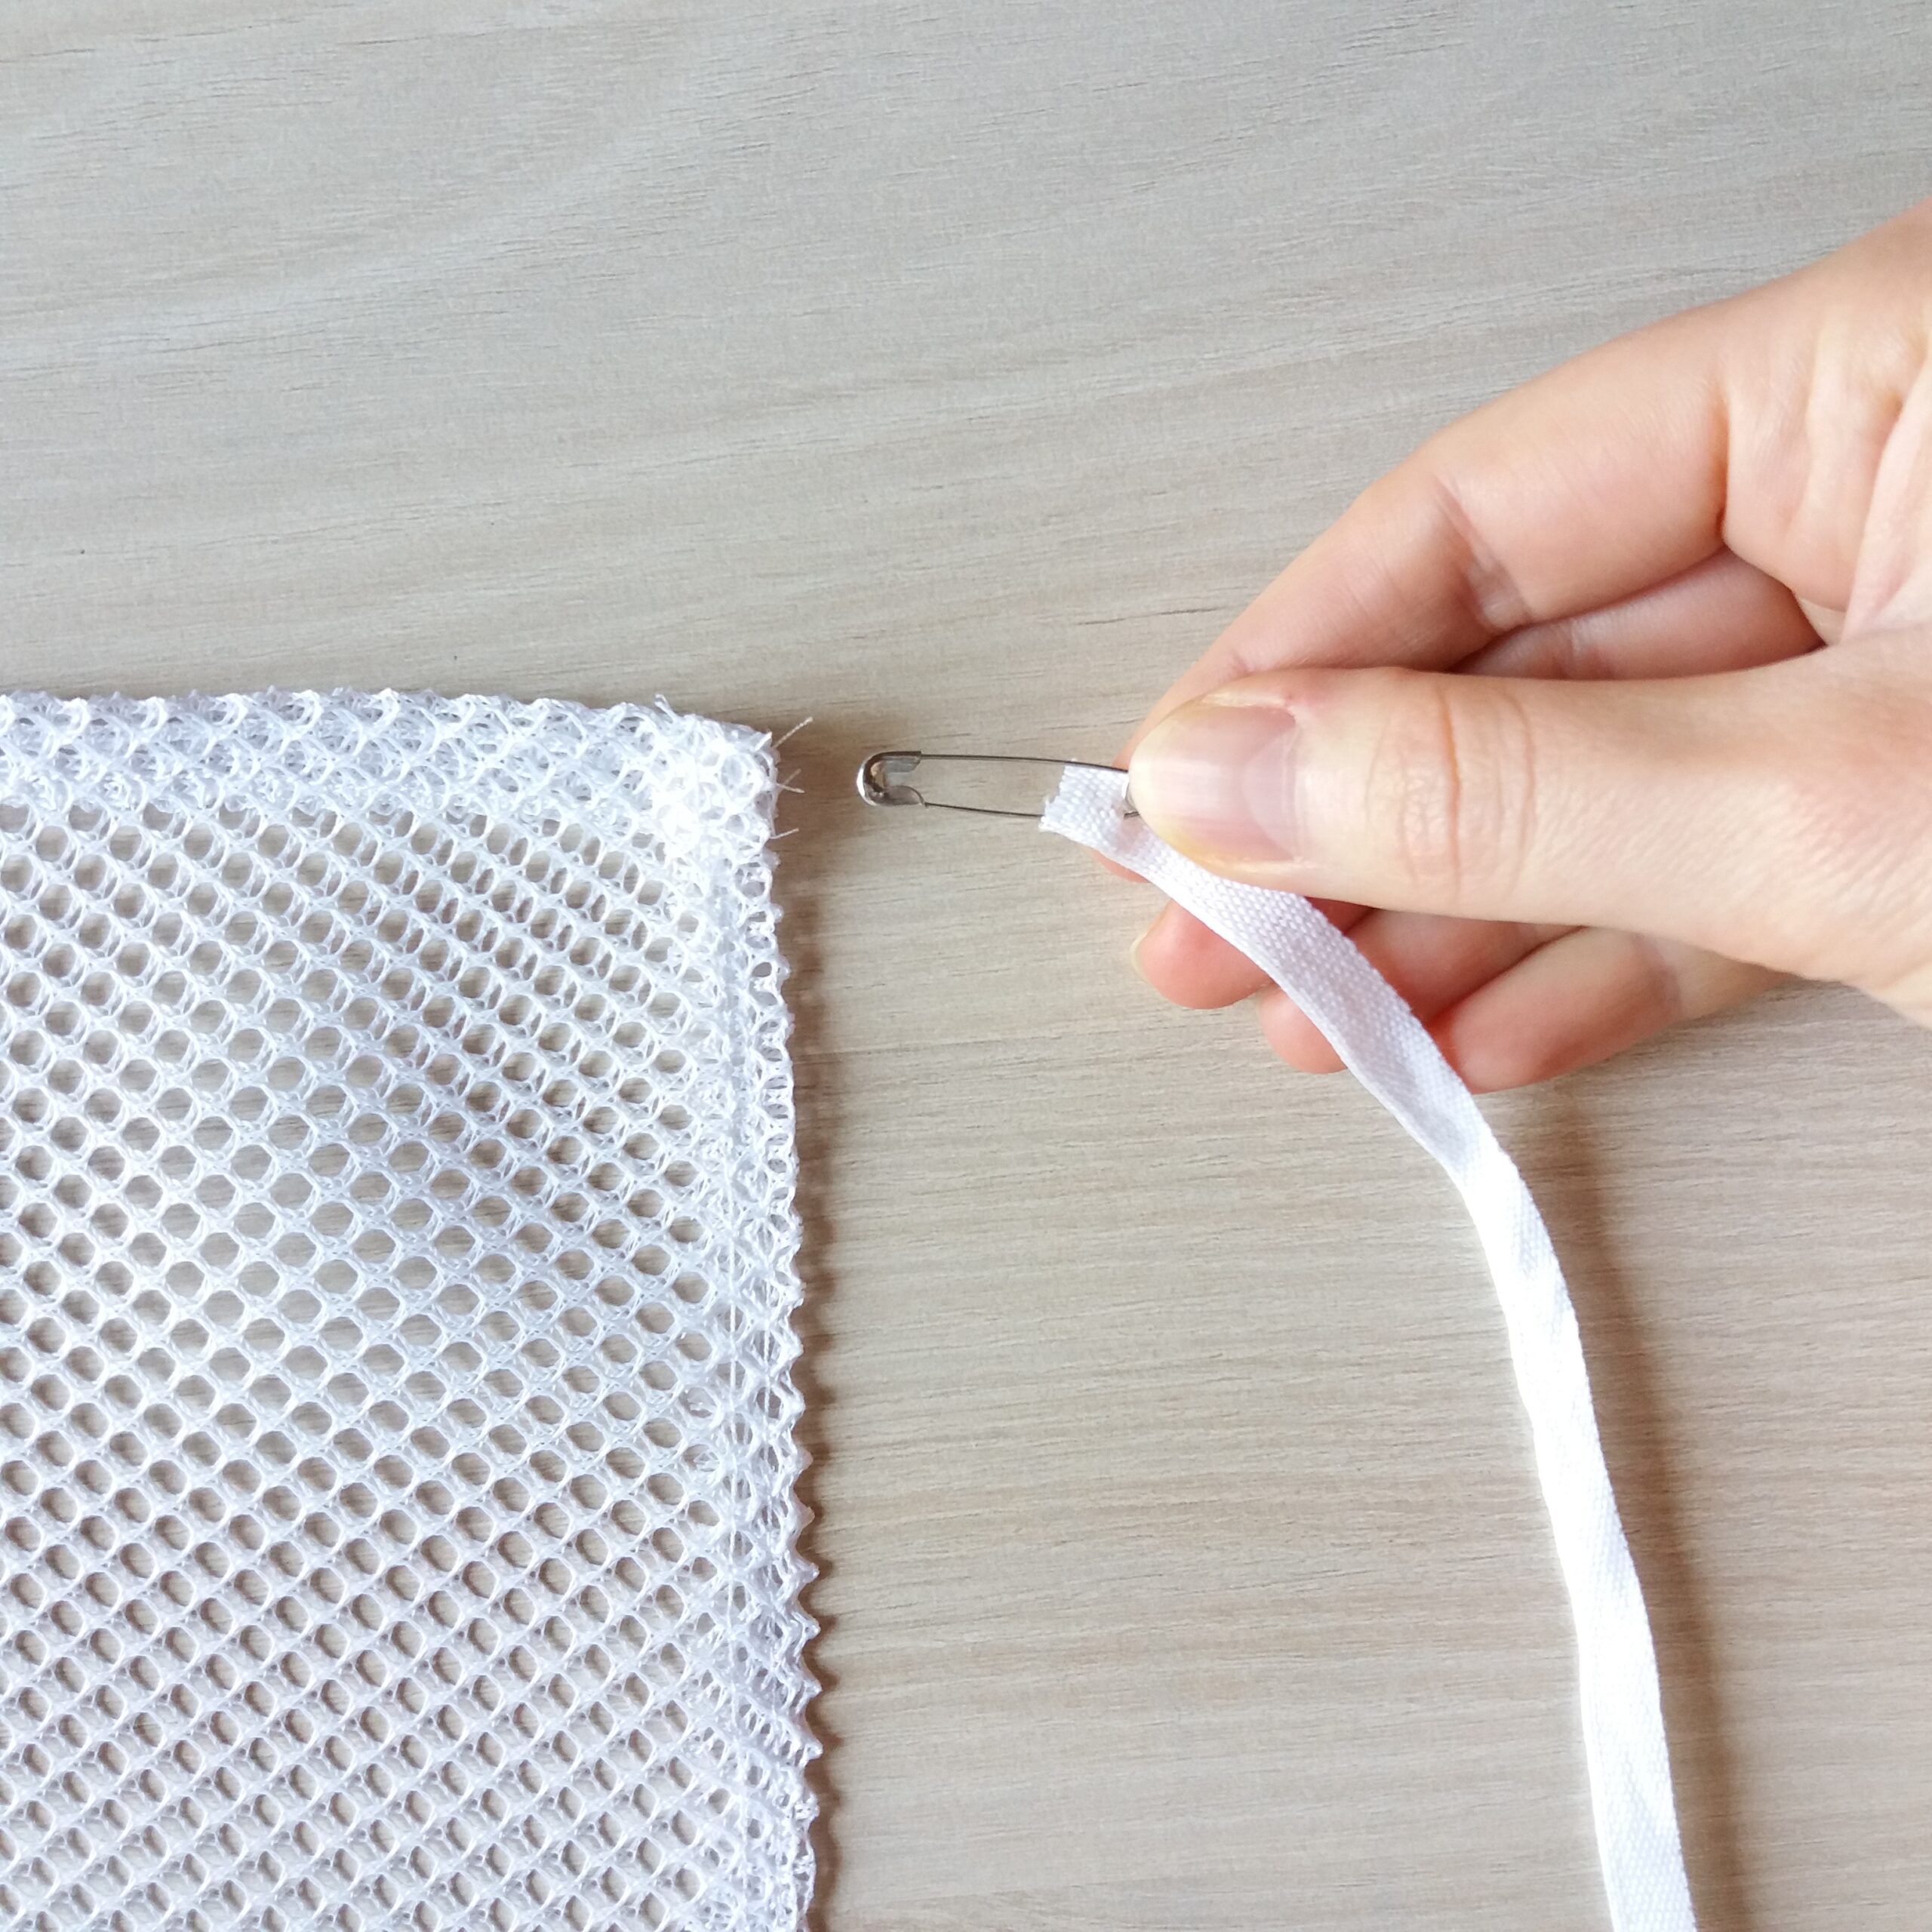
↠ Wash bag: 64cm (25.1”) of 7mm (0.2”) white twill tape/ribbon, 1 safety pin
↠ A sewing machine (and an overlock machine if you have)
TECHNIQUES
– Sewing machine: straight stitch sewing,
– Sewing machine: overcast/zigzag stitch (or surjer/overlock machine),
– Zipper installation,
NOTES & TIPS
– The sewing seams are included;
– Pads: Try to overcast the butterfly pattern first on scrap fabric to practice;
– Remember to make stitches (back) to better fix your seams even if I do not specify it each time;
– Make sure to cut and sew in the right thread of the fabric;
BUTTERFLY MAKEUP REMOVER PADS
↠ Download the butterfly pattern below:
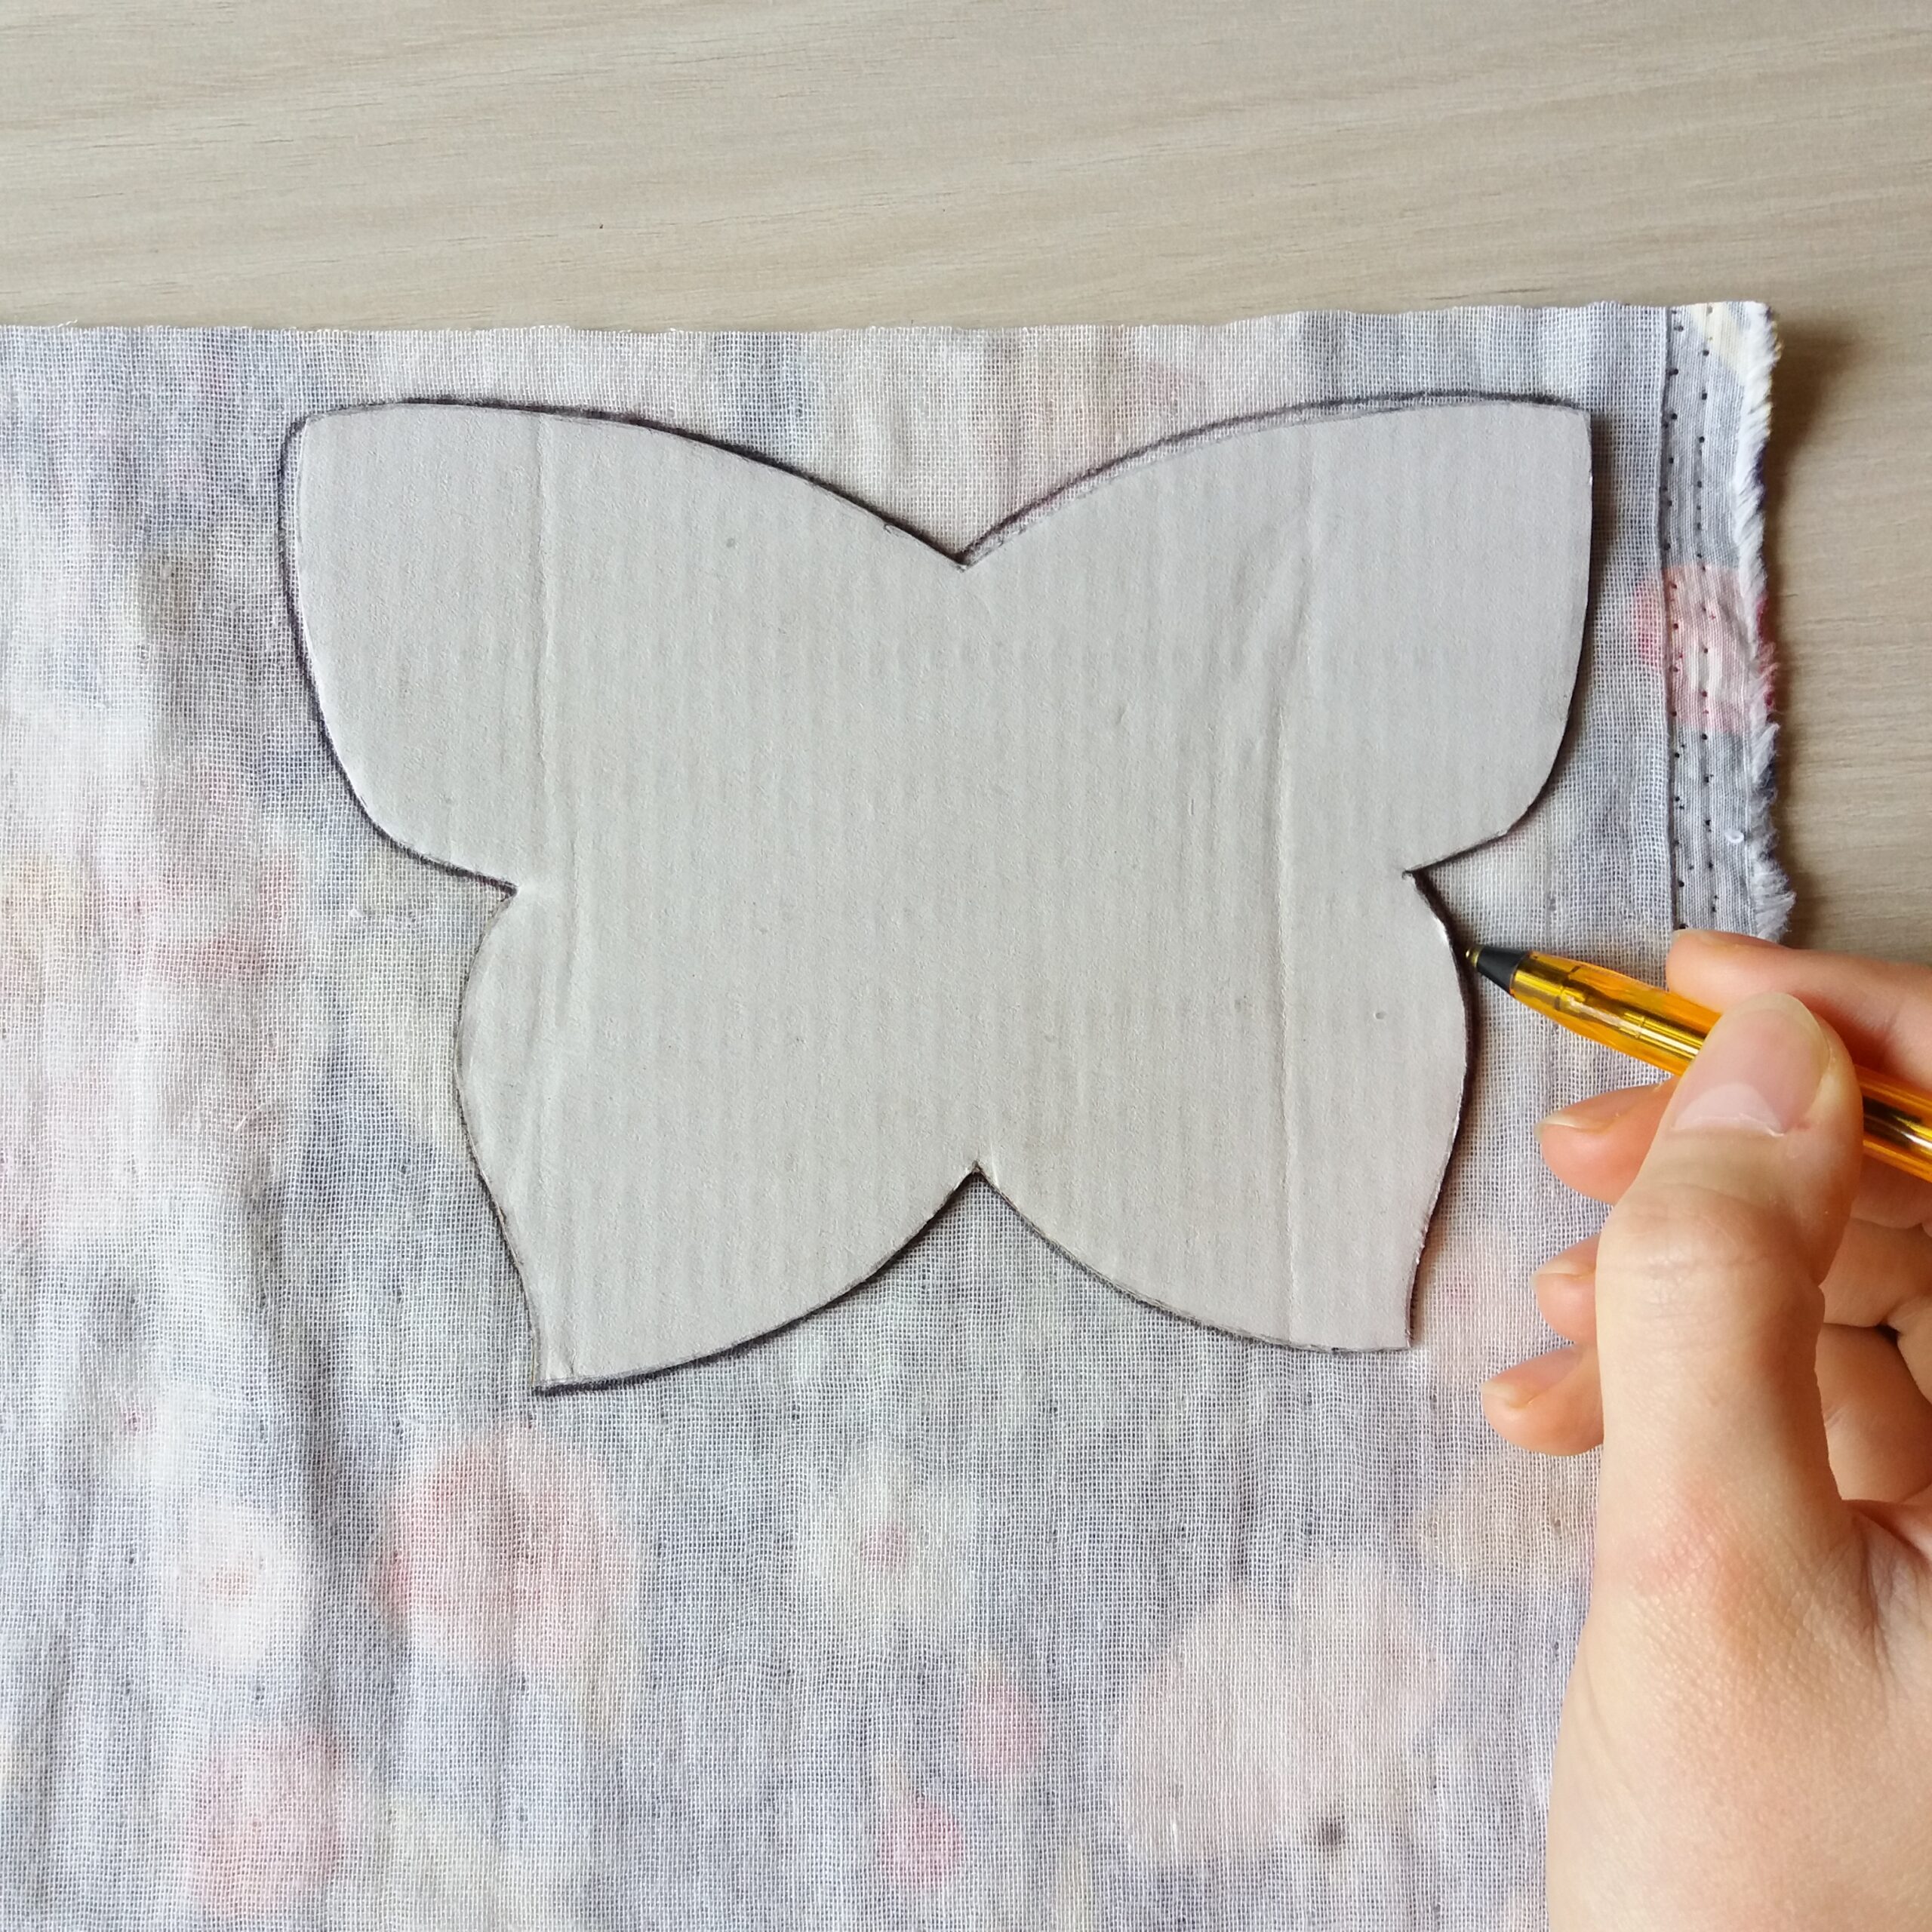
- Once your PDF downloaded: Print and cut out the butterfly pattern. Trace the outlines on the cardboard sheet and cut out the pattern template.
-
Using this template, trace (on the reverse side of the printed fabric) and cut the butterfly pattern out of the fabric.
-
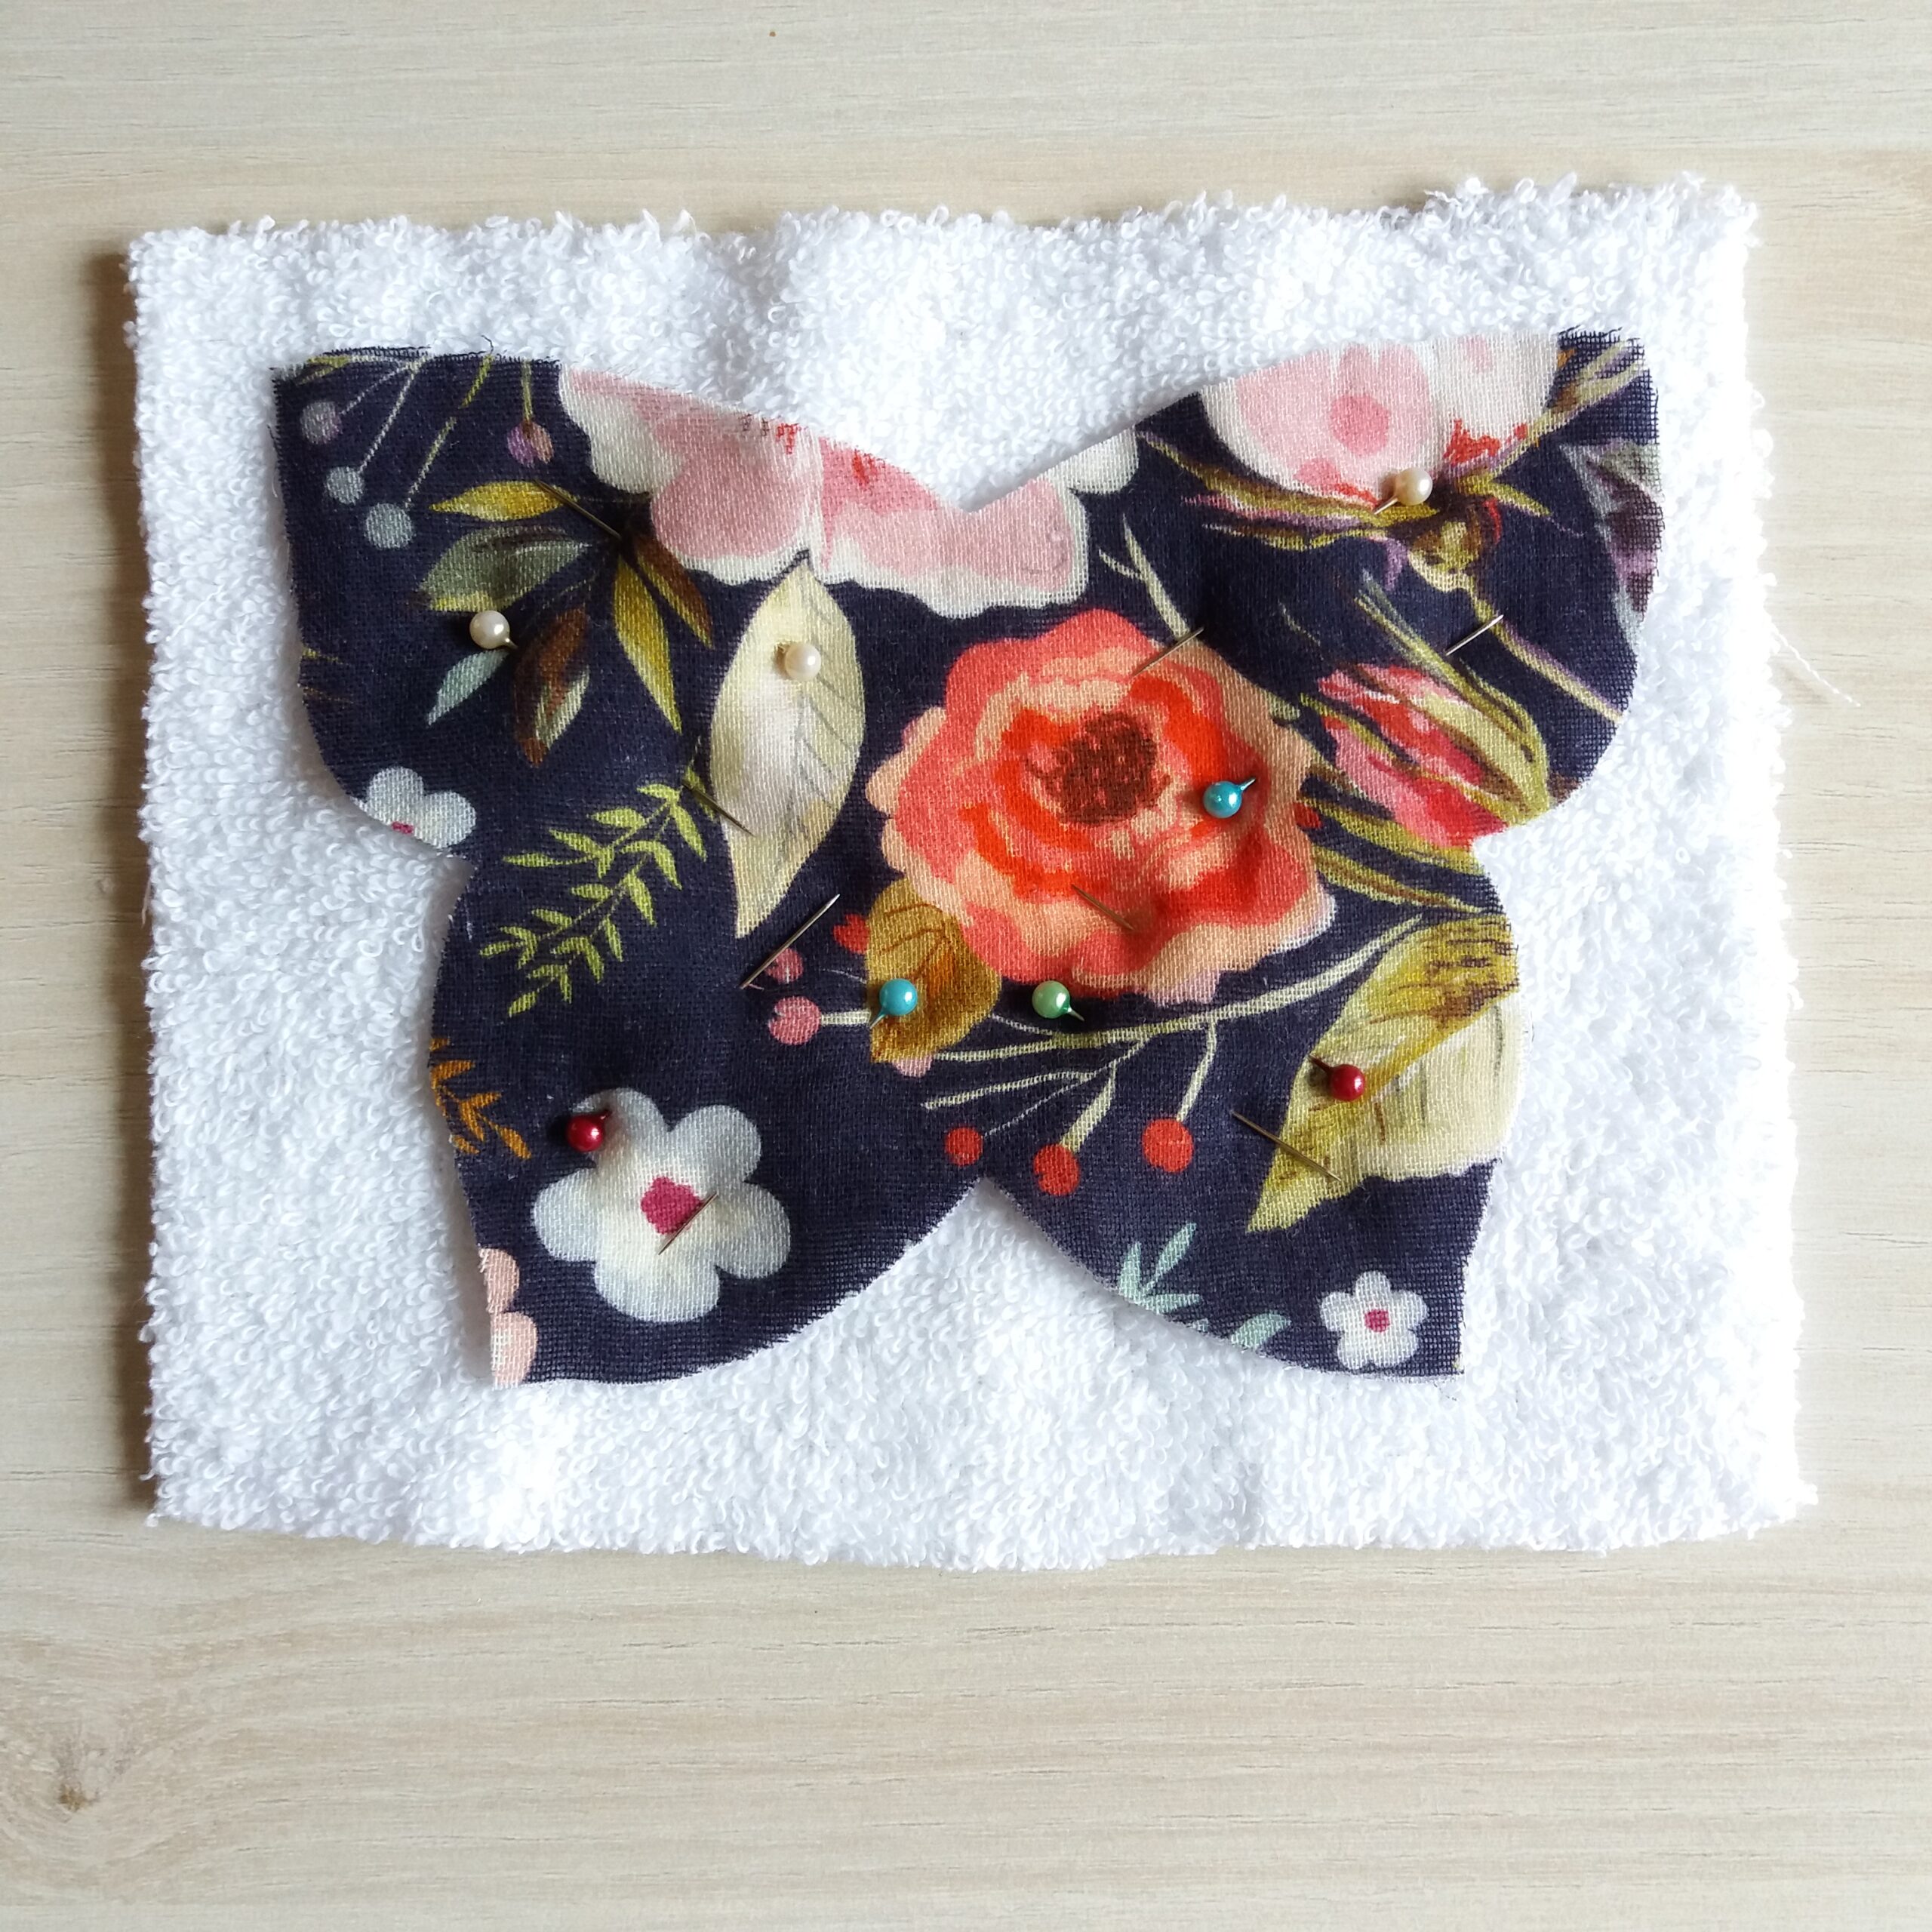
Overlap and pin the printed fabric butterfly back to back on the terry cloth.
↠ If you want to add a ribbon: Cut 5 cm (2”) of white twill ribbon, fold it in half and pin it to the butterfly head between the two fabrics.
-
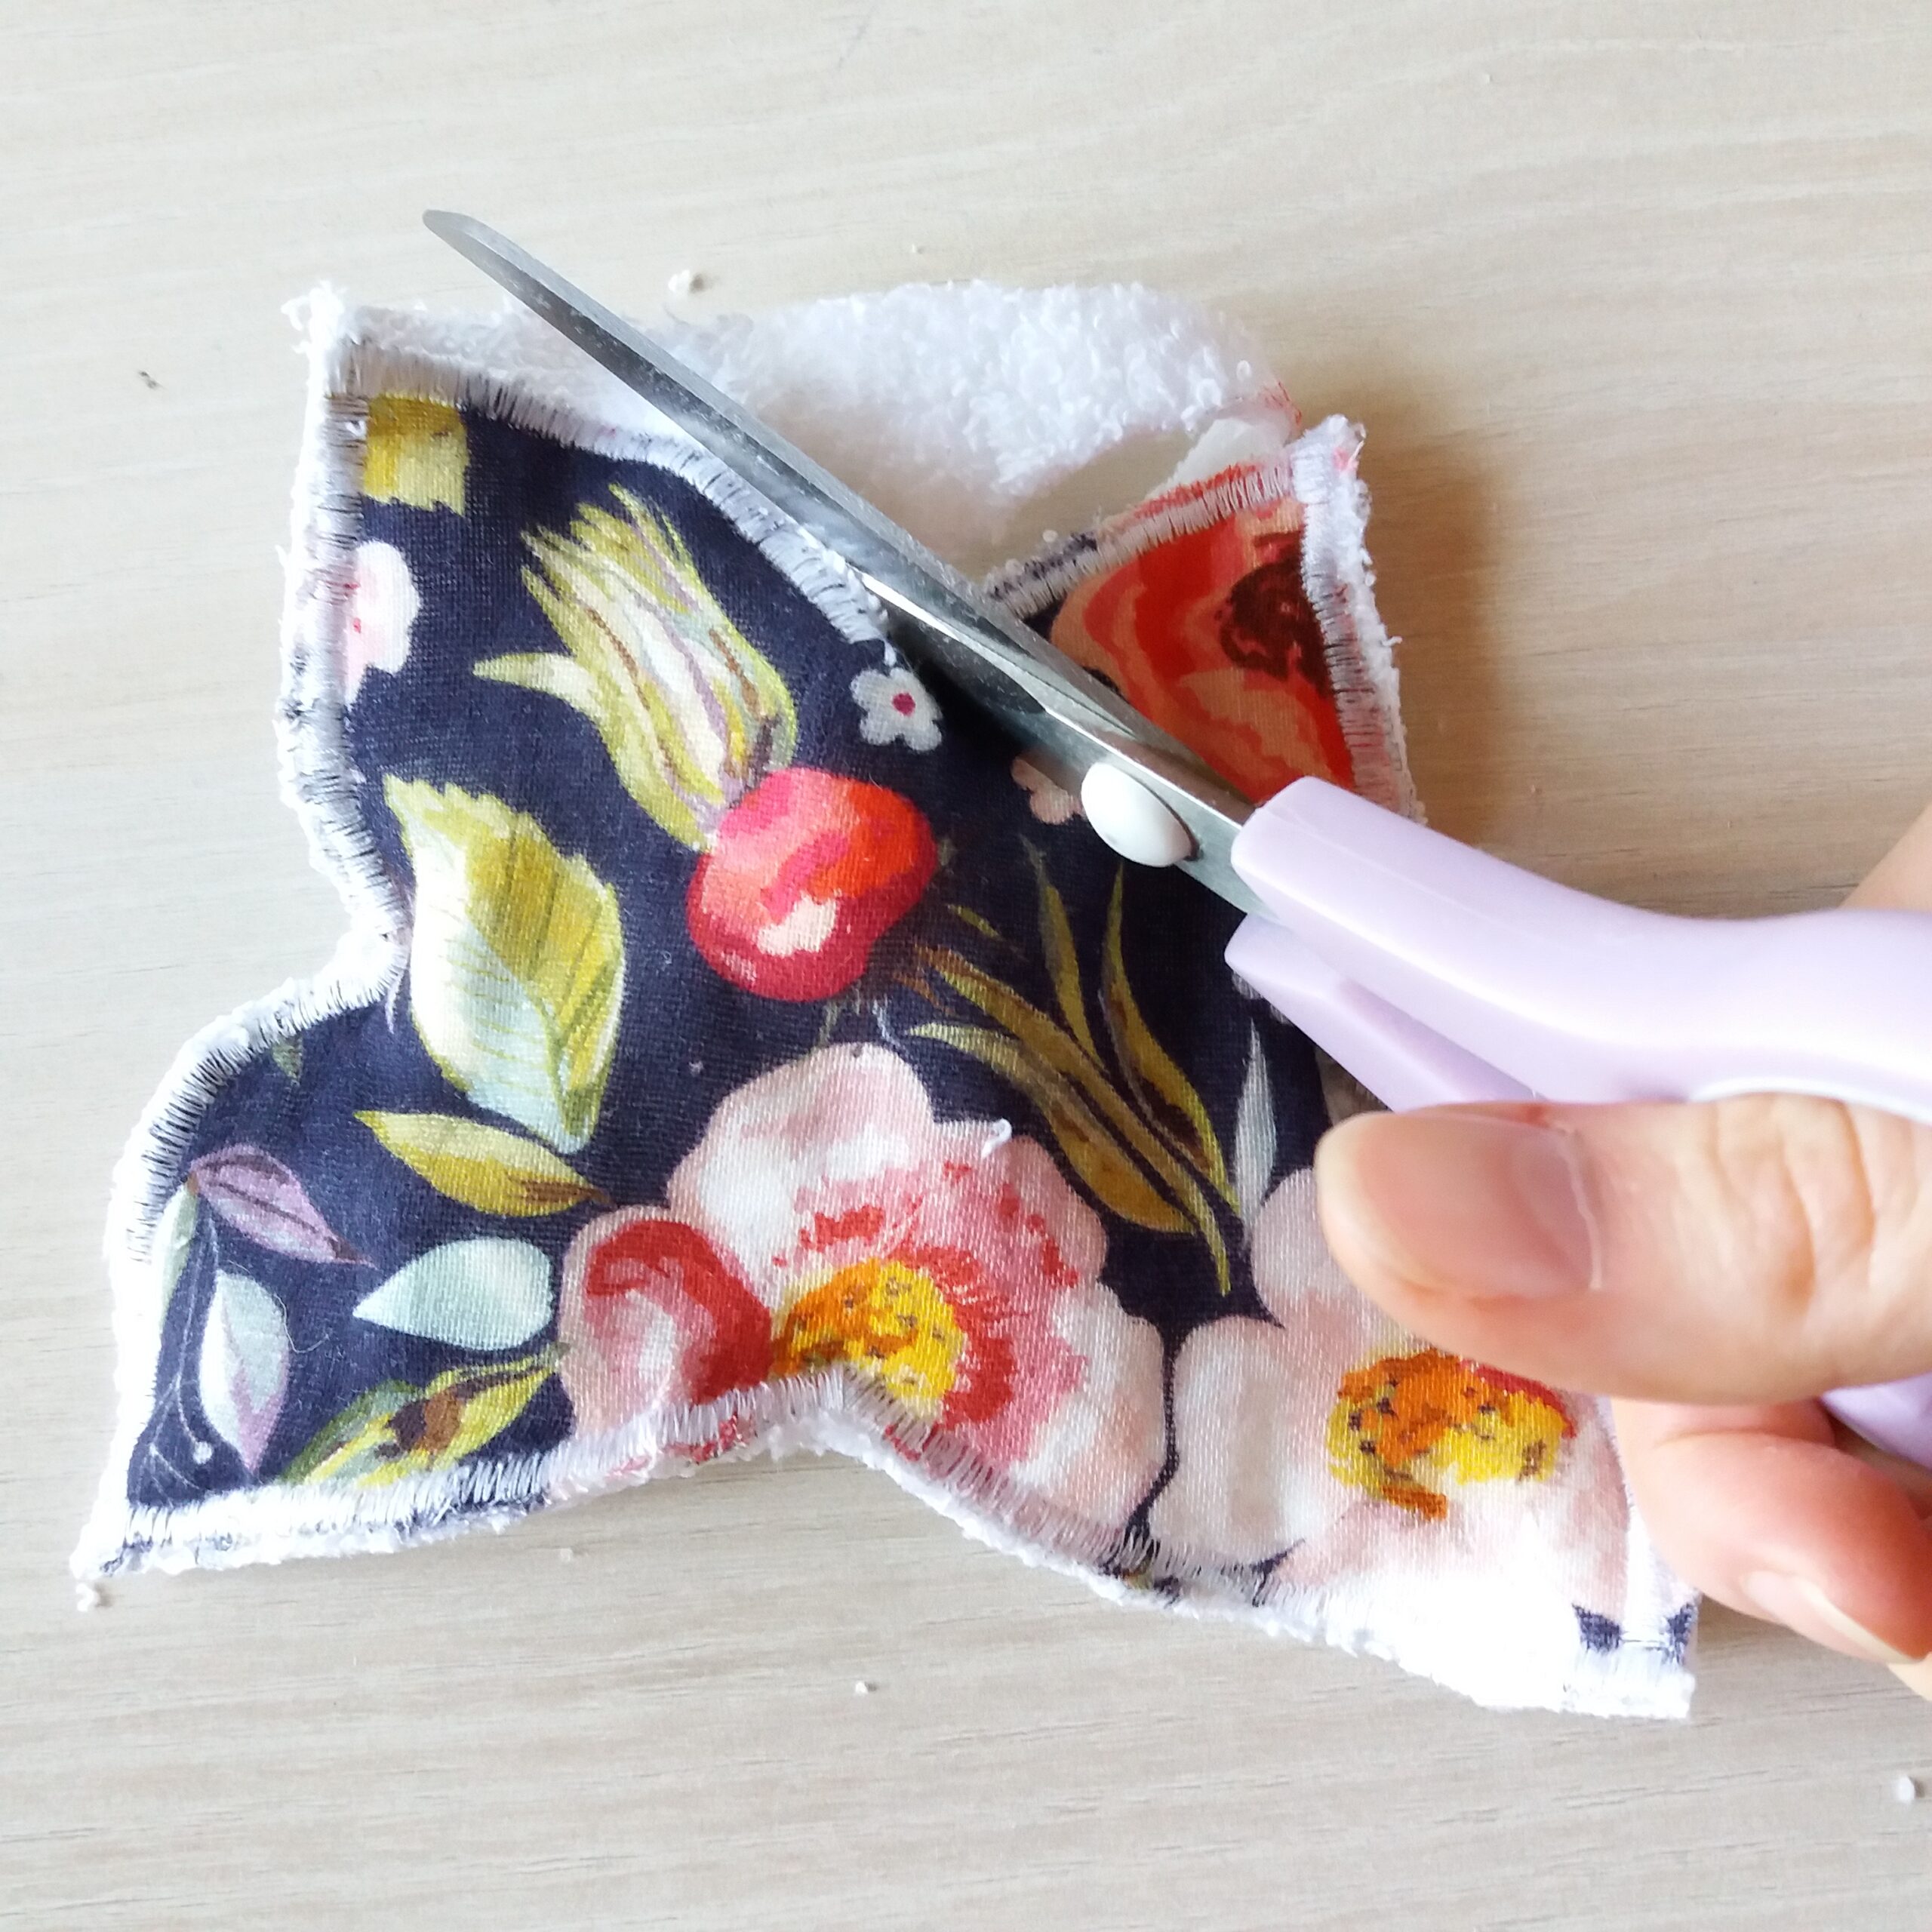
Cut the terry cloth into a rectangle about 1cm (0.4”) from the margin around the butterfly.
-
Overcast the outline of the pattern with the sewing machine, in zigzag stitch: Stitch width: 5, length: 0.1, foot tension: loose (or use an overlock machine if you have). Repeat an overcasting turn if you want greater fixation and better rendering.


-
Cut out the outline of the design in the terry cloth, being careful NOT to cut in the overcasting thread. And iron.

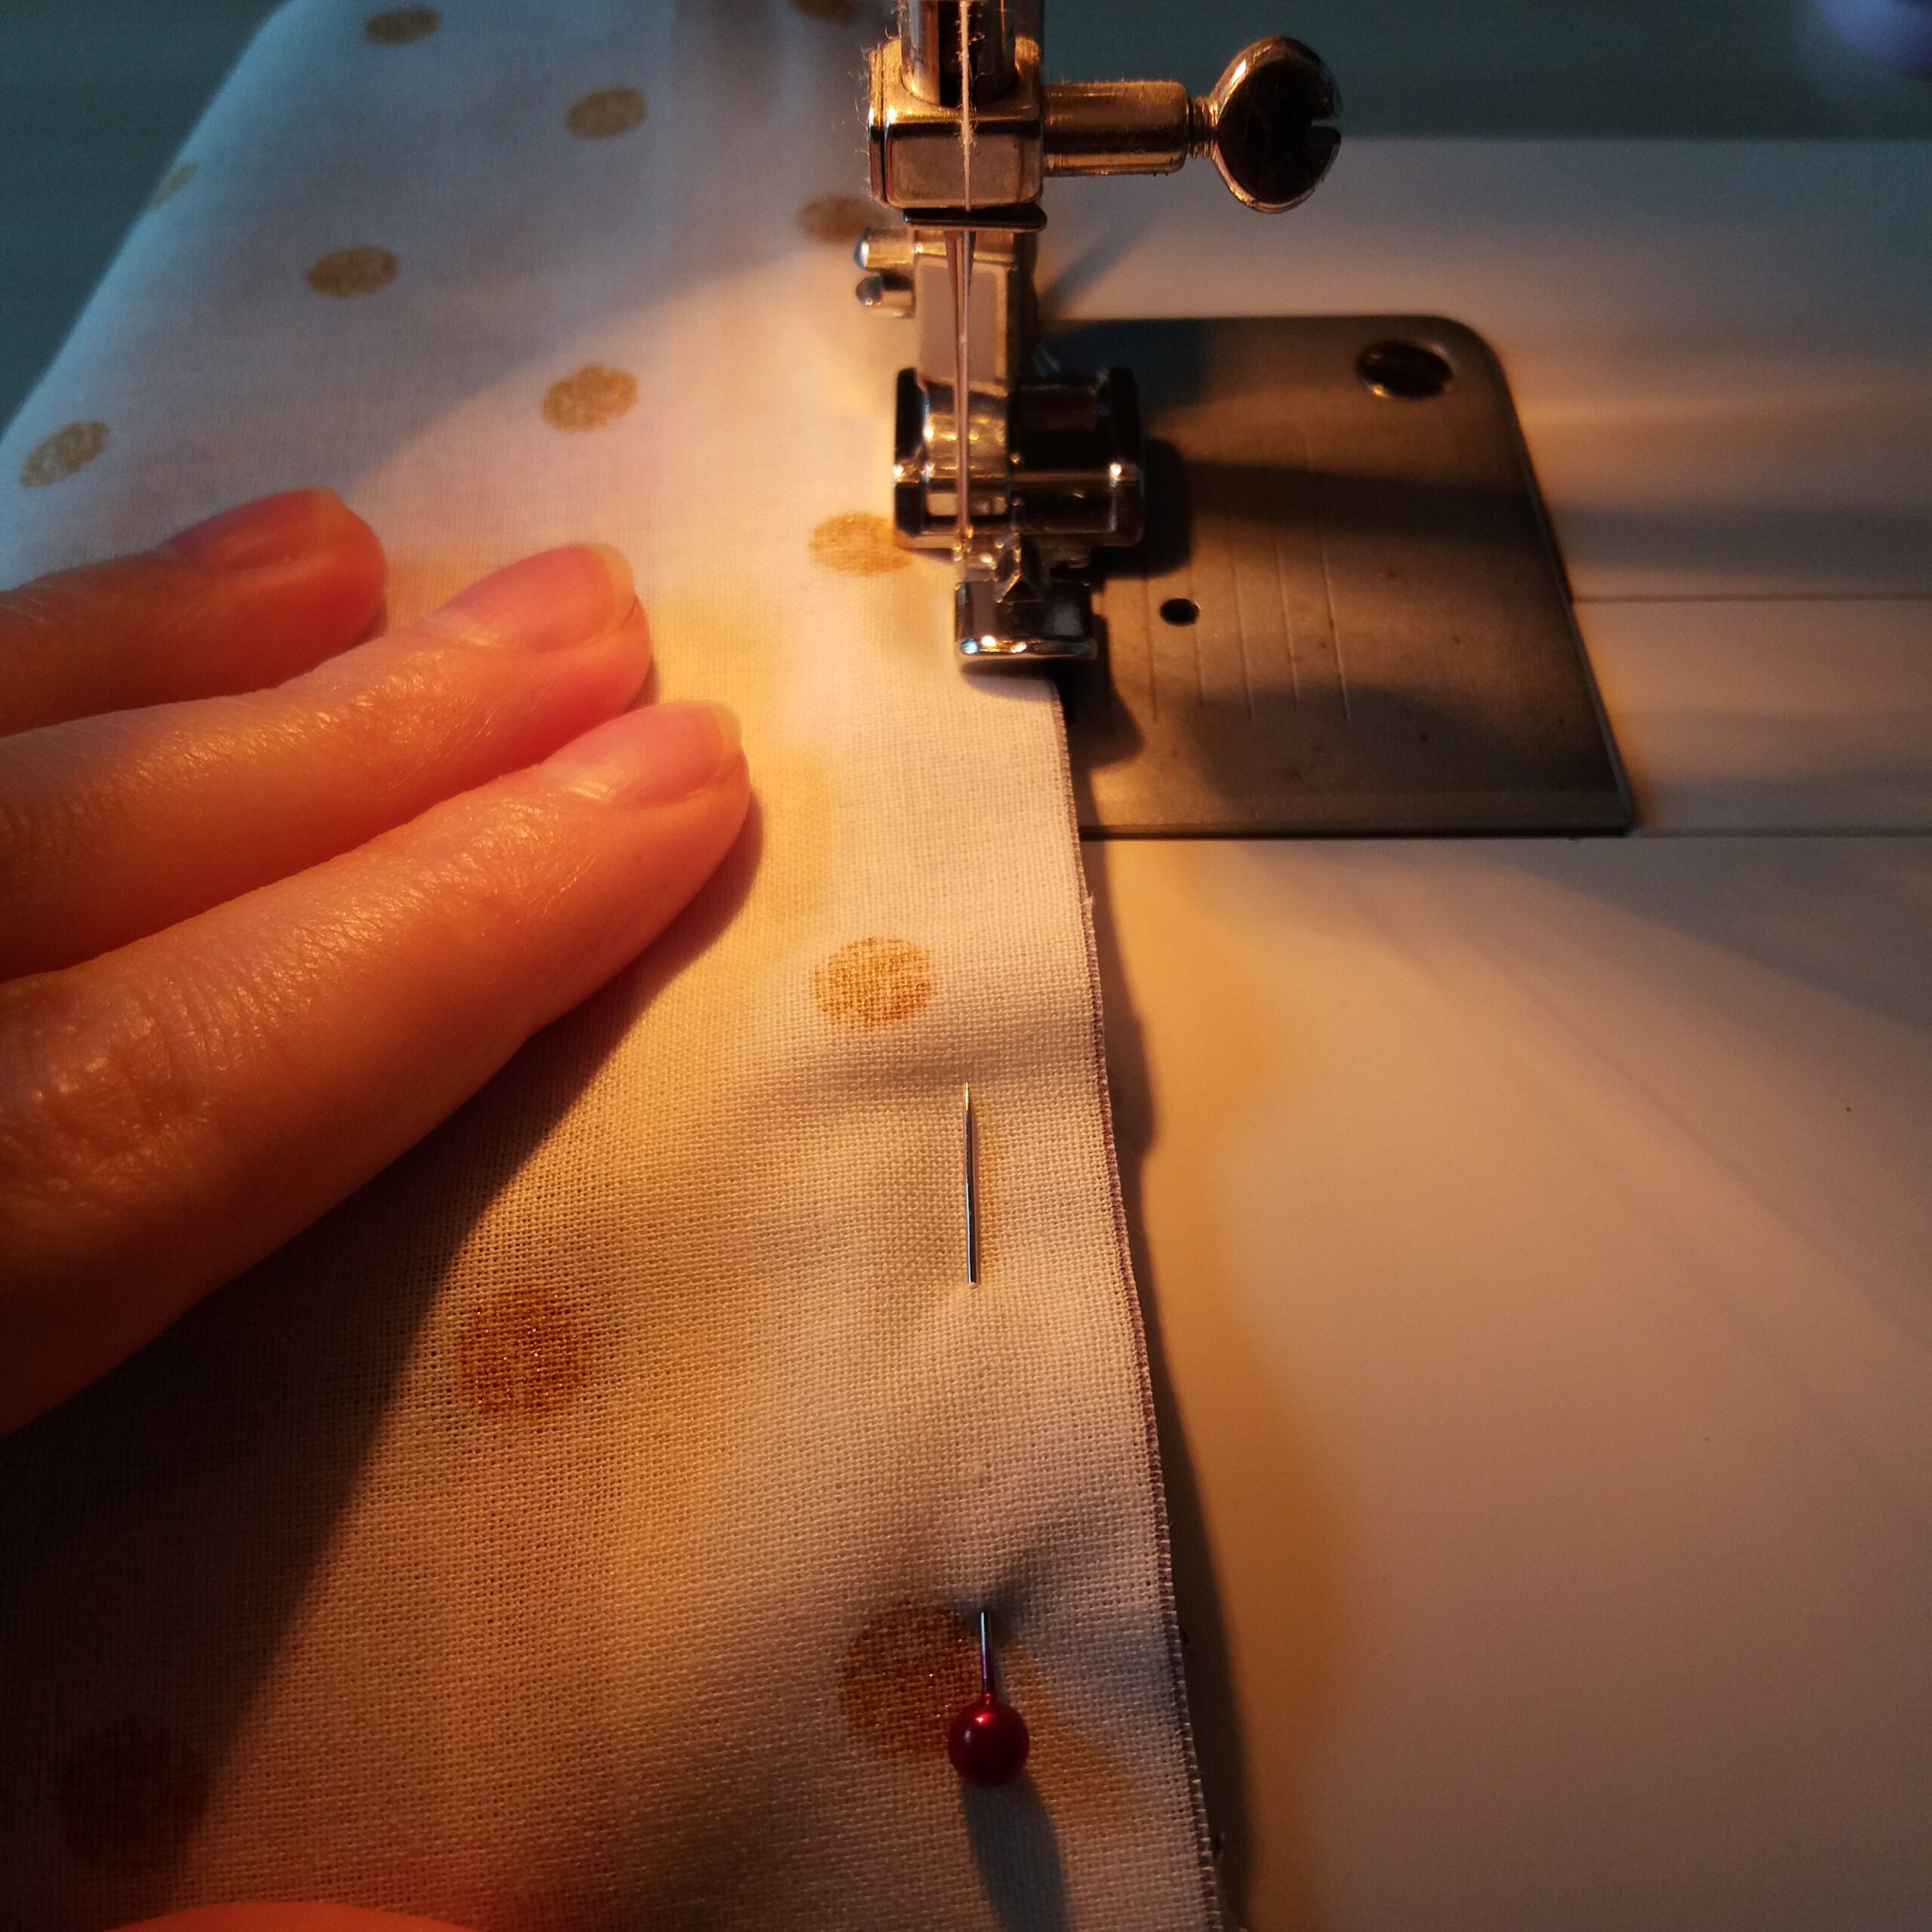
ZIPPER CHOUP
-
Place a rectangle of main fabric right side up in front of you. Position the zipper inside out, on the upper edge of the main fabric, centering it well: 1 cm (0.4”) of fabric protruding from the stops. Then place the lining right sides together on the printed fabric and the zipper. Pin the top of the three elements together.

2. Sew along the entire upper part with the zipper foot, without going over the bartacks. Starting at the bottom stopper: stop halfway through the seam with the needle sticking into the fabric, raise the presser foot, open the zipper, lower the presser foot and continue sewing.

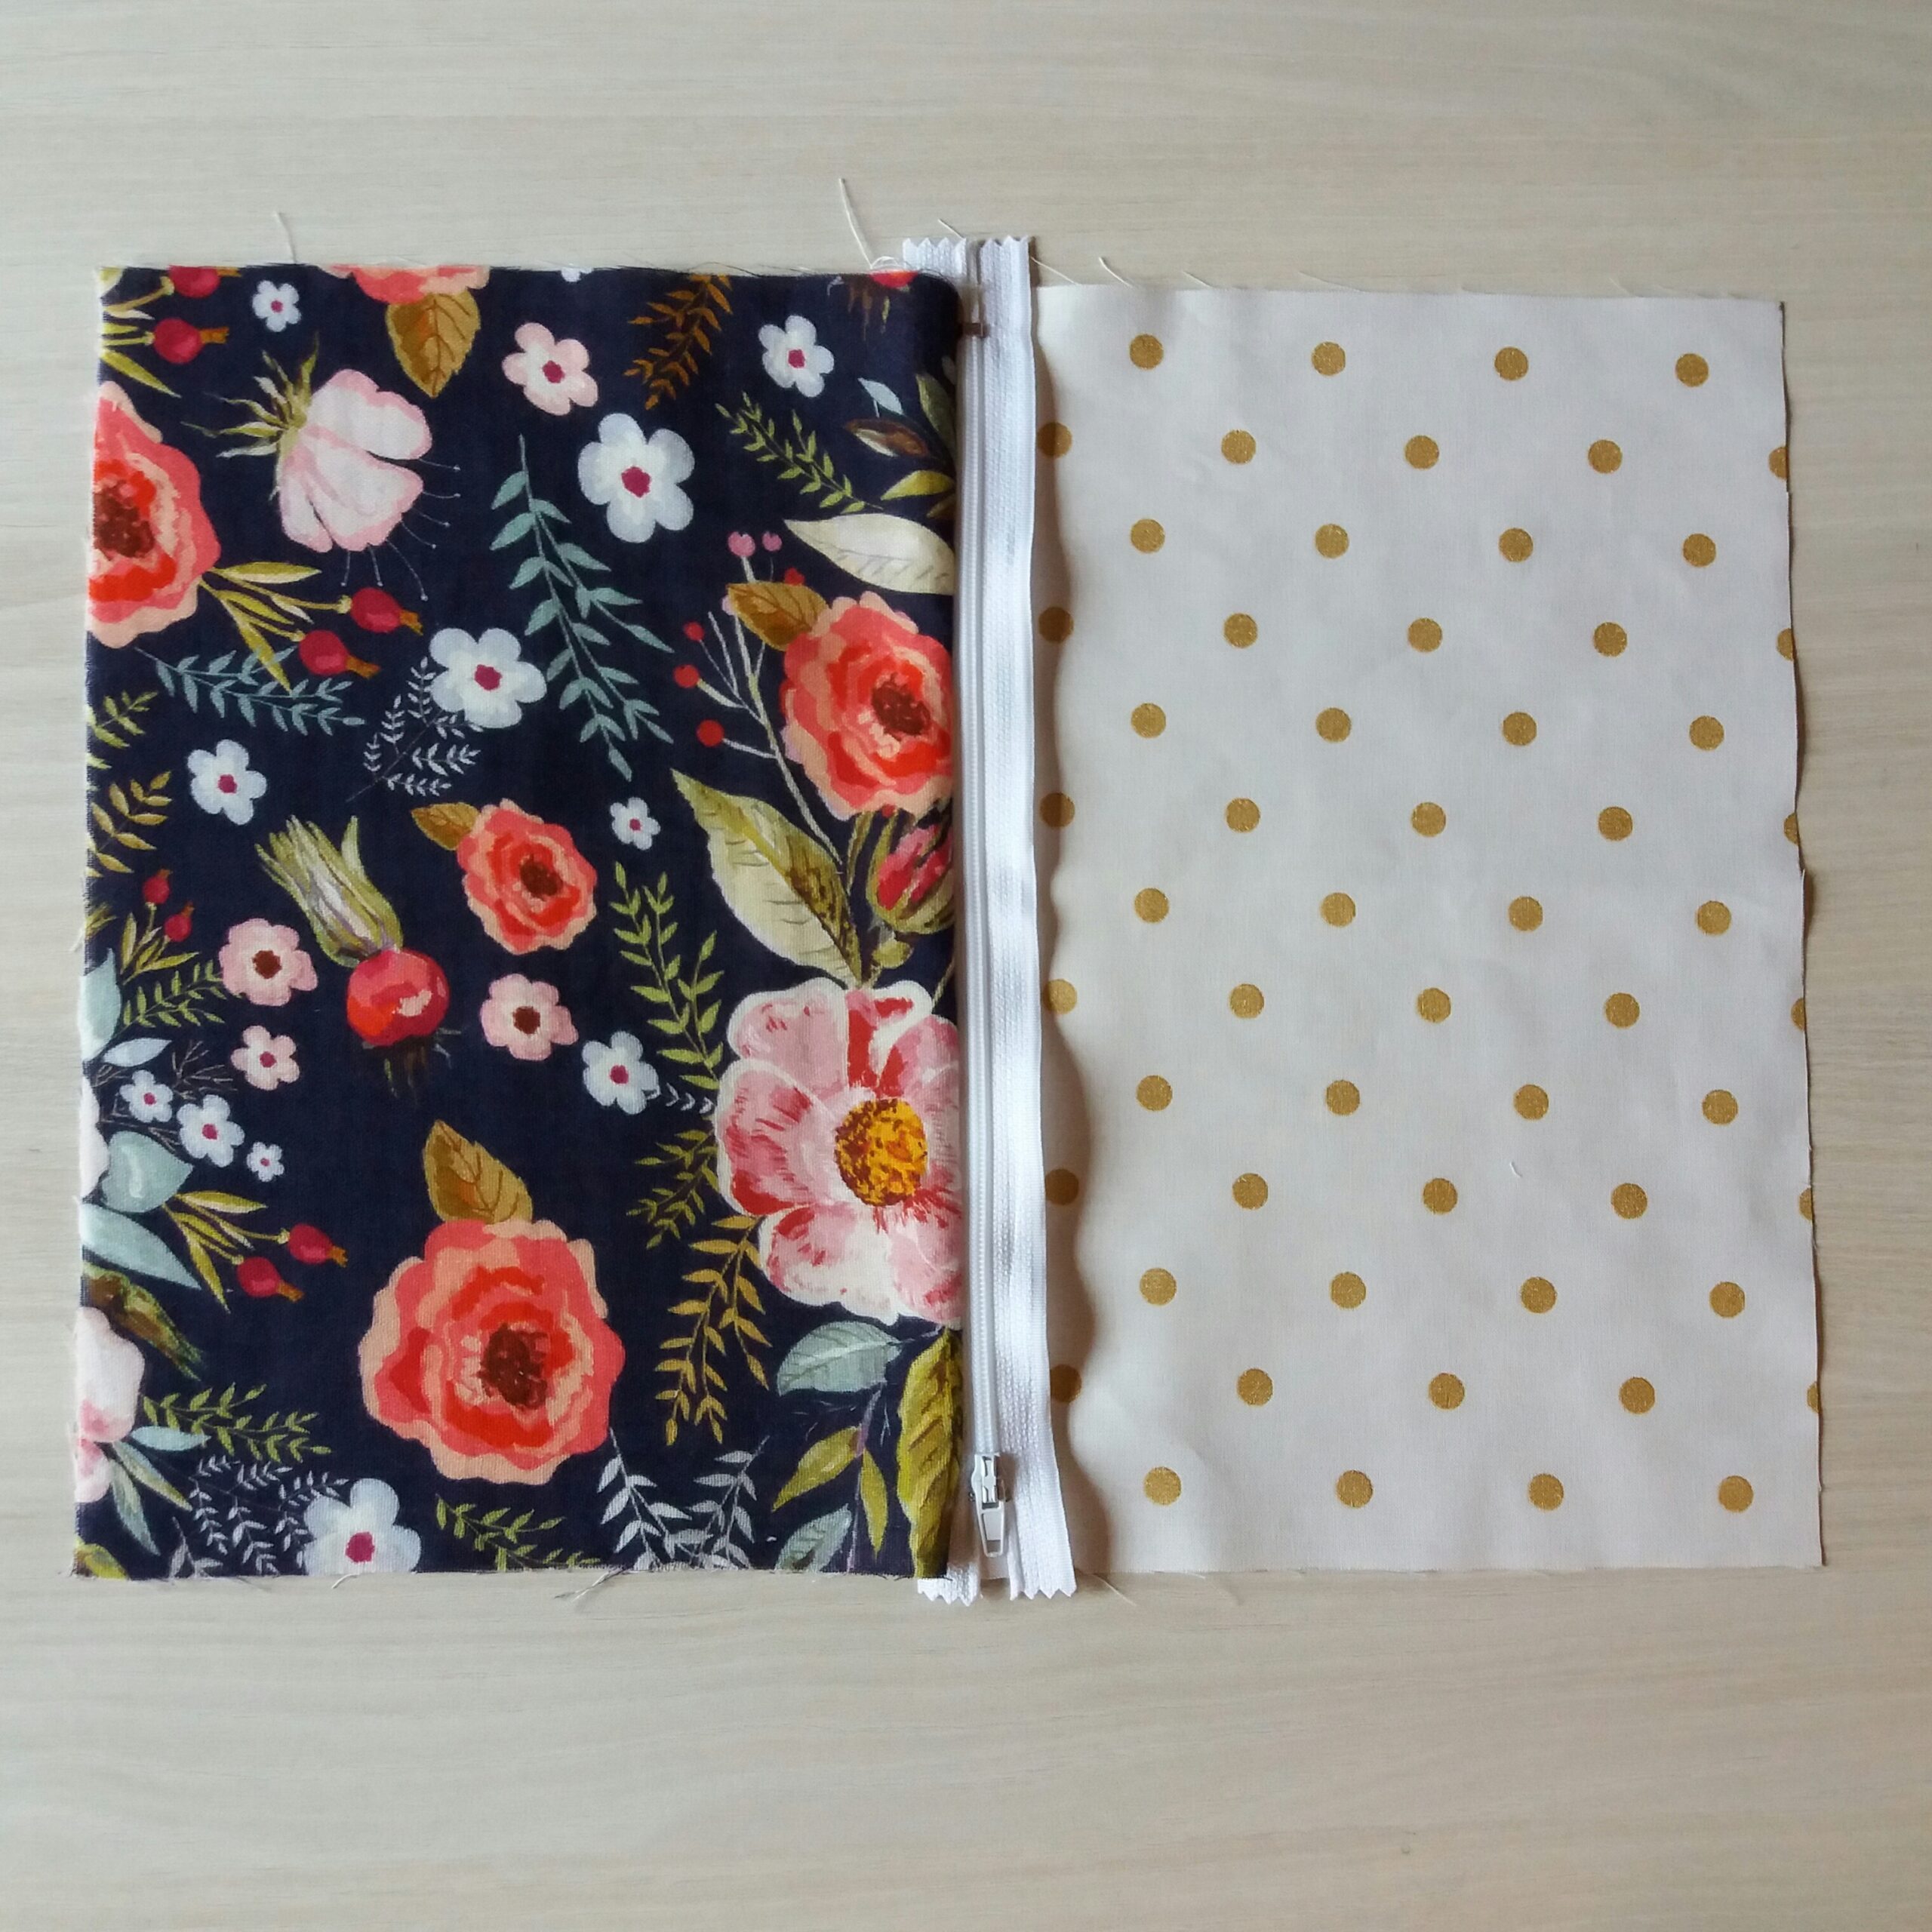
3. Repeat 1. and 2. on the other side of the zipper.


4. Open the zipper 3/4. Place the two main fabrics (flower print) right sides together. Pin to secure them together and, with the normal presser foot, sew 1cm apart, without (sewing) the zipper.
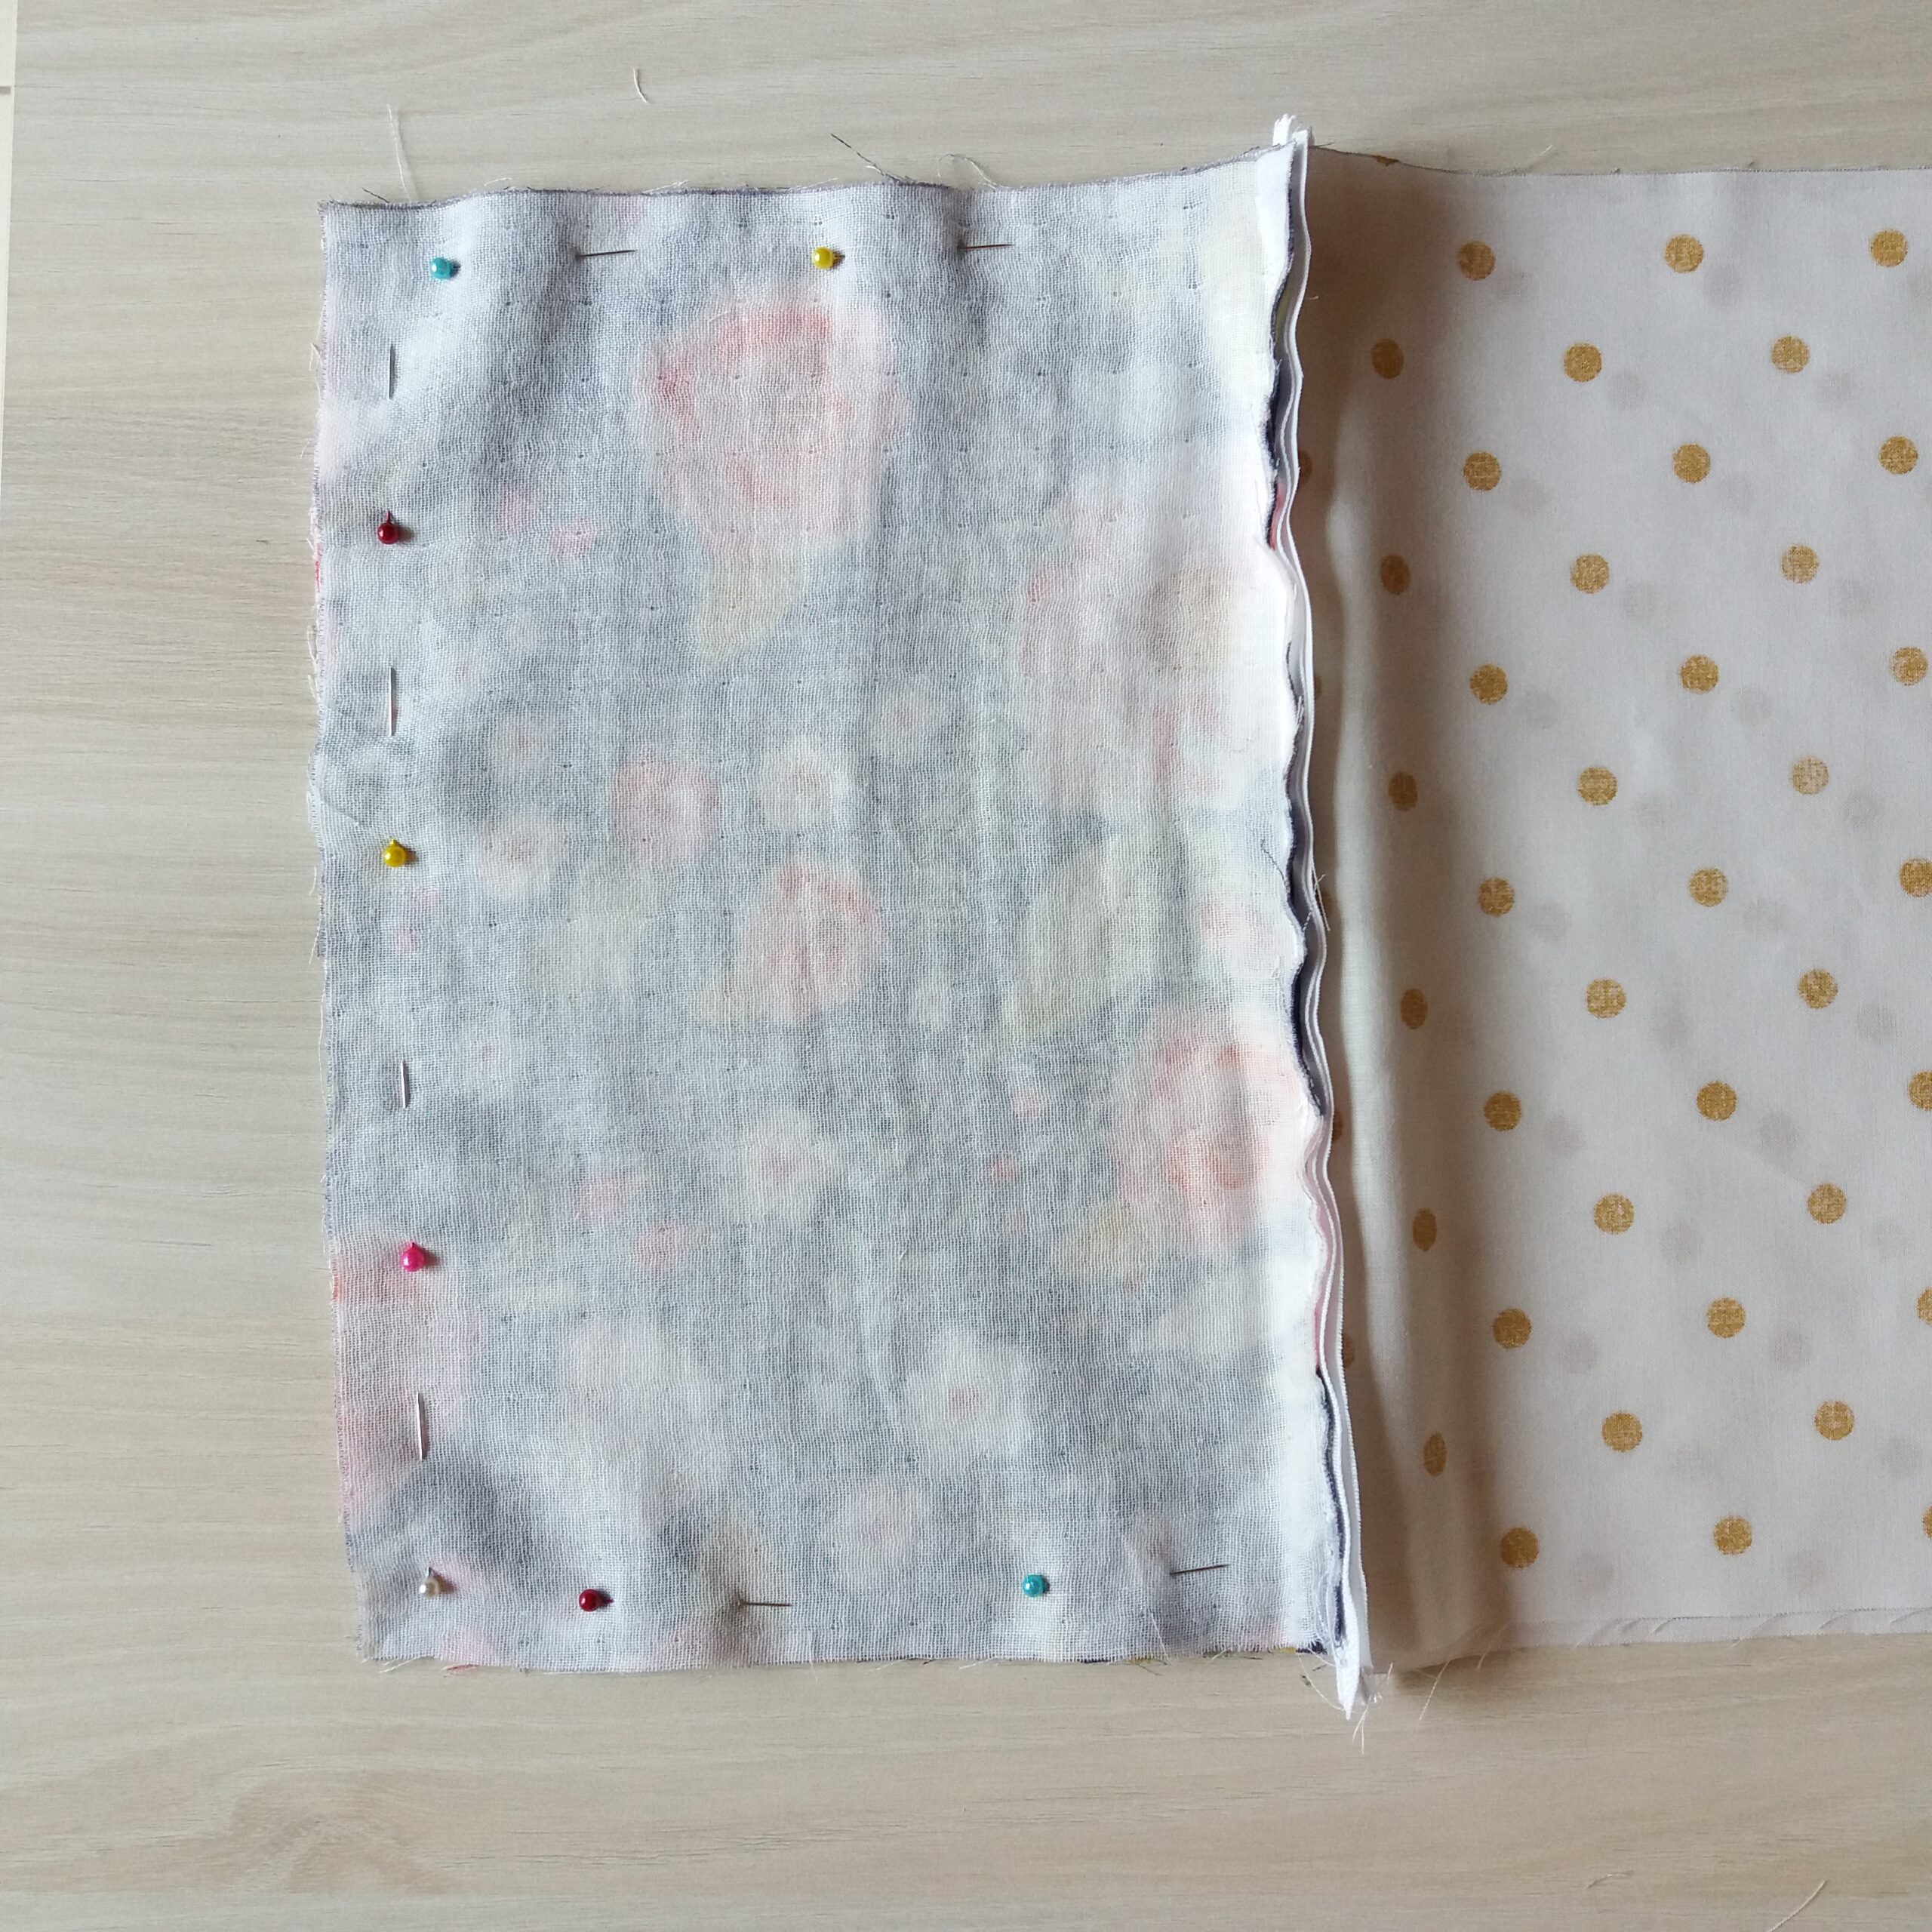


5. Cast off the two lining fabrics and pin them. Sew as before but leaving an opening (without seam) of 10 cm (4”) on one side.


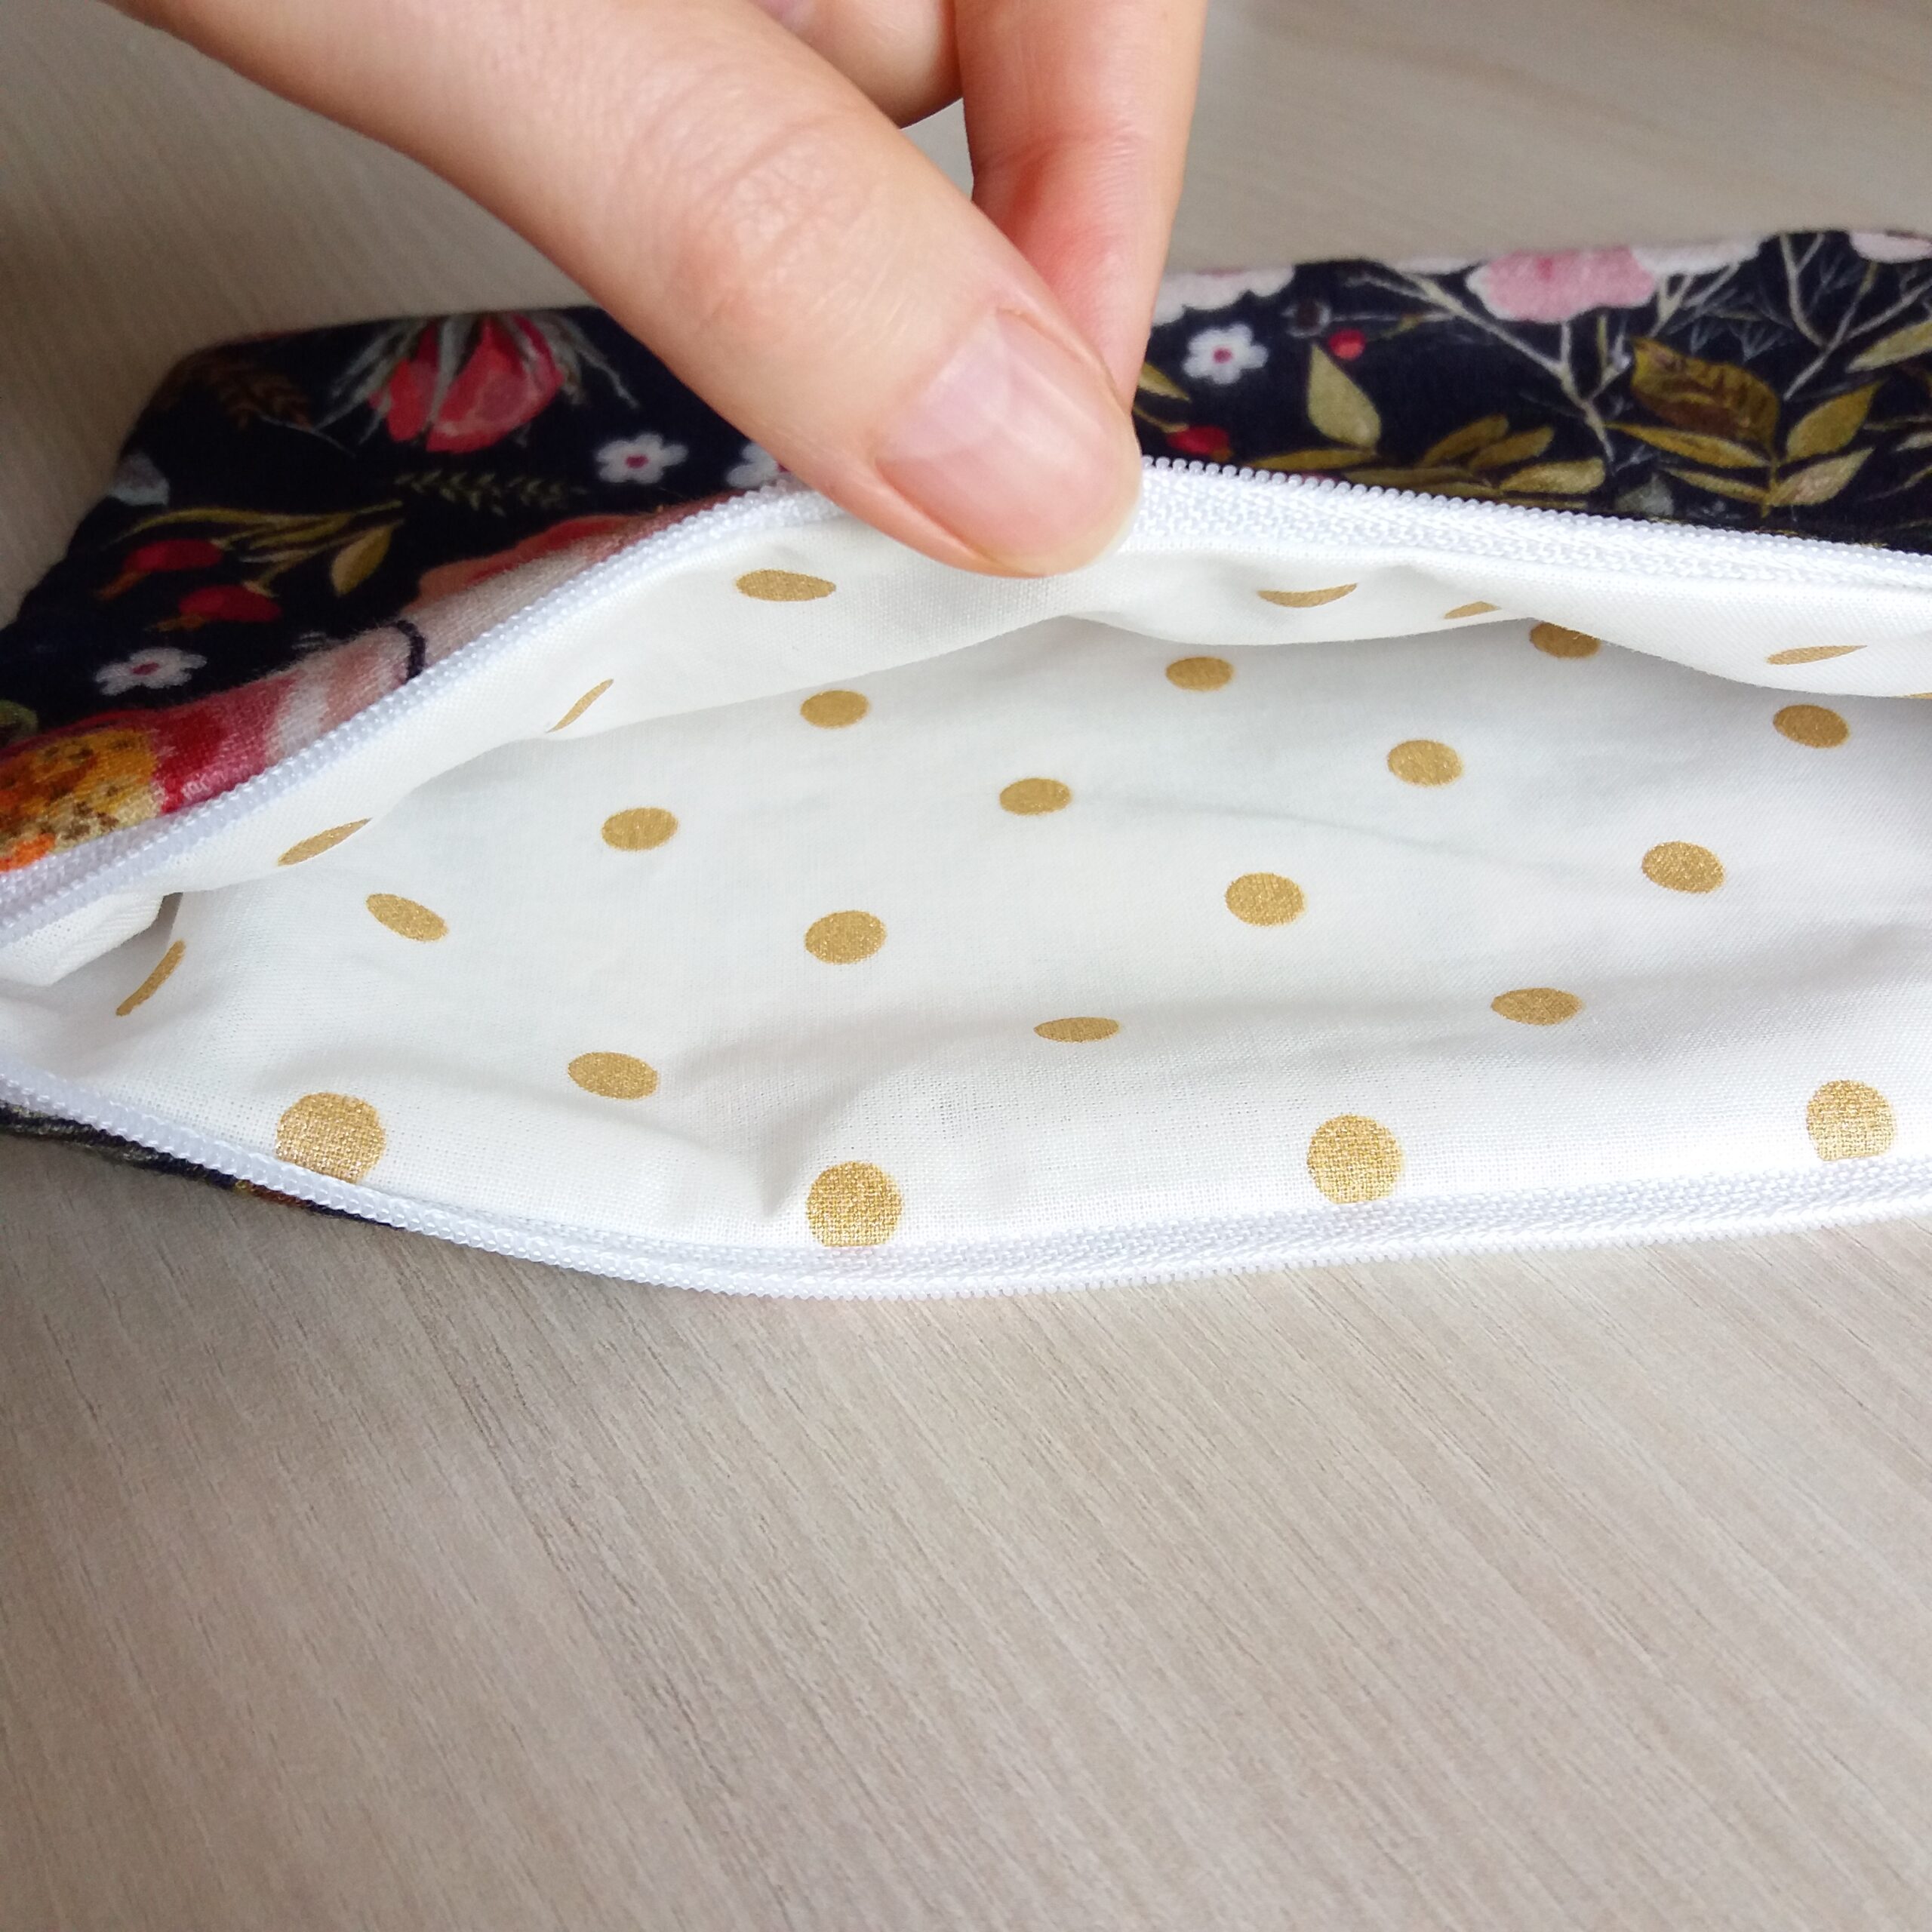
6. Trim the 4 outer corners and turn the pouch right side up through the opening in the lining. Sew it 2mm (0.7”) from the edge.


7. Put the lining in the pocket, your zipper pouch is finished!

REVERSIBLE FABRIC BASKET
-
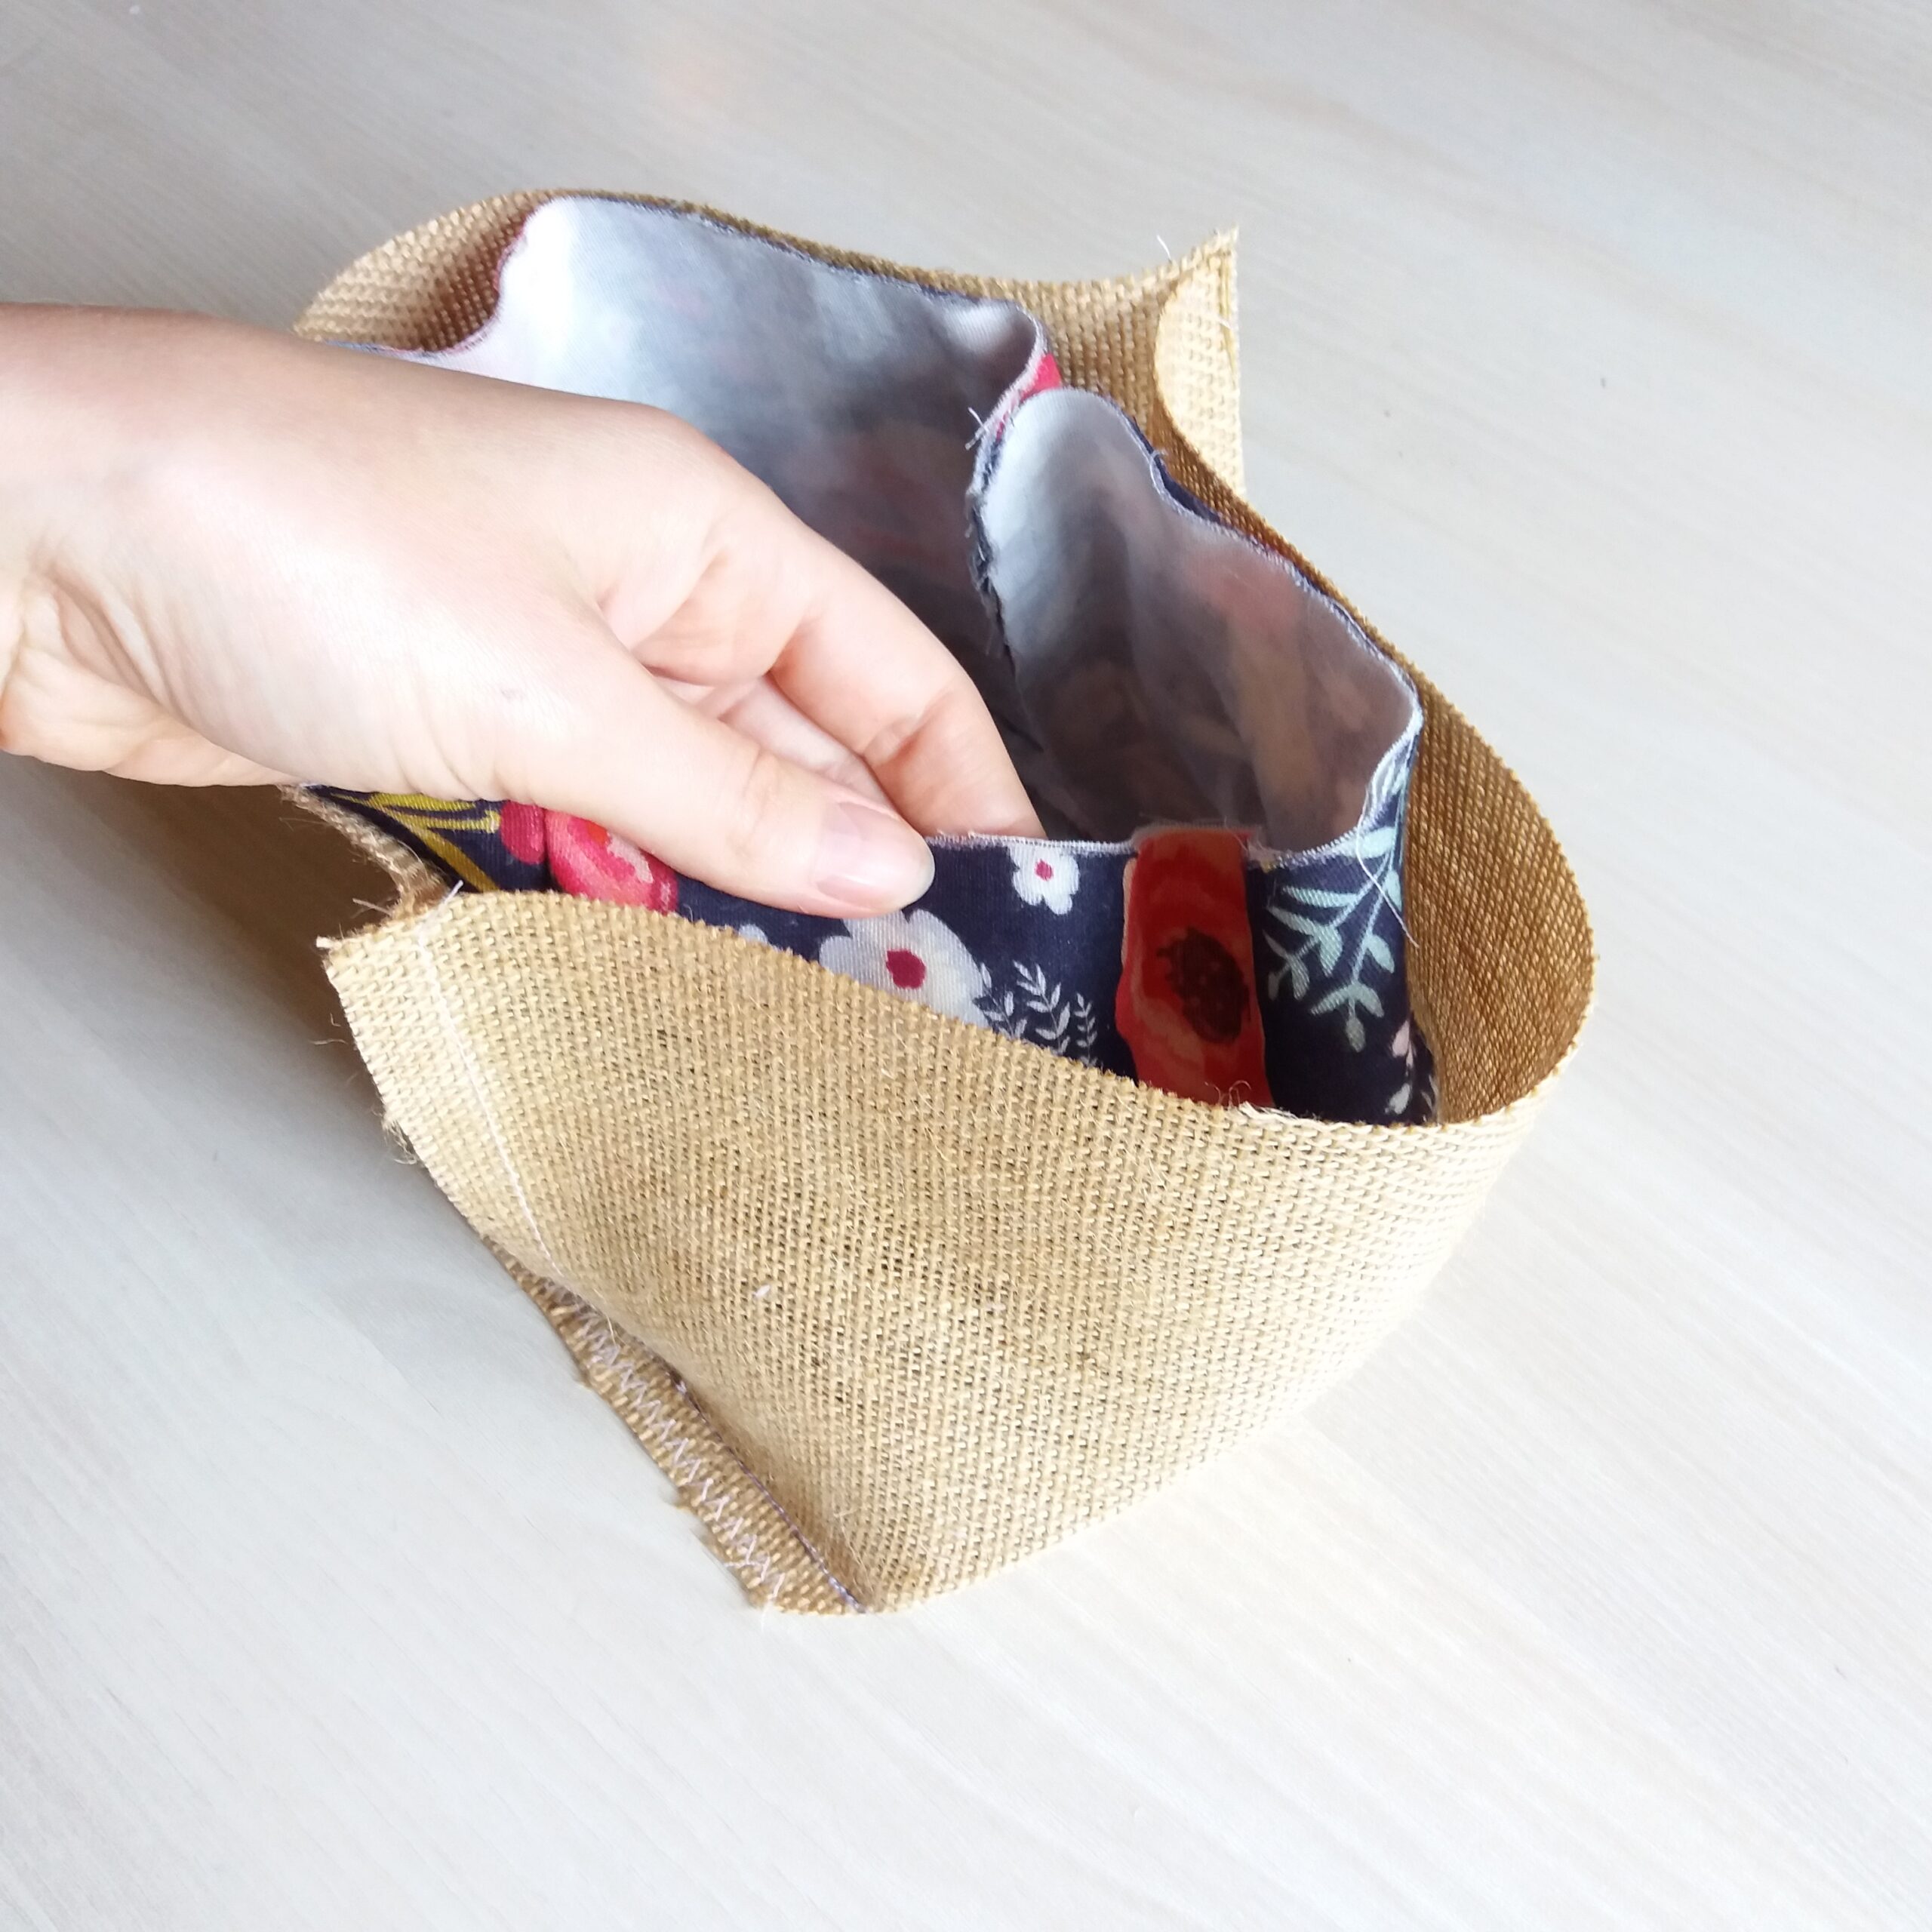
Fold each rectangle in half, right sides together, pin and sew the two side edges at 1cm (0.4”) margin WITHOUT sewing the upper part.


-
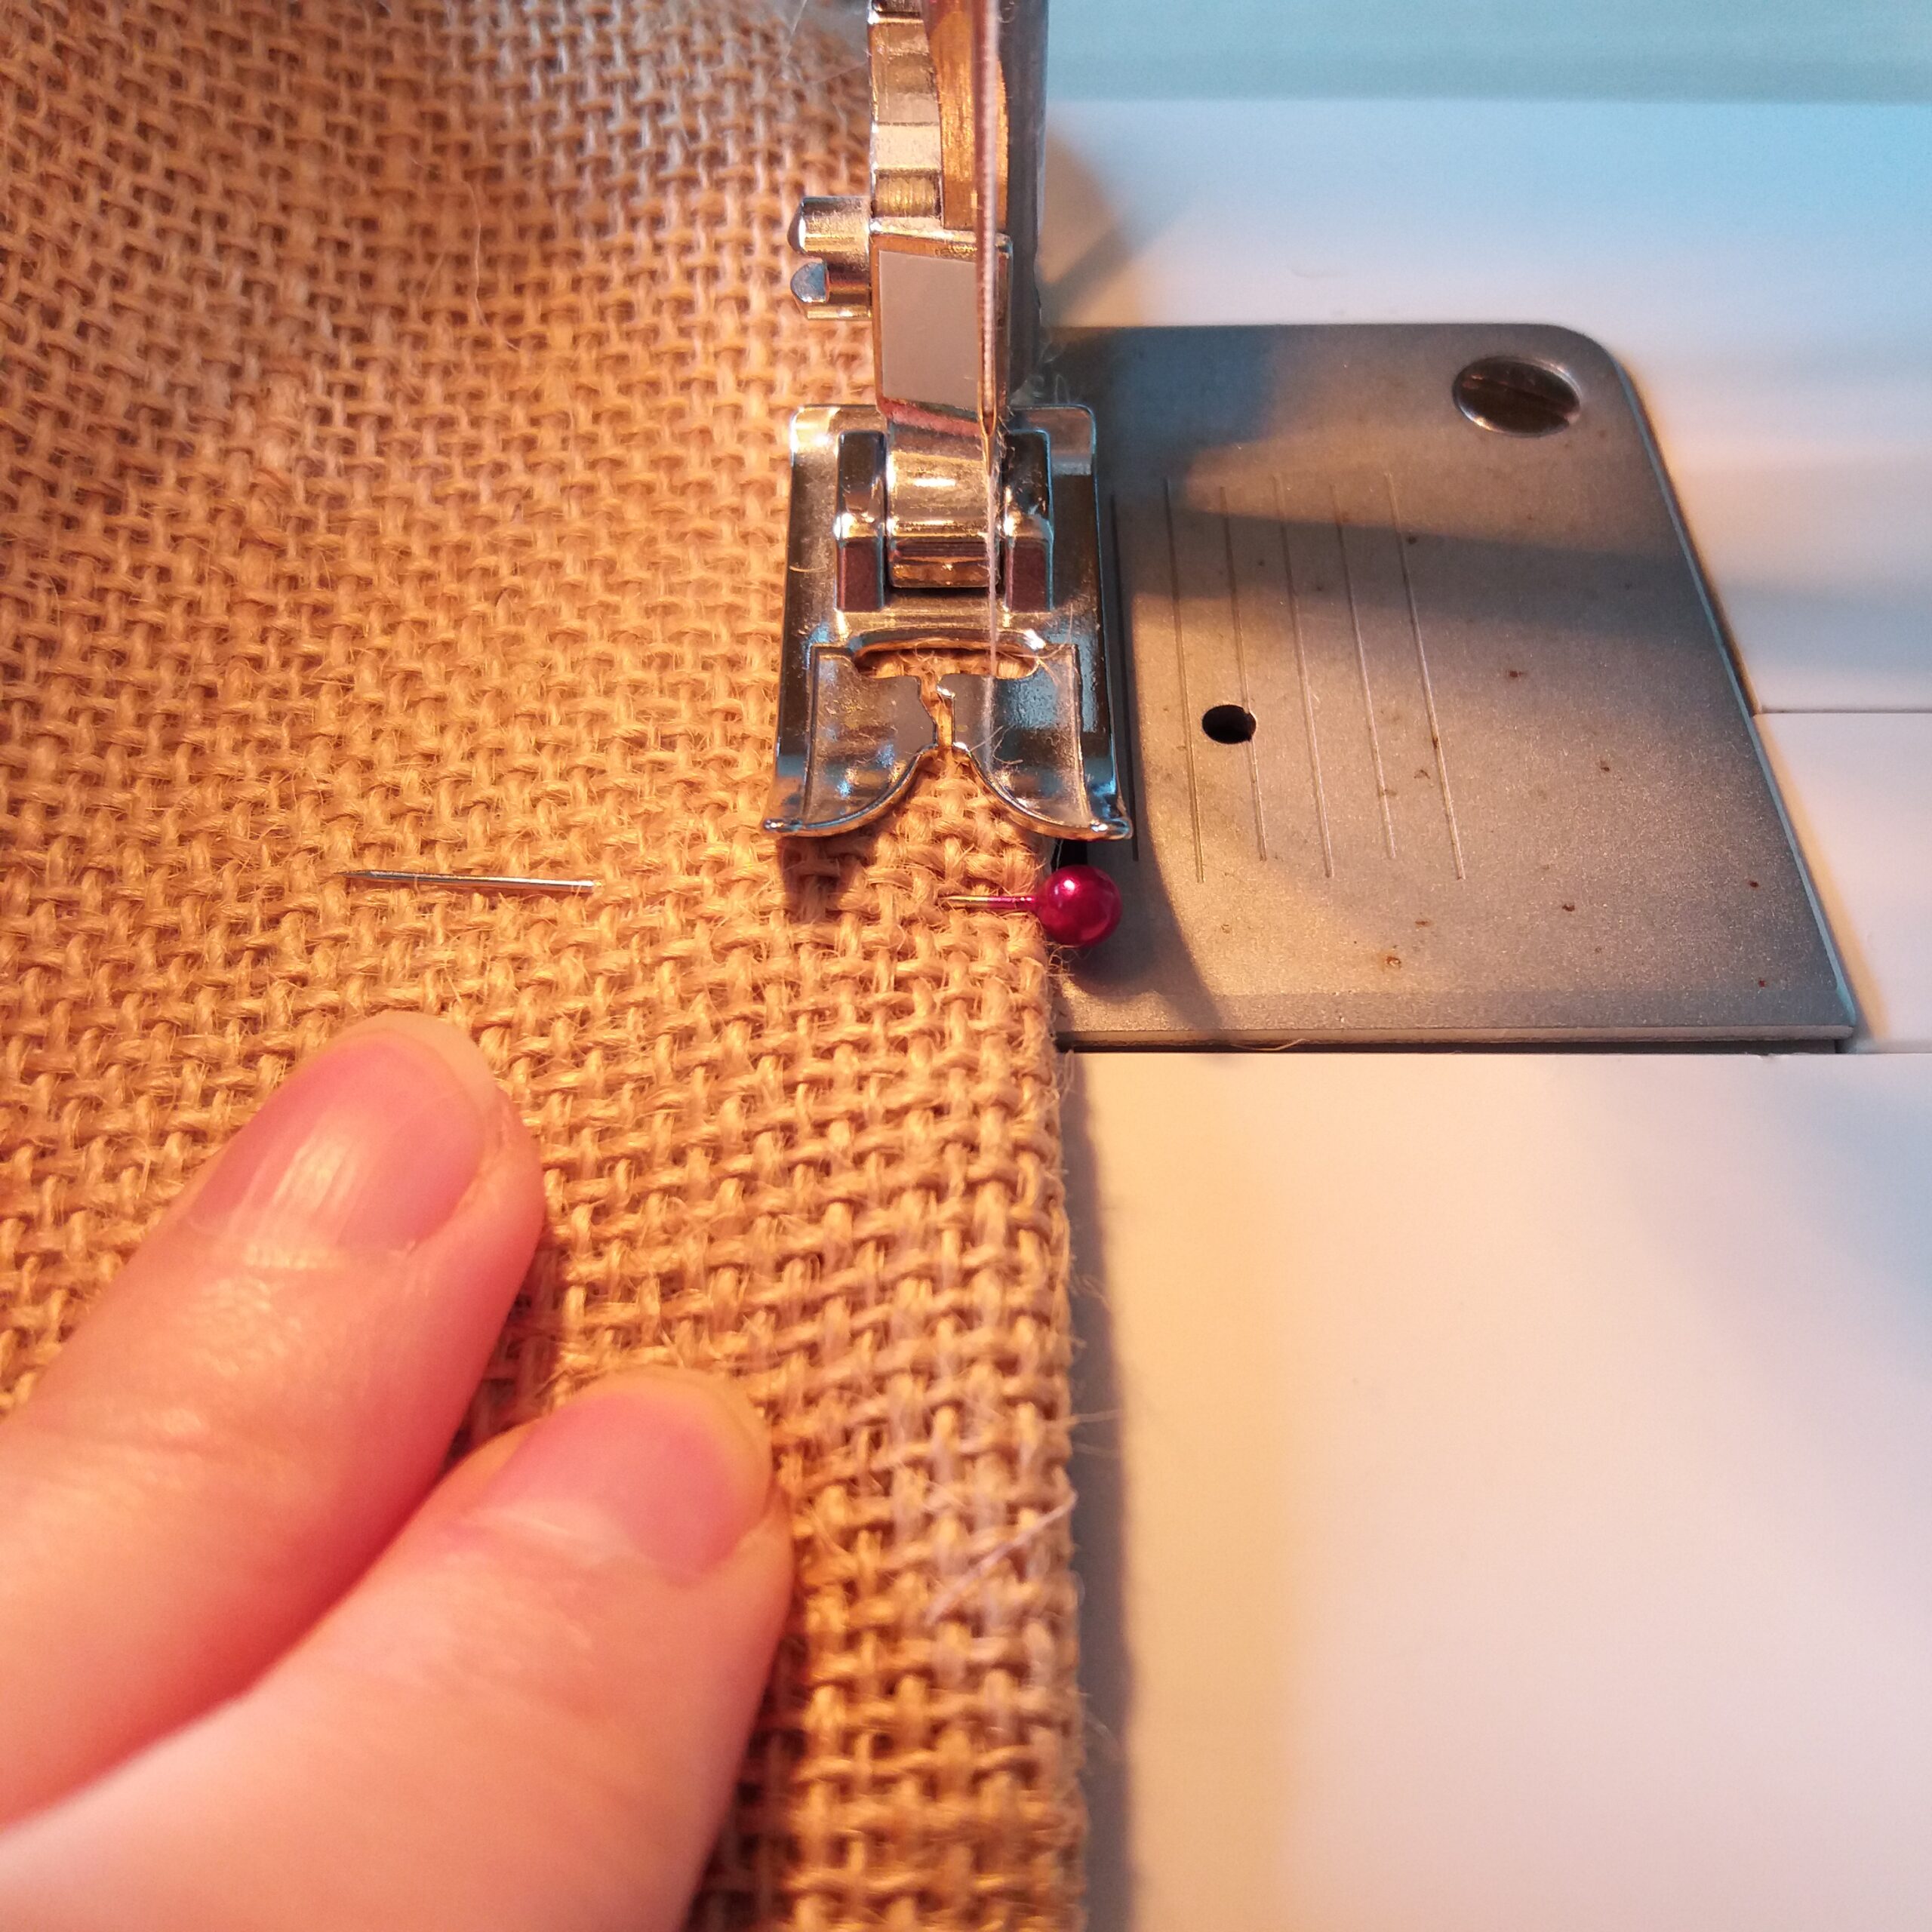
Fold an inside corner to form an angle, draw a line 13cm (5.1”) wide by centering the middle seam at 6.5cm (2.4”), pin, sew along the line and cut the angle at 1cm (0.4”)margin above the seam. Finish with a zigzag stitch on the edge. Repeat for the other angle of the fabric and those of the burlap/jute fabric.


-
Turn the flower print fabric over, bringing out the angles and place it in the basket / jute fabric right sides together, pin the upper edges and sew at 1cm (0.4”) margin, leaving an opening of about 8cm (1”) (a stopping stitch at the start and end of the seam).

4. Turn the basket through the opening by putting it back on the right side, then pin the edge all around and sew at a margin of around 2mm, closing the previous opening at the same time. Turn it over, fold a lapel at your convenience!
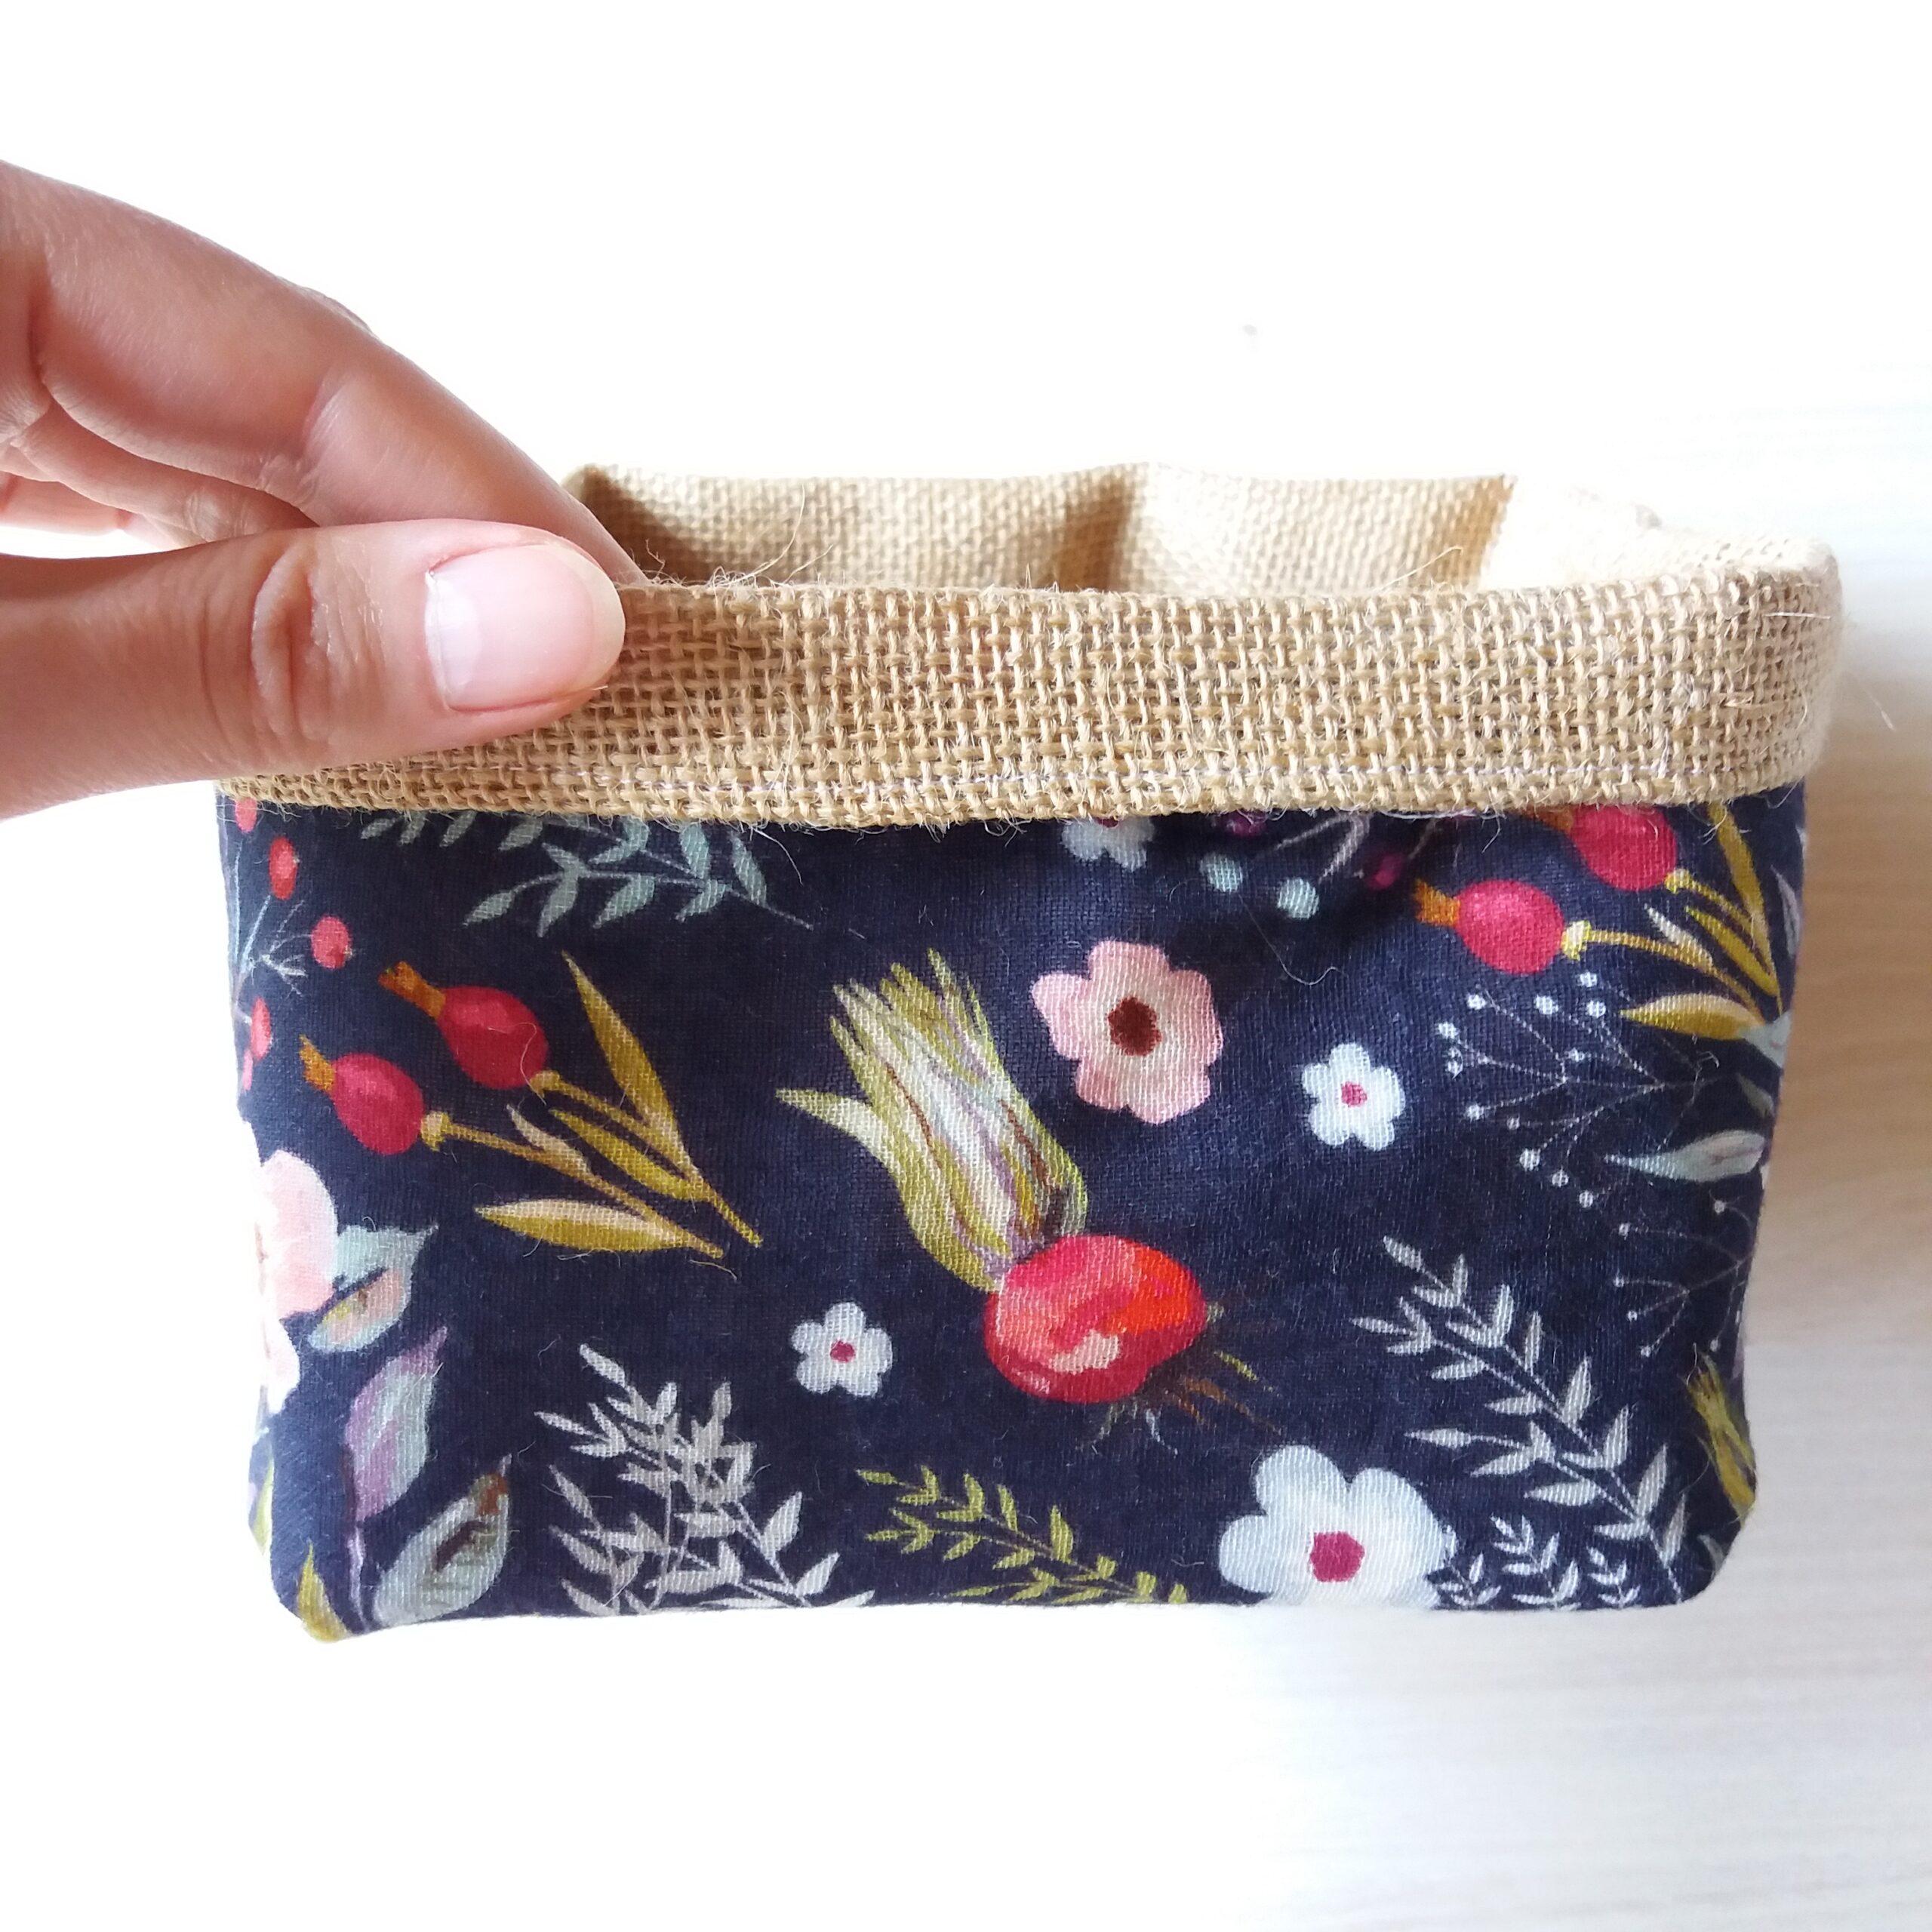
Your reversible fabric basket is finished!
What to do with the rest of the burlap/jute fabric?
A shopping bag, ecological sponges, an exfoliating washcloth with the rest of the sponge,..
WASH BAG
-
Make a fold and pin (or clip) 1cm (0.4”) each side of the rectangle. Sew straight stitch.


-
Repeat 1. only on the two short sides / ends of the rectangle, sewing 8mm (0.3”) from the edge to allow the ribbon to pass through afterwards.
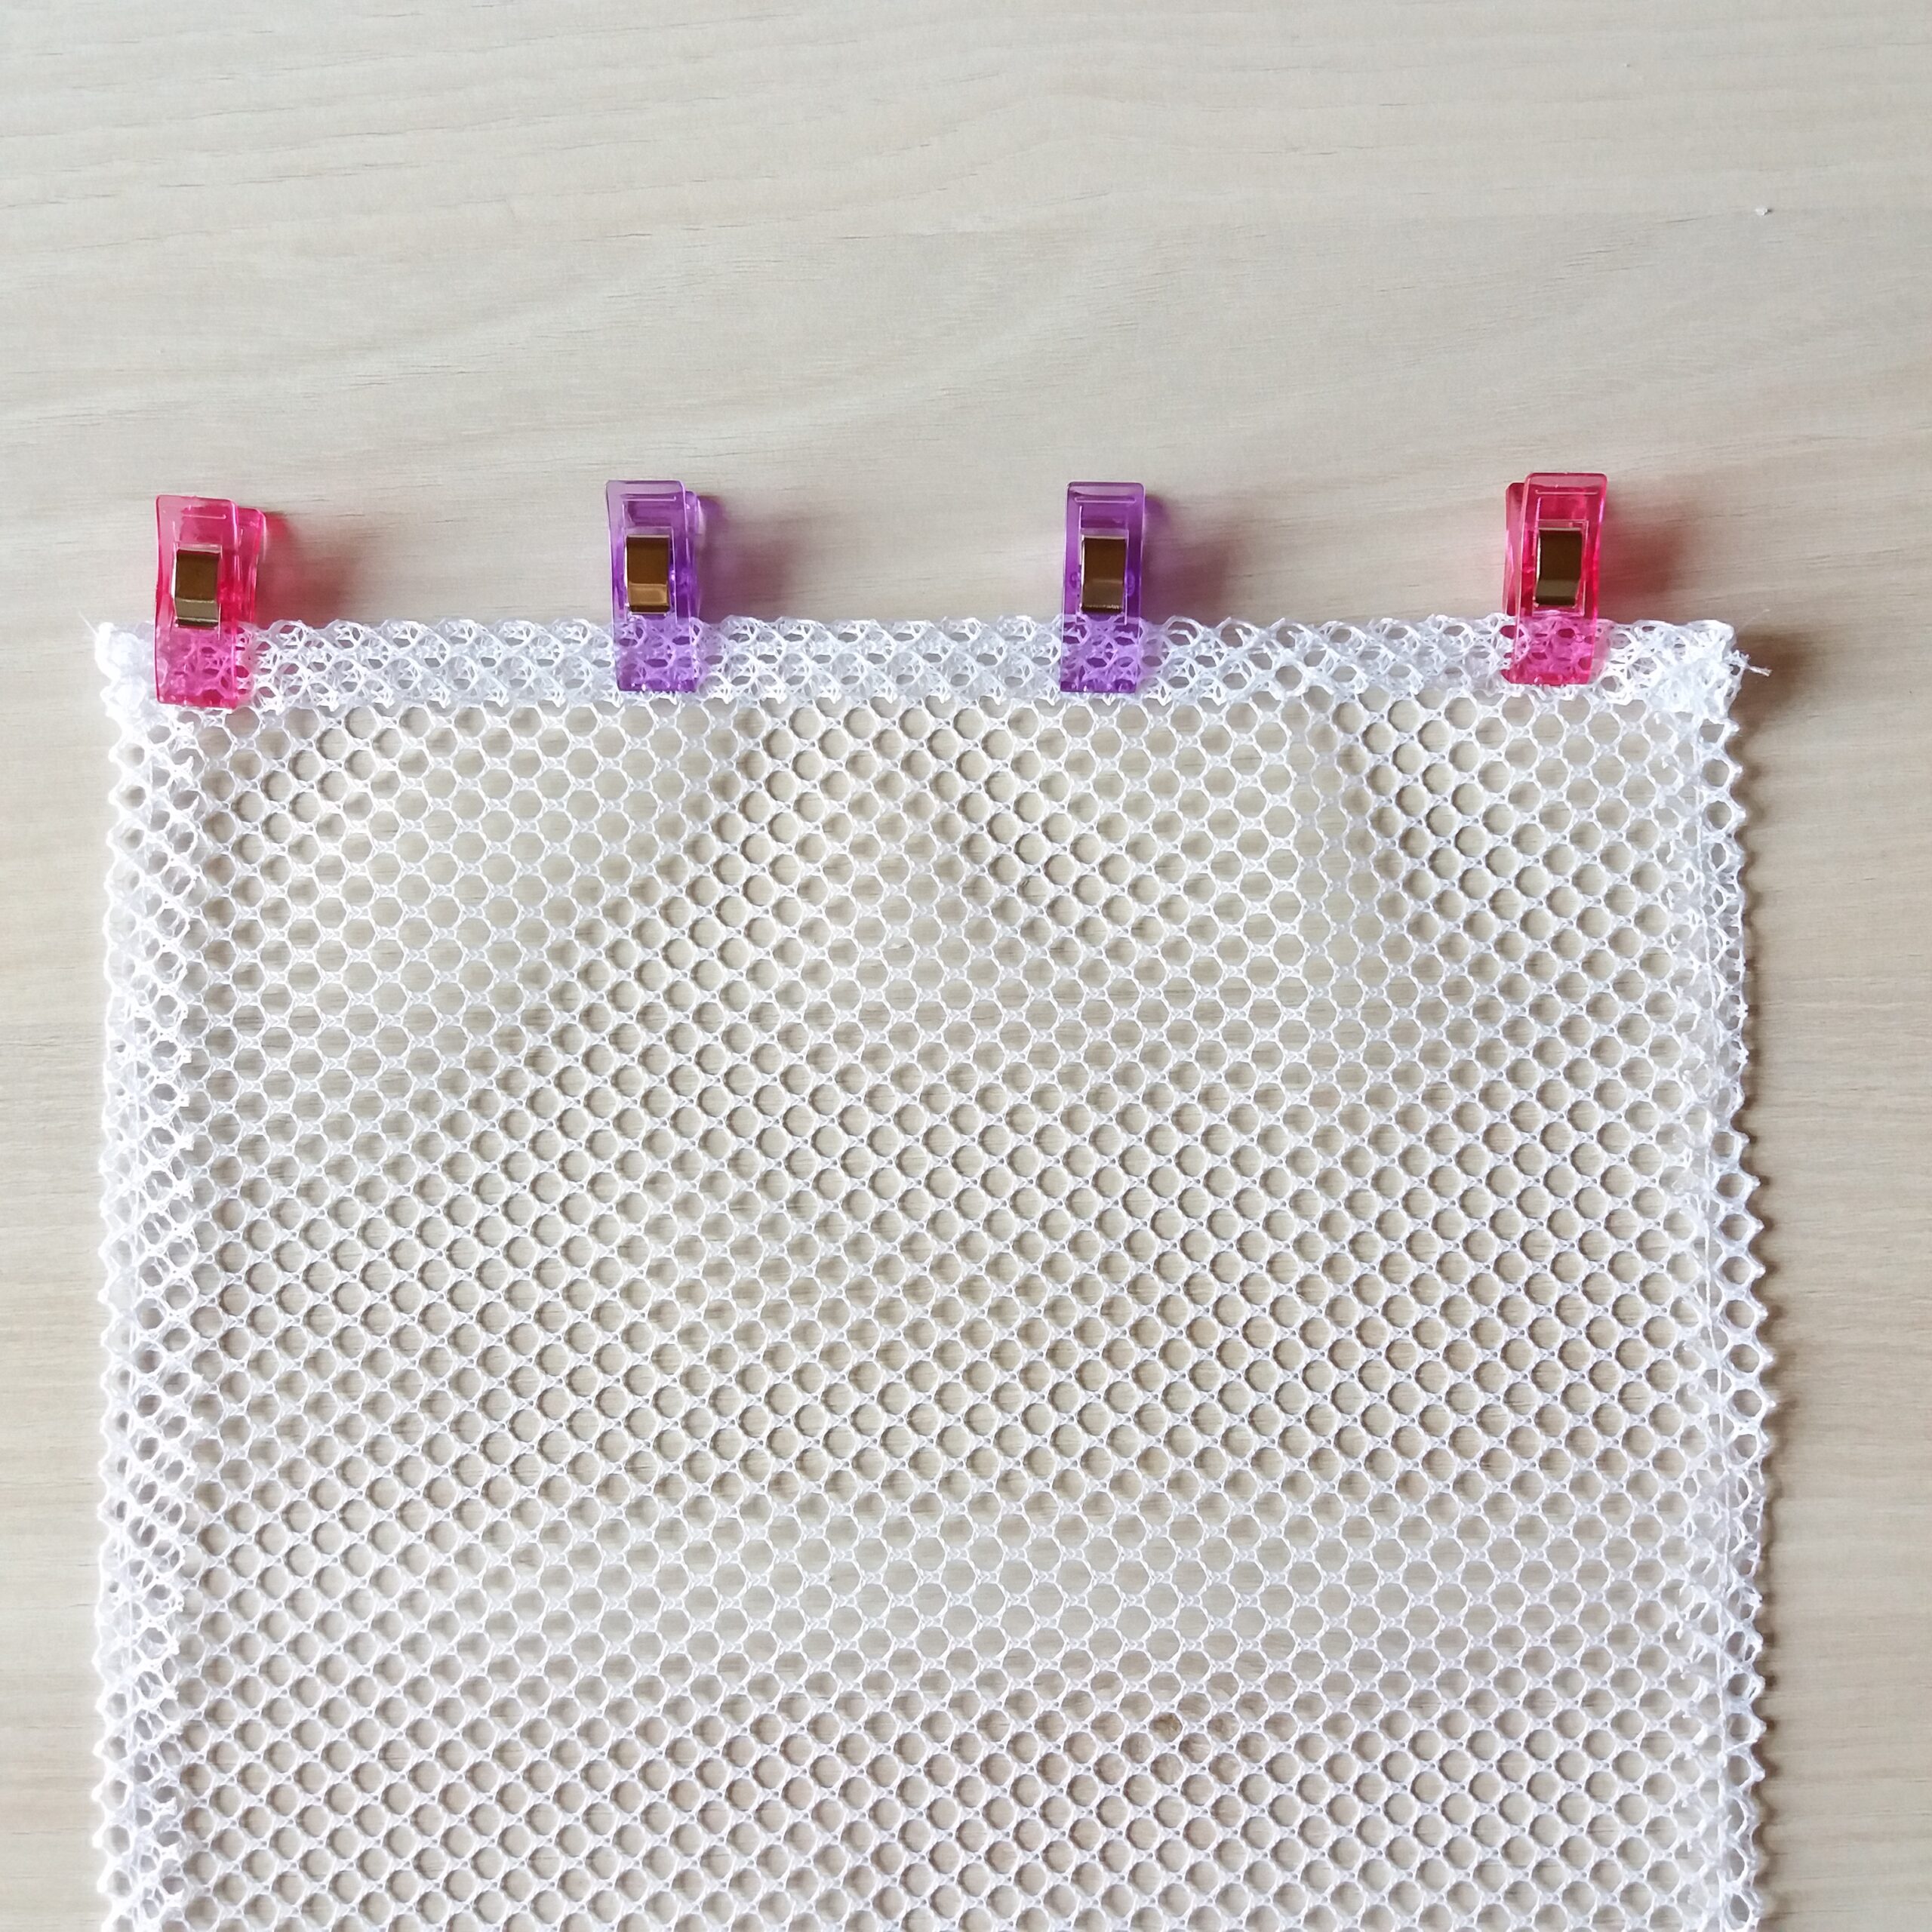

3. Fold rectangle in half wrong side against wrong side, pin (or clip) and sew 2mm from the edge of both sides WITHOUT sewing the top hems.

4. Pin the end of the ribbon with the safety pin, slip it through the two top hems. Remove the pin, tie and bevel each end of the ribbon. Your kit is ready!
What to do with the rest of the net fabric?
Redo washing bags in larger sizes for your clothes, a shopping bag for fruits/ vegetables,..
WHAT TO DO WITH “UNUSABLE” FABRIC STASH?
Don’t throw away your little pieces of fabric! You can use them to stuff a pillow or a pincushion!
Voilà! I hope you enjoyed this butterfly kit?
I love to see your finished projects! Use #fibreandfolk and tag me on Instagram (@FibreandFolk) to show off your butterflies and have a chance to be featured.
The patterns and photographs of items on this site are the property of Fibre and Folk and are for personal, non-commercial use only. These patterns files are protected by copyright, and you may not distribute or sell them electronically or physically. If you would like to sell finished pieces made from these patterns please contact me. This post contains affiliate links.